Famicom Expansion Audio Double Play: Bases Loaded, and the Stereo Mod Revisited!
In the west, the Nintendo Entertainment System exposed its graphics bus over the cartridge slot, allowing for all sorts of mayhem. But what you might also know is that the Famicom went a step further: it exposed the audio output on the cartridge slot. Let’s take a closer look and figure out why this feature might not be working on one particular Famicom. On the way, we’ll see why one of the most common Famicom ROMs may be technically undumped.
The expansion audio
The Famicom expansion audio implementation is beautiful in its simplicity. There are two pins on the cartridge slot: audio in, and audio out. One pin featured the audio from the cartridge, and then it would be sent to the RF modulator on the other pin. Cartridges without special audio handling, like Culture Brain’s Hiryuu no Ken II, just route the audio from one to the other.
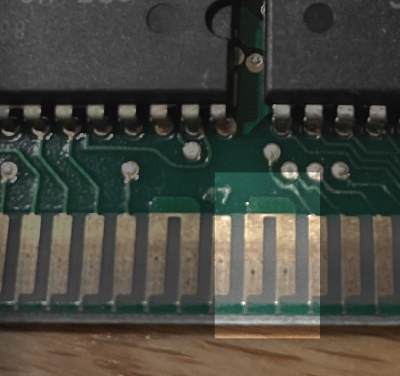
This was removed on the western Nintendo Entertainment System release, which moved audio to the expansion port. But it’s hard to criticize them too much for that– nothing on the Famicom would take advantage of this feature until 1986’s Famicom Disk System, which as an add-on designed to sit under the console, could easily have used the expansion port had it got a western release.
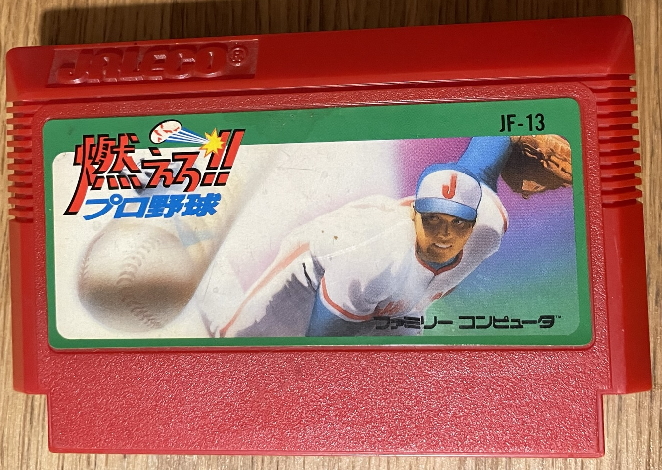
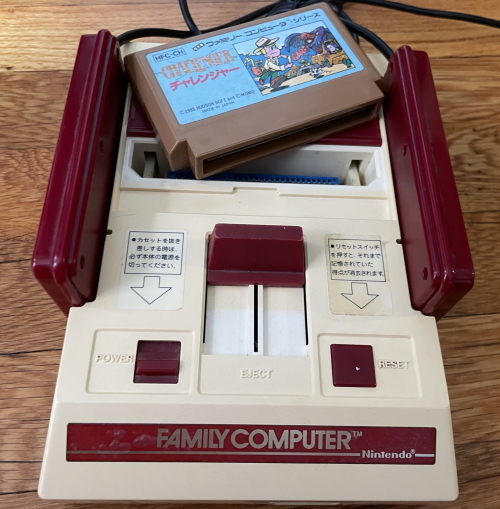
I’m not sure what the first cartridge game to use expansion audio was; it may be Bandai’s Family Trainer 3: Aerobics Studio from early 1987. Which I don’t have. But another early adopter from that year was Jaleco’s Moero! Pro Yakyuu.
Moero! Pro Yakyuu is one of the most common Famicom games. Like seriously, common as dirt. Baseball was at a height of popularity, the Famicom was at a height of popularity, so it just made sense. It’s so common, in fact, that I don’t feel bad that I cracked the plastic trying to open my copy up. Famicom games are really frustrating to open; unlike NES games, they’re only held together by plastic tabs. Reinforced plastic tabs.
Moero! Pro Yakyuu’s use of expansion audio
So the most famous Famicom expansion audio uses brought in new synthesizers to add to the built-in 2A03 APU. For example, the Famicom Disk System’s 2C33 added a wavetable synthesis channel, that gives The Legend of Zelda’s theme some punchy new instruments.
Other games like this include the Konami VRC6 used by Akumajou Densetsu, the Japanese release of Castlevania III– this added two pulse wave channels and a sawtooth. Even Nintendo’s own in-house MMC5 added some additional sound channels, but they were only usable by Japanese releases. In any case, what all these games had in common was that the sound expansion was done through the addition of new channels that were controlled by the game ROM in the same way as the built-in 2A03 channels.
Moero! Pro Yakyuu doesn’t do that. Let’s take a look at its synthesizer.
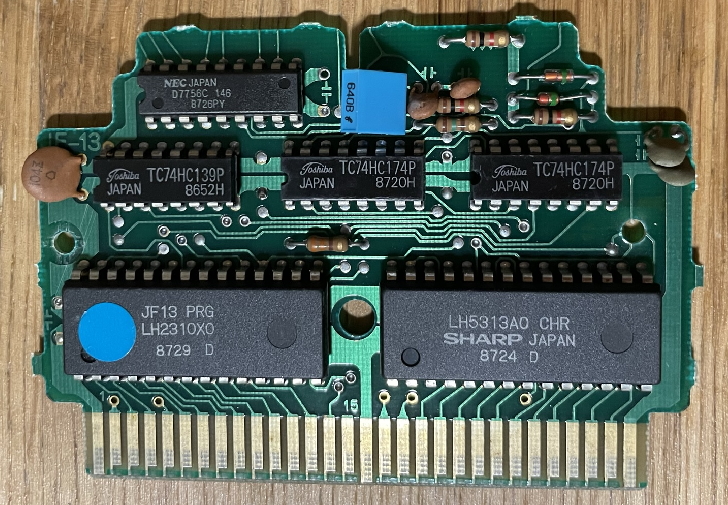
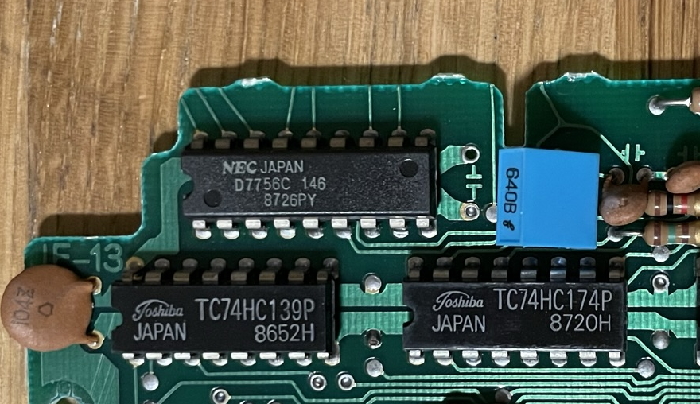
The synthesizer is the NEC D7756C, or to use its full name, the µPD7756C. It’s used by this game and several other Jaleco releases, and this chip is not designed as a music synthesizer. So what is it? A clue might be found in the similarly-numbered NEC µPD7759, used in the Sega System C2. You might remember that chip from it not actually being present on the game Bloxeed, a System C game.

The NEC µPD7759 is an ADPCM playback chip, which plays back samples from an external ROM. The NEC µPD7756C is similarly an ADPCM playback chip, but plays back its samples from an internal ROM. The ROM is on the same die with the ADPCM playback; for a mass-produced game like Moero! Pro Yakyuu, the economies of scale were almost certainly worth it. Another benefit is that it presents a simple interface to the game; the ROM knows where all the samples are, so the game only needs to pass a 4-bit track number, as opposed to a ROM address that will be at least 16 bits.
We can actually see the µPD7756 in an NEC catalog from 1995, alongside the µPD7759. The 7756 offers 256 kilobits (32kiB) of internal ROM, enough for 12 seconds of 6kHz speech. This isn’t super high quality, but it gets the job done.

The internal ROM is the undumped ROM I mentioned; as far as I know, there is no way to get this chip to output its data in a binary form. If that’s true, to extract the ROM the only thing that could be done is to remove the casing and carefully image the die within, and then carefully analyze the images to manually extract the ROM bit by bit. This has been done before, but the fact is, for a mass-produced baseball game, or for that matter the other Jaleco sports games using similar NEC ADPCM chips, as far as I know nobody has wanted to put in that painstaking effort. Can you blame them?
What does it sound like?
As noted, this is a sample playback chip that can play one sample at a time. You could imagine using it for percussion, I suppose, but Moero! Pro Yakyuu uses it for announcers. That’s a big part of televised baseball, and with the voiced announcers and behind-the-pitcher viewpoints, Jaleco was trying to bring a more television-esque experience to the Famicom. Certainly it was a lot flashier than Nintendo’s ancient 1983 Baseball.
So what does it sound like? If you leave the game on the title screen, it’ll hit a home run, so we can hear it in action.
Those of you familiar with the NES library might notice two things:
- Moero! Pro Yakyuu came to the United States as Bases Loaded, where it was also a very popular game, which litters the used game stores in great numbers to this day
- Bases Loaded also featured in-game spoken audio. Let’s take a listen.
The thing is, Bases Loaded was a western release for the western NES, so of course it couldn’t use the NEC µPD7756C– it had to rely on the 2A03’s APU. The 2A03 has a PCM audio channel. So what’s the difference?
Moero! Pro Yakyuu has, in addition to its speech chip, a 128 kiB program ROM, and a 64 kiB character ROM. This is where all the data for the game lives. The additional chips seen on the circuitboard are 74-series discrete logic, used for banking.
Bases Loaded uses an MMC1 mapper, which I talked about in my post on the MMC series, backing a 64kiB character ROM and a much larger 256kiB program ROM. That extra ROM space is used for all those samples; and at that high cost, the audio quality is still worse to my ear. (Though the samples aren’t the same) ADPCM works.
So that’s Moero! Pro Yakyuu. Is it the best example of expansion audio? No, but it was an early adopter of the feature, and a bit interesting for that reason.
Audio mixing is hard…
You might have noticed something interesting there: the music in Bases Loaded is a lot louder than in Moero! Pro Yakyuu. The two videos were captured on the same system– a Sharp Twin Famicom– but a consequence of the simple audio-in to audio-out is that mixing in the expansion audio is entirely the job of the cartridge. Back when repairing my Athena arcade board, I noted that you generally use resistors for this. So of course Jaleco did, and their resistors inevitably drop the total sound output. Bases Loaded, a western title, isn’t injecting any new audio into the mix, so its audio remains nice and loud.
Three-channel Famicom audio
What if we wanted to use a different Famicom? Here’s one from my collection that has shown up a few times on this blog.
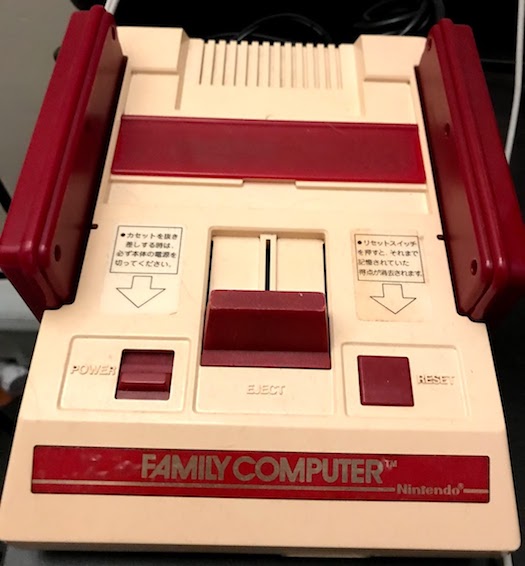
This was once a standard Japanese Famicom. The thing about this model, however, is that it only had RF output– RF output is modulated so that the console’s output can connect to a TV as if it was an antenna, which in 1983 was the only thing most TVs could accept input from. So to use this Famicom on a modern television, or an upscaler (like, say, the Micomsoft Framemeister), you need to add an AV circuit of your own, which was what was done here– once by my drunk girlfriend (I keep telling her not to solder while drunk…) and then repaired by me.
The mod installed on this Famicom features an interesting characteristic: a stereo mod. I’ve talked about this before; essentially, the APU (audio processing unit) built into the 2A03 CPU chip outputs its audio on two pins instead of one. One pin has the square waves, the other pin has the noise channel and triangle wave. Here’s what that sounds like in Super Pitfall:
This mod, however, takes the audio directly off of the APU’s two pins. It has to; by the time the audio reaches the cartridge slot, those two channels have already been combined into a single channel. And so the music of The Legend of Zelda on Famicom Disk System ends up sounding like this:
Let’s fix that. Without removing the weird “stereo” feature.
…let’s go diagramming
Since this might be a bit confusing, I’ve made a diagram of the current state of the modded Famicom with regards to audio. To see a stock Famicom, just remove the “AV Mod Amplifier” section– in that case, the audio will come out the RF modulator along with the video.
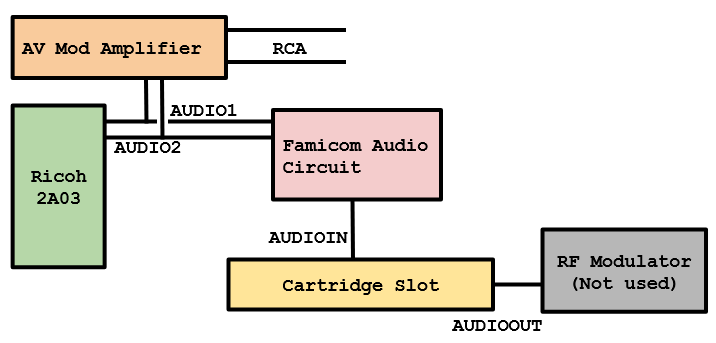
You can see that the 2A03 has two audio outputs, which are directly tapped to a new amplifier, bypassing the original audio circuit. Unfortunately, that audio circuit bypass also leads it to bypass the cartridge slot, which proceeds to mix in audio only for the RF modulator.
The problem is that the cartridge slot only has one audio input; therefore, there’s no way to have the cartridge mix the audio as-is. So my mod plan is to do something like this:
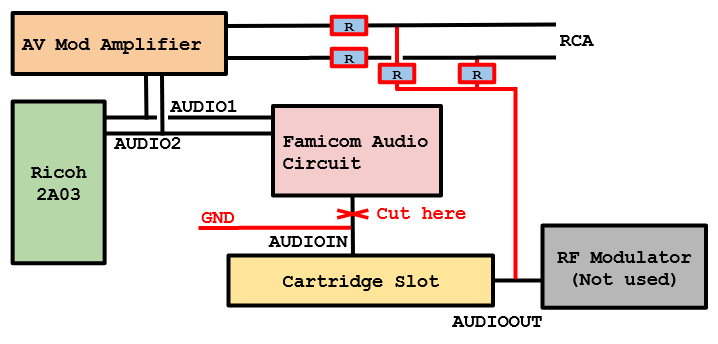
First off, I ground the audio input pin. This means that any mixer in the cartridge will mix in their audio with silence, so that the audio out will only be the mixed circuit. Finally, a simple audio mixer circuit is created with resistance R to split the expansion audio and add it to each side. This has a few downsides:
- The level of the audio is reduced. This could be solved by adding a new amplifier circuit again, but I don’t think that’s necessary, and with a well-chosen R the audio should be loud enough.
- The cartridge audio will always be mixed at the same level. This is a problem because the cartridge’s circuit could be customized for its particular use case, causing audio to be strange. In practice, though, there are already different variations between audio for Twin Famicoms, AV Famicoms, modded adapters for the NES, etc. So this doesn’t make a complex situation any worse.
- It is theoretically possible for the cartridge to do something with the audio in pin other than mix in expansion audio; for example, it could generate DTMF tones and output them somewhere else, or use a cassette tape. As far as I know, this was never done during the lifetime of the NES– neither the Famicom Network System nor Family BASIC rely on the 2A03’s audio output. But there is something coming up that will– Krikzz’s RGB Blaster. This mod will break audio compatibility with that.
I think these are acceptable sacrifices, but I think that because I have multiple Famicoms; even if I completely ruin this one, I’ll have other systems I can use, like the Twin Famicom that captured the footage above. So as with all console mods, proceed at your own risk.
Actually modding
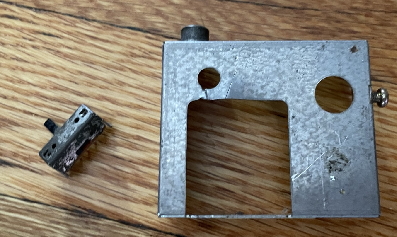
So, the first thing I did, having made that plan, was to do something totally unrelated: removing the RF shield around the modulator, and the channel switch. These aren’t really used anymore in this system, and I wanted to free up the space because last time I messed with this, I didn’t have enough space and had to remove the eject mechanism. I’m hoping that’ll be enough.
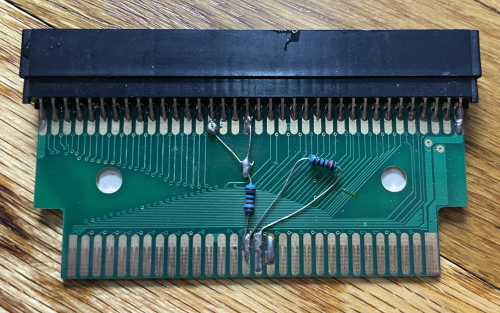
The circuit is very straightforward. But what is “R” here? To get a reasonable value, I decided to take a look at a project I already did. See, I have a PowerPak, one of the older flash carts for the NES. It supports expansion audio, but as an NES cartridge, does so through an unused expansion pin– to get the audio to a Famicom, you need to mod an NES -> Famicom converter. I did this years ago.
Here, I used 10kΩ resistors, and it seemed to work great for games that did and do not use expansion audio alike; a lot of Aspect Star “N” (a game with no expansion audio) testing was done through this adapter. So for the mod, I’ll be using 10kΩ again.
Get to it already
So, this is a surprise– 10kΩ resistors, everything just worked. Take a listen. We’ll go with Moero! Pro Yakyuu as a test; it’s already been shown in this post, it does expansion audio without any interaction on turning it on, and it’s cheap enough that if I did something horribly wrong and destroy it I won’t feel too bad about having to replace it.
Can you hear those pauses when the game has to load things?
One thing that admittedly surprised me is that this circuit didn’t really lead to any reduction of the stereo effect; the square waves and triangle wave are easily separated as usual, just with the layer of the expansion audio on top. I suppose since the resistance between the left and right channels is 30kΩ, that’s high enough to attenuate anything beyond the threshold of noticeability.
If you have done the stereo mod on the Famicom, then, this is a good way to get back the expansion audio. And honestly, who wants to play a baseball game without an announcer?
Plus, I managed to get the eject mechanism working again. Win-win!

