The Great Composite Comparison!
You’ve read my post explaining composite video, and now you want to watch some video encoded in it, or play a game. The best option is a CRT television, but those are heavy and you want to use a flat-screen monitor or television instead. So, how best to upscale this video? Let’s take a tough challenge, and see what we can do.
To start
Before we introduce the upscalers I will be comparing, I wanted to discuss some options I’m not covering in this blog post. Generally, the main reason is I don’t have access to them.
Component video transcoders (e.g., Koryuu)
Many very nice scalers, like the OSSC and the GBS-8200 with Control firmware, only support component or RGB inputs. This means that you can’t use composite video with them, unless you want to deliberately get a monochrome image like I did last time.

Therefore, tools like the Koryuu, which decode the color signal to convert composite to component, but don’t alter the signal timing in any way, are potentially excellent companions to these scalers. Pairing this with an OSSC may be the best option for a gamer who only wants low latency above all else, but you will be limited to “bob” deinterlacing for 480i content.
Super-high-end video scalers (Lumagen, Crystalio II, etc.)
Laserdisc is the highest-quality analog video format released. (Well, technically, it’s specifically HiDef MUSE LaserDisc, but that was a niche format released only in Japan, and still on a LaserVision Optical Disc, just one that spins scarily fast). Some people like it for the novelty, the large video jackets, special releases, and nostalgia.
Some people, though, like it for its high-end audio (on the latest releases, sometimes better than DVD), and want to try to get the best possible video out of them as well. When you look into options for this, names like “Lumagen” and “Crystalio II” are dropped. These are high end, professional devices intended for the serious video connoisseur.
Due to their high cost, however, they will not be covered in this post.
The RetroTINK-5X
The RetroTINK-5X looks very promising, with controllable comb and notch filters, motion adaptive deinterlacing, and super low latency. Unfortunately, it was literally just recently released, and so is difficult to obtain. I imagine over the next few months after the initial rush they will become easily obtainable, like the other RetroTINK devices.
For now, RetroTINK devices will be represented by a much lower-end device. It’s important to note that many limitations of it I point out will not necessarily apply to the 5X.
Upscaling, our challenge, and challengers
So generally, there are two competing goals when it comes to upscalers:
-
Video playback oriented upscalers focus on high-quality deinterlacing and picture output, ignoring the potential for lag. Image processing is focused on getting a smooth image. Video content is always interlaced, so progressive handling is optional.
-
Video game oriented upscalers will often use lower-quality deinterlacing but focus heavily on lag. Image processing is oriented around preserving pixels, or maybe scanlines but they must be optional. A video game scaler must handle both progressive and interlaced video, and handle both correctly.

So our challenge today is to find an upscaler to pair with the Pioneer LaserActive game console and LaserDisc player. This is a heavy ask; I think this might be the hardest case for a composite upscaler:
- The system is my only LaserDisc player, and so needs to be able to play back 480i encoded video
- The system switches between 480i and 240p when paused with a PAC installed.
- The system is a game console, and must play 240p-encoded Mega LD and LD-ROM2 games
- The game consoles’ library (at least the games I want to play) consist of FMV quick-time event games, and crosshair shooters, so low-lag is a must.
- The system must also be able to play cartridge, HuCard, Sega CD, and CD-ROM2 games from both PACs
As you can see, the LaserActive has qualities of both a video player and a game console, which is what makes it particularly tricky to upscale. Most likely, some of these demands will have to be sacrificed, but I want to see how close we can get. I’ll also take a look at some non-LaserActive use cases while I do it, just for fun, so keep on reading even if you’re not going to get the world’s most capacitor-plague-prone boat anchor. Let’s bring in the players!
The MINI AV2HDMI (x2!)

This is one of the most common, and most affordable options. These boxes have proliferated the internet, and you’ve surely seen them about. Indeed, I have two! The insides of them are different, which surprised me. Both contain a chipset created by Macro Silicon.

Macro Silicon is a name you’ll find in many low-end AV parts. For example, the “EasyCap” branded composite to USB capture device I have has an MS2100E chip, which converts S-Video and composite to USB, just as promised.
The black one has the following chips:
- MS1850, which decodes analog composite and S-Video to deinterlaced VGA
- MS9282, which converts VGA to HDMI
- STM8AF62, a microcontroller by STMicroelectronics
The white one has a simplified chipset:
- MS1858, a single composite to HDMI chip with an internal microcontroller
The two seem to be identical, both able to do 720p or 1080p output, but we can test that throughout this process. Generally, these are reported to be similar to the chipset used by most HDTVs that have composite video inputs. My guess is that the black one is older, since it has a larger chipset, but this may simply be based off of what was available at the factory.
It’s worth noting that in this review, I’ll be referring to them as the “AV2HD (white)” and “AV2HDMI (black)”, however, I’m working from a sample size of one of each. I don’t know any way to guarantee you’ll get a particular chipset when purchasing these, which means that if you buy a MINI box, no promises on what’s inside.
The RetroTINK-2X Mini
The RetroTink-2X Mini sits at the bottom of the well-regarded RetroTINK line of products, since it only supports composite and S-Video. For this test, that’s exactly what we need.

The RetroTINK-2X Mini, as its name implies, can only scale 2X, to 480p, and it will be up to whatever device or TV you’re using to upscale the rest of the way to its native resolution. This isn’t a big deal, but it does mean the final picture will be a little soft on my 1080p panel.
It has another trick up its sleeve that we took advantage of in the composite article; it has a switchable comb and notch filter. This should allow us to try both methods in our testing. It also has smoothing, which means for image quality tests, I’ll need to use four different settings.

But most importantly, it has bunnies on the bottom!
The Extron IN1502

This is the representative of professional video equipment, but compared to the ones I mentioned above, it’s far more affordable and obtainable. You can tell it’s professional though, because it uses a BNC connector for composite video rather than the plebian RCA connector.

Another thing you might notice is that it only has a VGA output. For the purposes of this article, I’m going to use a lag-free VGA-to-HDMI converter; if I do use this on my television though, I’ll likely just use the built-in VGA port. The HDMI converter also handles digitizing audio, as this device does nothing at all with the audio.
Apparently it can also be controlled over DB9 serial. We won’t be using that feature though I did take a quick look at the manual. It doesn’t seem to let you do more than you can do with the front panel.
The Micomsoft Framemeister

The Micomsoft Framemeister. It’s come up a lot; it’s out of production, very expensive nowadays, and certainly hard to recommend for composite video alone. But since I have one, I’m going to include it in my tests.
Something to look out for is a tendency for rainbow-banding.
Commonalities
All devices will be hooked up using the same setup, with a thick shielded component cable serving as our composite cable. Capture will be done using the Elgato HD60S. While this worked with all the scalers tested, please note that RetroTINK specifically calls out that they do not support Elgato capture devices, and they are notoriously finicky, so your mileage may vary. I don’t recommend making capture device purchase decisions based on this blog post.
All pictures will be scaled to a 4:3 aspect ratio, even if that’s not their native output, as my expectation is that my TV will be able to handle this.
Test 1: 480i LaserDisc Video Quality

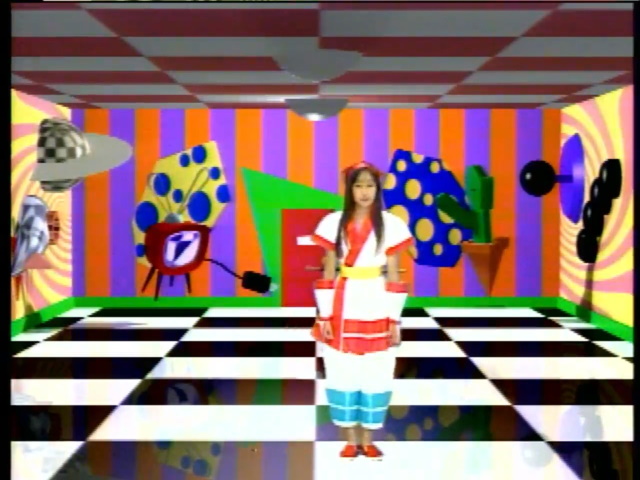
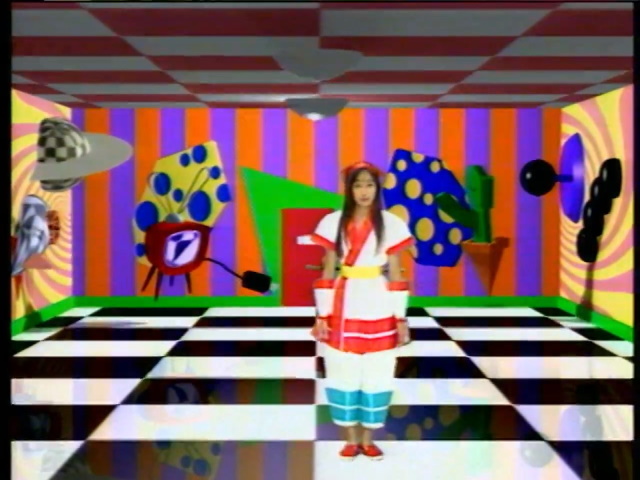
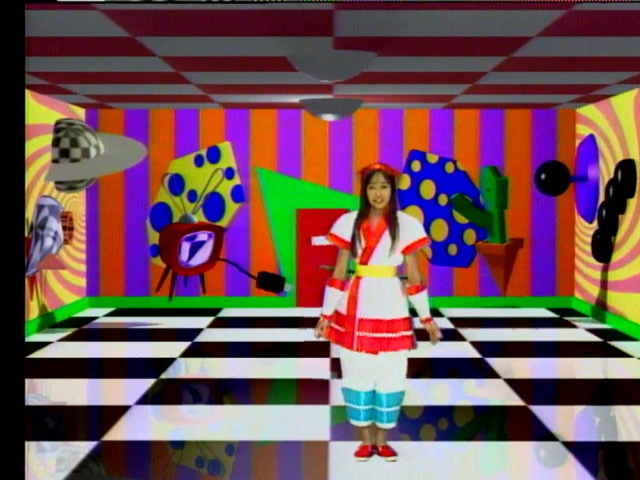
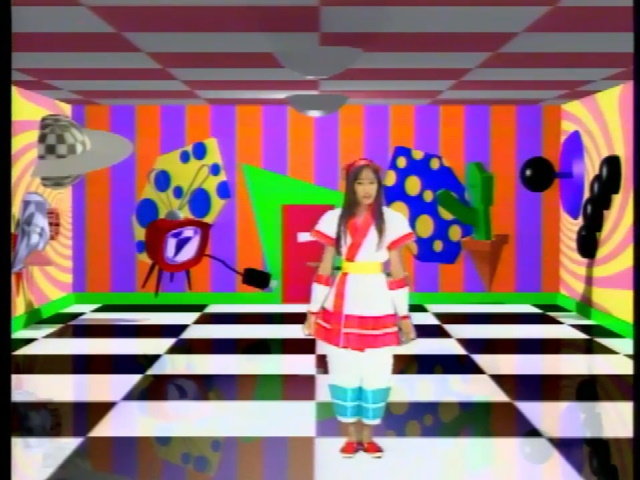
Our test LaserDisc is Neo Geo Gals Graffiti, released by Pony Canyon and SciTron in 1994. It is a promotional disc which promotes much of the female cast of Neo Geo games, game footage, and cosplay. It uses bright colors, and like all video LaserDiscs, is 480i interlaced.
Guidelines: Subjective. Play disc until our host dresses as Nakoruru while zoomed out. Take screenshots of her as Nakoruru, and of the Neo Geo Gals Graffiti logo.
The MINI AV2HDMI
MINI AV2HDMI (black)
Recall from above that this one actually converts to VGA first, and then to HDMI. I noticed on the Macro Silicon website that only the VGA chip lists the capability of edge detecting in deinterlacing.
![]()

MINI AV2HD (white)
My suspicion is that the reason it changed from “AV2HDMI” to “AV2HD” is that HDMI is technically a registered trademark that you need to license and meet certain standards. Perhaps the manufacturers of this box (MINI?) didn’t want to bother.
![]()

The surprising thing here is that the two are more different than I thought! Thanks to the VGA -> HDMI pass, there’s some analog differences and the color balance is slightly off. The AV2HD seems to have a little bit more dynamic range. (Of course, we are worlds away from HDR here)
RetroTINK-2X Mini
Comb filter, Smoothing off
![]()
Do you see those telltale harsh jaggedness? The RetroTINK-2X Mini can only do “Bob” deinterlacing, which produces a 60Hz image by treating 480i like it was 280p.
Personally, I consider pure bob deinterlacing unacceptable for a video upscale.
Comb filter, Smoothing on
![]()

Much better.
Notch filter, Smoothing on
![]()
I’m a bit surprised, but the notch filter looks a bit better. The comb filtered image looks a bit washed out, like the brightness is too high; you can see a little bit more detail with the darker notch filter. For example, look at the reflection in the floor.
Extron IN1502
![]()
Things look a little more defined than the RetroTINK and the AV2HD; I feel like this image has the least of the fuzziness we associate with analog video.
Micomsoft Framemeister
![]()
Colors are a bit washed out like the RetroTINK, but the Framemeister’s legendary motion-adaptive deinterlacing does a better job than the Tink’s bob+smoothing. Not much of a surprise there. The colors might be more accurate if I used a different preset or tweaked the settings more, so I won’t weight that too heavily against it. It also does the best job rendering Nakoruru’s eagle behind the logo.
Test 1: Conclusions
In the Laserdisc community, the common recommendation for an upscaler is to just use the one attached to the TV; if the AV2HD’s any sign, I can see why. The deinterlacing is quite good despite being a budget device.
Personally, my favorite here is the Extron IN1502, since its image seems a little bit more defined. However, the MINI AV2HD (white) is also a strong option, and the Micomsoft Framemeister as well with some tweaks.
Test 2: Is 240p supported?
For this test, we’ll be using the 240p Test Suite, which as the name implies, is a suite of tests of 240p capability. We’ll be using the TurboGrafx-16 port on my PAC N-1 inside the aforementioned Pioneer LaserActive.
Why do we care about this? Two reasons:
- This can result in horizontal line artifacts when things move or flicker (which is common in older games to simulate transparency)
- This is often a sign of additional lag, as deinterlacing takes at least two fields to do something with
Guidelines: This is a pass or fail test. To pass, a device must treat 240p as 240p, and not try to handle it as 480i. The 240p test suite test flickers a black sprite on and off at 60Hz; a deinterlacer will see this as a pattern of horizontal lines.
| Device | Interprets as |
|---|---|
| AV2HDMI (black) | 480i (fail) |
| AV2HD (white) | 480i (fail) |
| RetroTINK-2X Mini | 240p (pass) |
| Extron IN1502 | 480i (fail) |
| Micomsoft Framemeister | 240p (pass) |
The Extron IN1502 is a bit interesting here, as while it is possible to make it have deinterlacing artifacts when moving, while the flickering sprite is stationary it is rendered almost correctly, with only a little bit of deinterlacing. It’s a smart deinterlacing algorithm, but it shouldn’t be running it at all.


Test 2: Conclusions
240p is not a real graphics mode; by which I mean it is not part of the NTSC television standards. All signals are supposed to be interlaced, so it’s not illegal for these upscalers to just assume every signal is. However, this test has clear winners: the RetroTINK-2X Mini and the Micomsoft Framemeister.
Test 3: 240p TurboGrafx-16 Image Quality
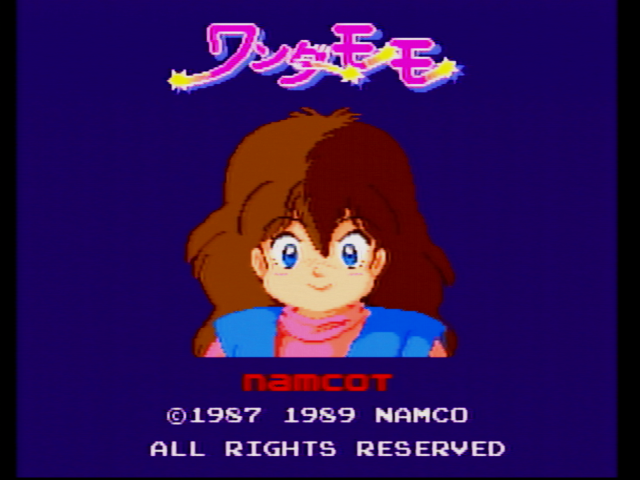
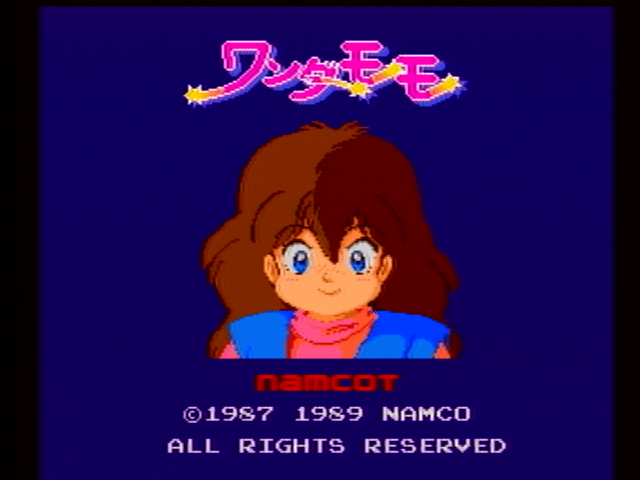
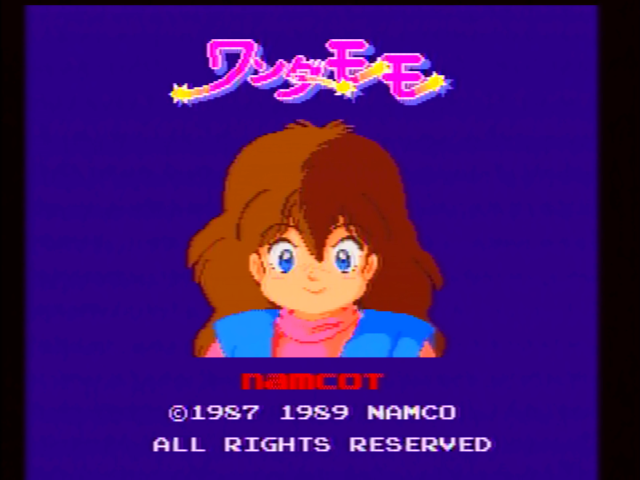
Our test game is Wonder Momo for the PC Engine. This is a more “primitive” game with lots of areas of open color, as it is a relatively earlier title for the system, when the aesthetics were closer to NES games. (The PC Engine must have one of the largest ranges of game aesthetics out there)
Guidelines: Subjective. Take screenshots of the static title screen. Things to keep an eye out for are the text, the blue background, and the gaps between letters in “NAMCOT”.
MINI AV2HDMI (black)
MINI AV2HD (white)
Like the 480i test, the color range is a little better, but in this case, you can see some more interference in the shadow of the “Wonder Momo” text at the top of the screen. The “NAMCOT” text is also much more blurred.
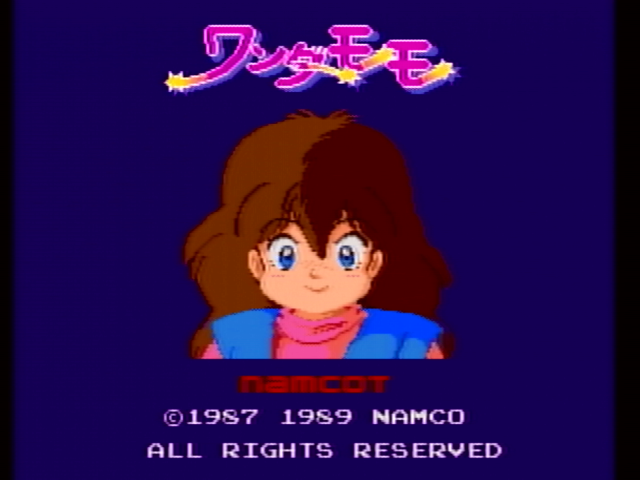
RetroTINK-2X Mini
Comb filter, no smoothing

Comb filter, smoothing

In both comb filter images, there’s something going on in the “A” in “NAMCOT”, that isn’t visible in the notch filter shots below.
Notch filter, no smoothing
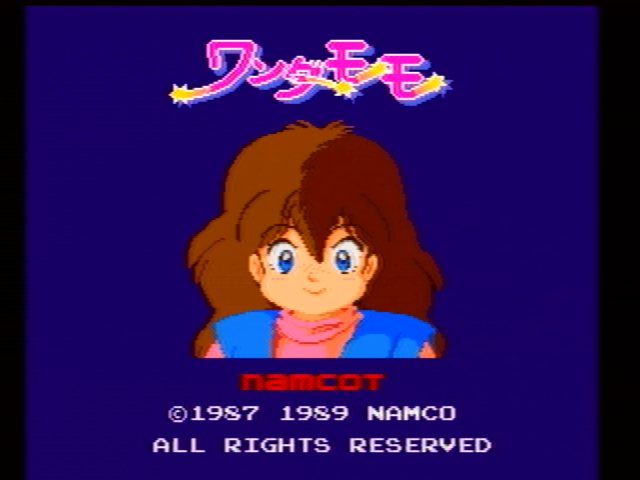
Notch filter, smoothing
I’m surprised how much I like the smoothing filter here. It looks good on these low-color-depth anime images that are very common on the PC Engine, on both old and new games. It also hides the interference in the shadow of “Wonder Momo”, and looks pretty good.
There’s no artifacts around the copyright text, which is very nice.
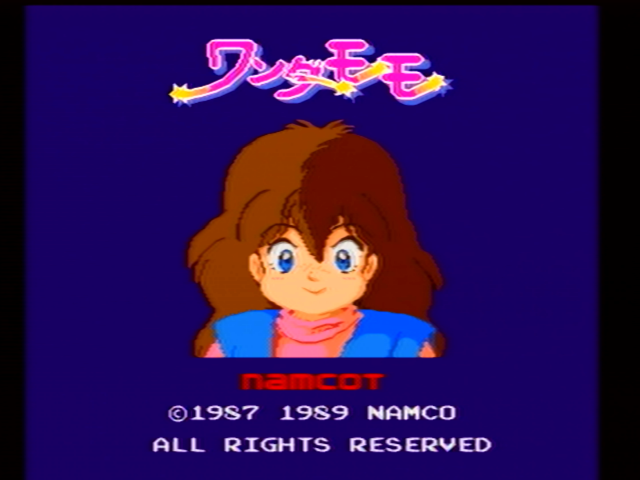
Extron IN1502
Again a very crisp image. Probably the strongest of “NAMCOT”, but you can see sharpening artifacts around the copyright text that aren’t there in the RetroTINK, though the text is not as blurred as on the MINI boxes. Very little visible interference to my eyes.
Micomsoft Framemeister
Very bright colors and some horizontal artifacts. The first half of “NAMCOT” is almost continuous red, and glimpses of rainbows are seen around the letters. Horizontal lines are seein the blue background. The Framemeister is very picky about what composite video it likes, and this isn’t one of them.
Test 3: Conclusions
Our winner is the RetroTINK-2X Mini. Usually I don’t like my sprite graphics smoothed, but even the smoothing filter is quite nice here; for Momo here, I’d recommend the notch filter, with smoothing enabled. The Extron IN1502 is a respectable second place contender and the best for sharp pixels.
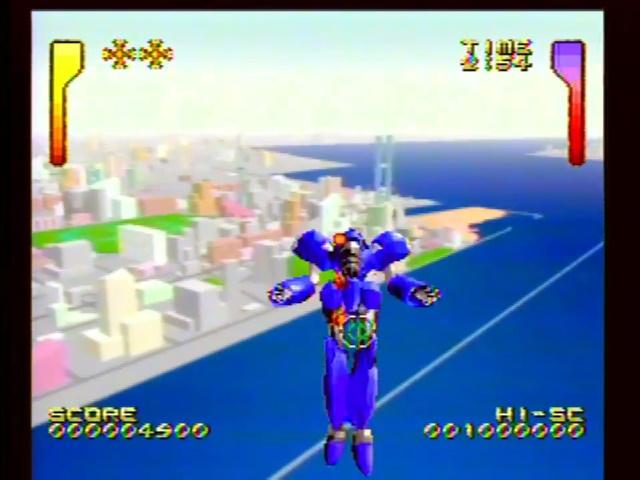
Test 4: 240p Sega Mega Drive image quality
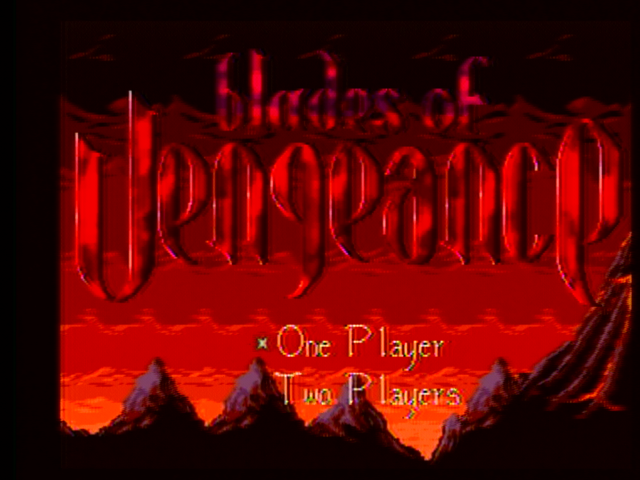
Our game this round is Blades of Vengeance. This Electronic Arts game offers “Intense Battle with Unbelievable Evil”, and the Framemeister did a terrible job at decoding a composite image from it back in the TMSS article.

That was on my Genesis 1, though, whereas we’ll be using the Pioneer LaserActive here. For comparison, here’s what that title screen looked like over RGB, on my Sega CDX.

The Sega Genesis is a system I’ve always thought had pretty good composite output, but apparently there’s something off about it technically. However, this game in particular seems to cause weird color issues I haven’t seen in any other game– hence, a perfect test case.
Guidelines: Subjective. Take screenshots of the static title screen. Things to keep an eye out for are color reproduction and distinguishing similarly-colored areas.
MINI AV2HDMI (black)
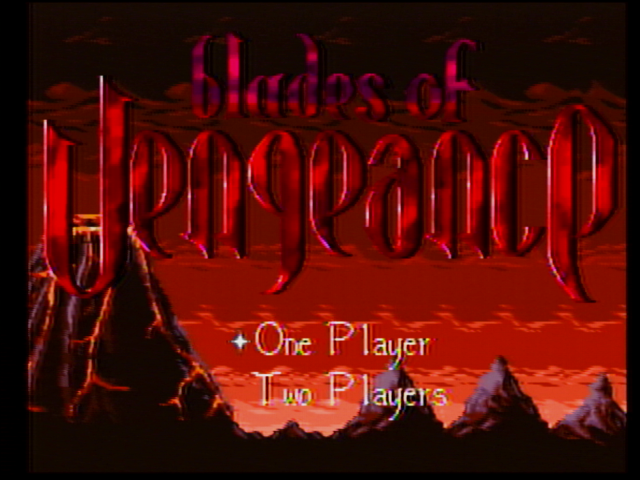
MINI AV2HD (white)
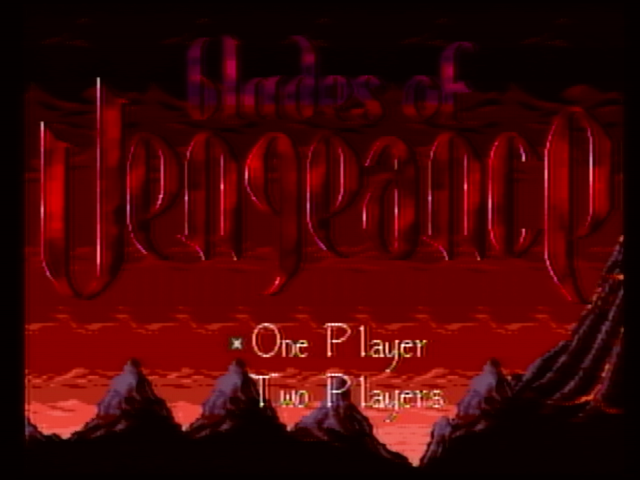
The purple in the title text becomes a bit red, and there’s a little more interference in the AV2HDMI than the one-chip AV2HD. Overall, though, this is fairly competent. Things look a bit better defined in the AV2HDMI despite having a little bit of rainbow banding on the text.
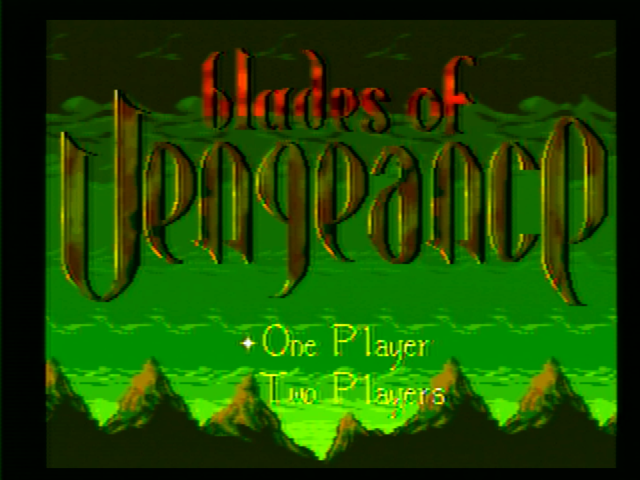
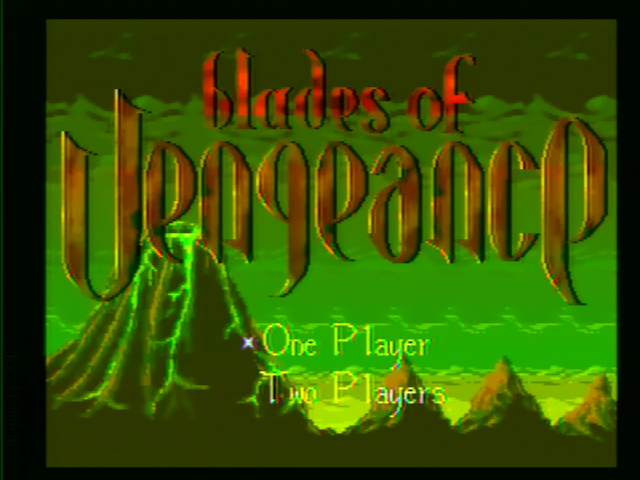
RetroTINK-2X Mini
Comb filter, no smoothing
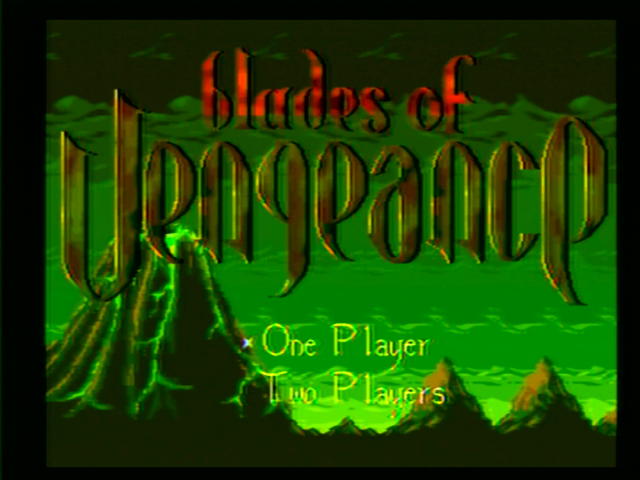
Comb filter, smoothing
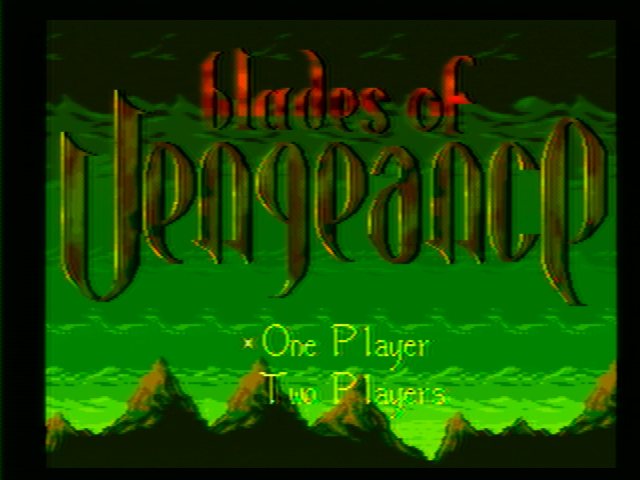
Notch filter, no smoothing
Notch filter, smoothing
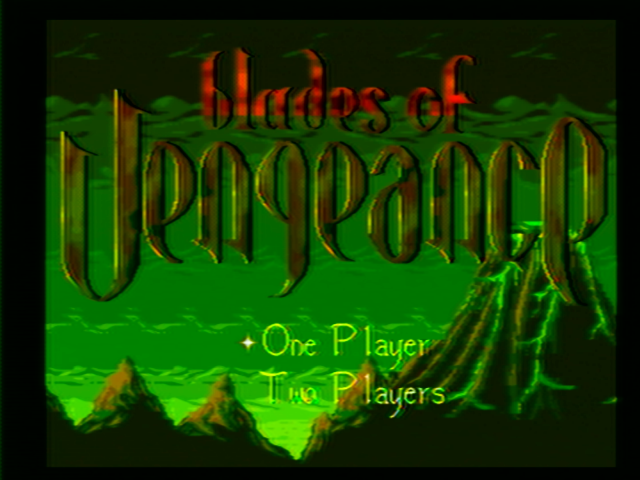
Everything is a lot cleaner than the AV2HD boxes, pixels are more crisp and the smoothing is quite satisfying on the “One Player” and “Two Player” text.
But let’s not ignore the elephant in the room: why is it green? Well, RetroTINK actually outright recommends not using the 2X-MINI with the Genesis composite output because of how out-of-sync it is; it recommends using RGB instead. Of course, you can’t do that on a LaserActive. Nevertheless, I felt it was important to stress that we are using the RetroTINK outside of the realm it was intended to be used.
Extron IN1502
Crisper, but with more interference than the MINI boxes. The colors also aren’t as well-distinguished.
Micomsoft Framemeister
It’s green like the RetroTINK, and it has rainbow interference like the Extron. Hope you didn’t pay $1000 for a used one on eBay to play Blades of Vengeance over composite, a thing people definitely do.
Test 4: Conclusions
The winner is the MINI AV2HDMI (black)! But really, there are no winners here. What on earth was EA doing? I guess I have to give points to the MINI AV2HD (white) and the Extron IN1502 for at least getting the colors right.
Long story short: if you want to play a Genesis cartridge game, unless you can’t stand dithering, don’t waste time upscaling the LaserActive’s composite output; get yourself a standard Genesis and a good quality cable that uses the RGB signal in some way.
Test 5: 240p Sega Master System image stability

The Pioneer LaserActive can play Sega Master System games. Now, sure, fitting a Power Base Converter seems difficult, but there are more modern solutions that do fit, though usually with the sacrifice of the card slot. In addition, for Japanese players of the time (who very well may have bought a PAC S-1), there was Phantasy Star Fukkokuban, pictured on the right.

Phantasy Star Fukkokuban looks like a normal Japan-region Mega Drive cartridge, but it’s actually just the exact ROM from the Sega Master System release, wired as if it was a Power Base Converter. (As it turns out, the only point of that device is to remap the pins, and also give you a pause button, which you don’t need here) Sadly, since the FM chip in the Genesis isn’t compatible with the FM chip in the Japanese Master System, you only get the PSG music. (Though I kind of prefer that for Phantasy Star)
I read recently a blog post by HD Retrovision where they mention that the Genesis in Master System mode provides a sync signal that is somewhat out of spec, though they’re discussing the Genesis’ CSYNC output. Therefore, I think it’s worth using this game as a test case for image stability.
Guidelines: The title screen is static, and therefore should remain unchanging.
Notice
The animations presented below are primarily as examples and should not be taken to be exact videos. Specifically, ignore the blink rate of the cursor. I sincerely apologize if these give you a headache.
MINI AV2HDMI (black)

MINI AV2HD (white)

These are pretty comparable I’d say, and neither are good. The colors are better on the AV2HD white, but the image stability, what we’re measuring, is about the same. In general, I’d hesitate to call this acceptable.
RetroTINK-2X Mini
For this, I decided to use smoothing off. All performed equivalently so I don’t consider this a disadvantaged to the TINK.
Comb filter

Just the slightest bit of rainbow banding (look at the hilt of Alis’ sword) implies an issue with separating out the chroma and luma signal. Can the notch filter do better?
Notch filter

In this case, yes!
Extron IN1502

Picture looks good and stable, but definitely looks noisier than the others. It almost looks like film grain.
Additionally, the “SEGA” text is very twitchy; this may be deinterlacing issues, but I’m not sure.
Micomsoft Framemeister

The rainbow banding ruins what would otherwise be a very good quality picture.
Test 5: Conclusions
The RetroTINK-2X Mini (with notch filter) and Extron IN1502 are the winners here, with the RetroTINK winning out by such a slight amount (slightly less noise) that it might even depend on where on my counter they happened to be sitting.
The Micomsoft Framemeister and RetroTINK-2X Mini (with comb filter) also put on a strong performance, with a stable luma image but issues with the chroma (rainbow banding). The MINI boxes did about as well as I expected. Unfortunately for them, my expectations weren’t high.
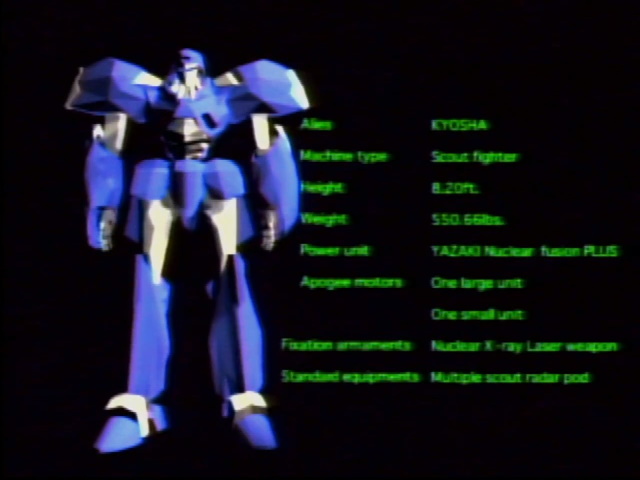
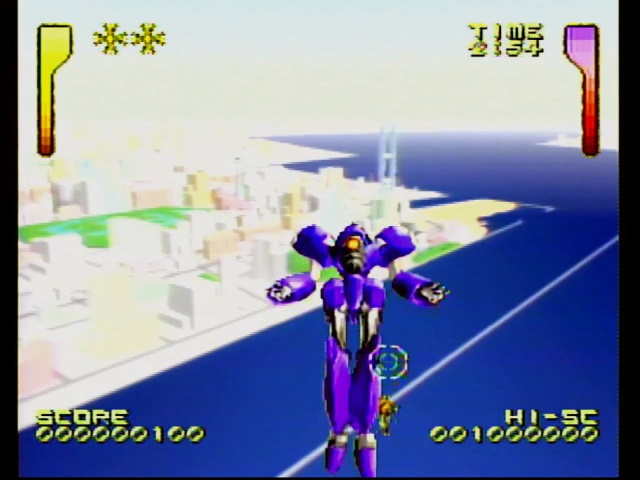
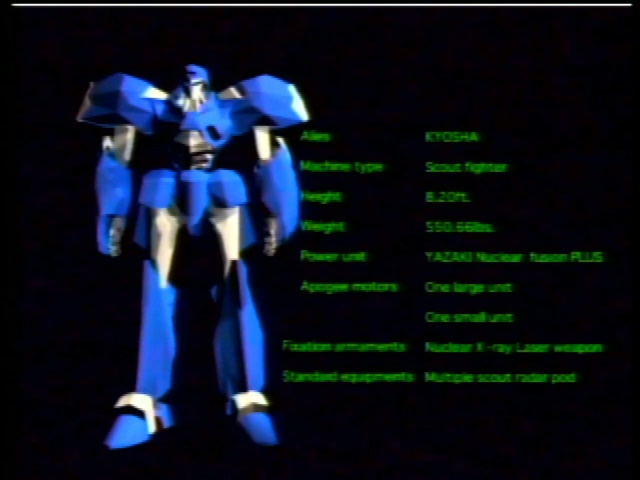
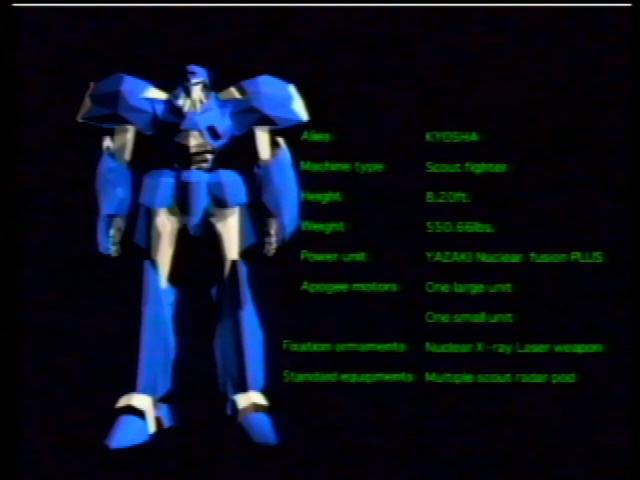
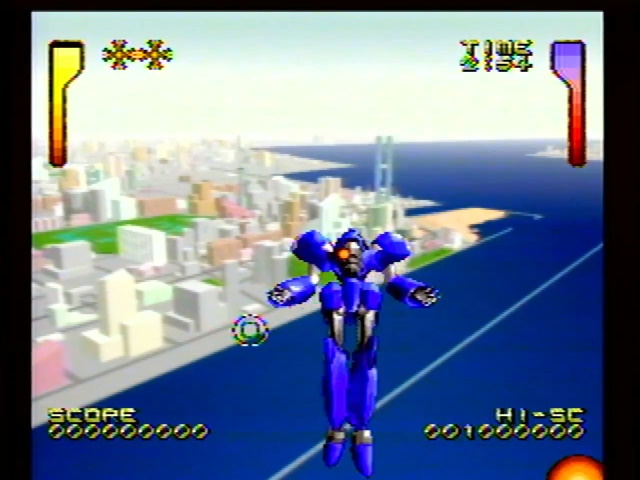
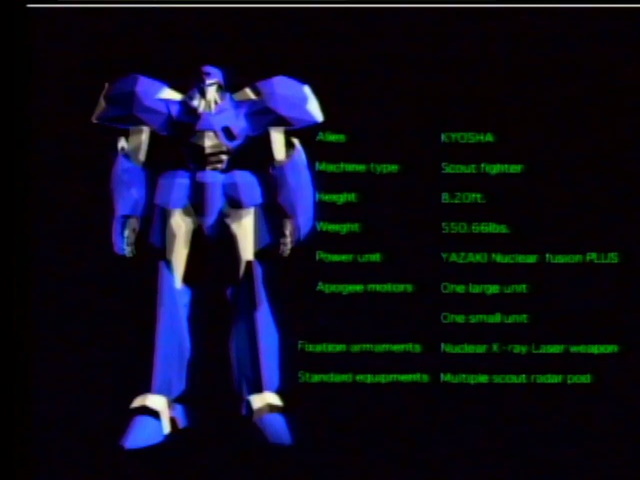
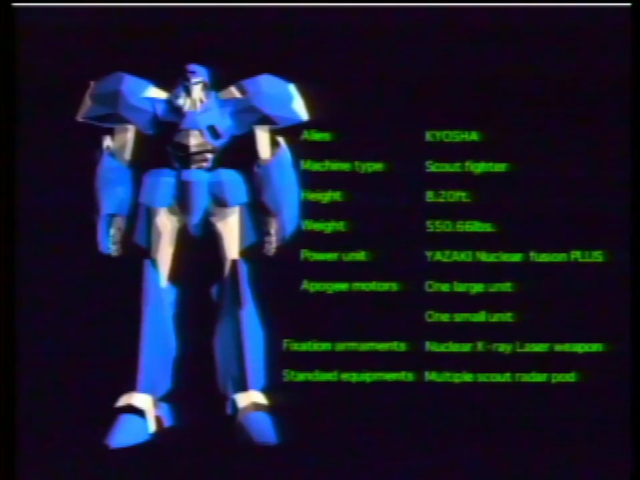
Test 6: 240p LaserDisc Image Quality (LD-ROM2)
But look, we didn’t break out the Pioneer LaserActive to play regular TurboGrafx-16, Genesis, and Master System games. We came here for Laserdiscs, so let’s play some more.
The LaserActive games are interesting because they embed the video as 240p for better compatibility with the game console PACs. As far as I know, this is pretty much the only case where you might run into analog 240p video. For our test today, we’ll be using Vajra for the PC Engine LD-ROM2.
Guidelines: Subjective. Take screenshots of the begining of gameplay, and the pre-battle screen, which has a lot of very small text.
MINI AV2HDMI (black)
MINI AV2HD (white)
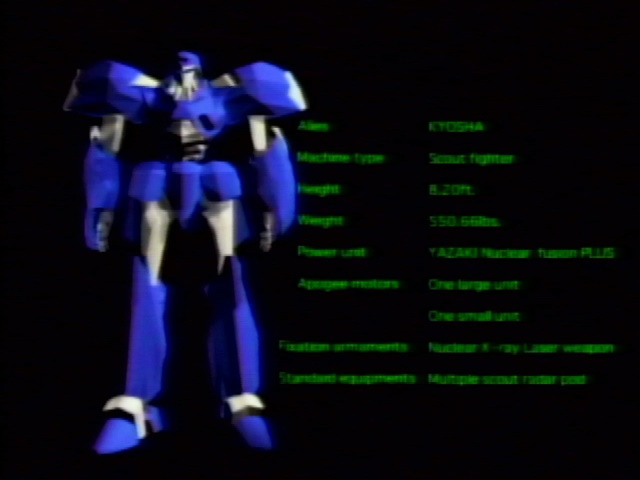

The stats text are slightly more readable on the older model, but that’s likely because the brightness is too high, as you can very clearly see in the city. There’s also some serious sharpness artifacts around the Kyosha on the older model and some rainbow banding on the targeting reticule; both are eliminated on the all-in-one chipset used in the white.
RetroTINK-2X Mini
Comb filter, no smoothing
Comb filter, smoothing

The smoothing effect is subtle, but it’s definitely quite helpful with all the sharpness around the boss. However, there is rainbow banding on the score.
Notch filter, no smoothing
Notch filter, smoothing
The notch filter helps with the rainbow banding, but does not eliminate it.
Extron IN1502

The sharpness is a bit too high, but at least the boss is clearly separated from the environment. Perhaps a bit too cleanly, as the sharpness draws lines. That might be configurable.
You can also see rainbow banding on the targeting reticule.
Micomsoft Framemeister
What is that purple noise in the boss stats? Meanwhile, the boss sides are sharp but without being too sharp like the Extron, but the on-screen text suffers from severe rainbow artifacts.
Conclusions: Test 6
I’ve got to hand it to the MINI AV2HD (white) for having an image completely free of rainbow banding. The Extron IN1502 came close, but the targeting reticule ruins it, and it’s a bit too sharp.
I was actually surprised what a difficult conflict this turned out to be! I’m not surprised, though, that the pre-battle text is pretty much always unreadable. That’s just for flavor really.
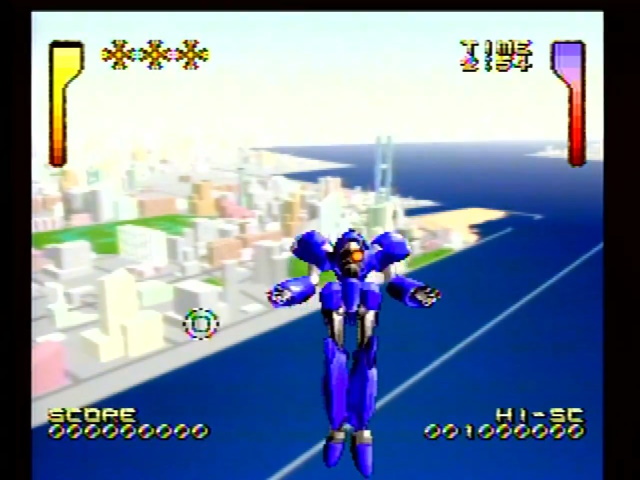
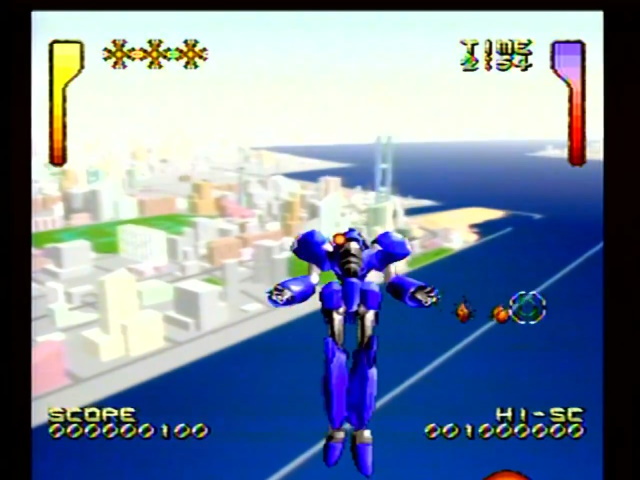
Test 7: 240p LaserDisc Image Quality (Mega LD)
It’s only fair to give the Mega LD a try as well, since really it does have the better game library compared to the LD-ROM2. I was going to use Triad Stone, but decided instead to go with Rocket Coaster since it overlays more sprites from the Genesis side than Triad Stone does, and therefore we can see if there are color issues here as well.
Rocket Coaster is an interesting game; it is a racing game which uses the LaserDisc video to display a wild 3D rendered backdrop, changing the speed as your car goes faster or slower. While that’s a cool concept that makes a unique use of the LaserActive for something other than crosshair shooters or FMV quick-time events, the game does feel a bit like a tech demo. There are no other racers on the track, and it’s way too easy to go flying off.
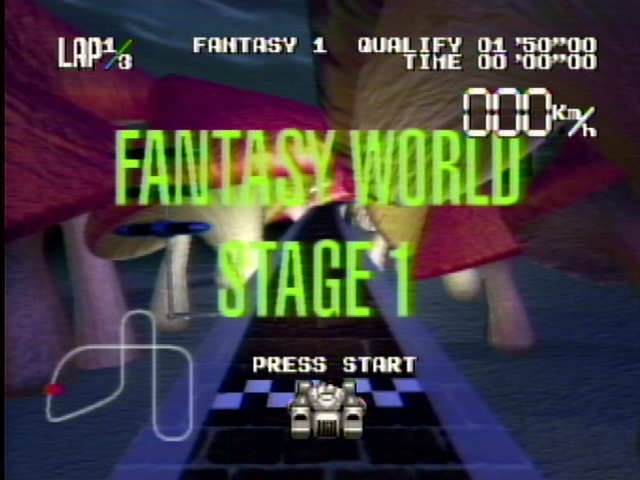
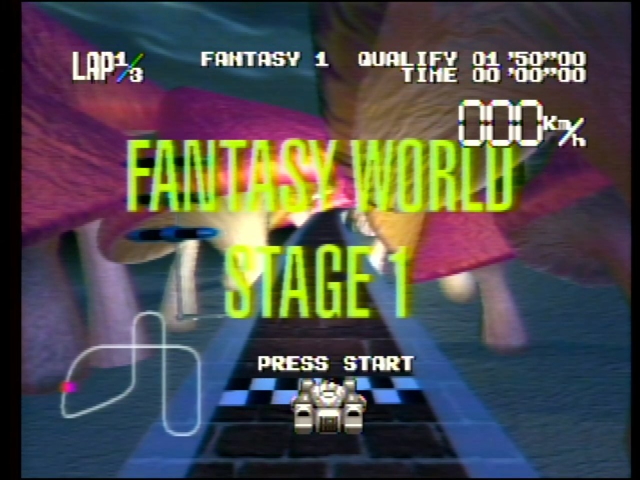
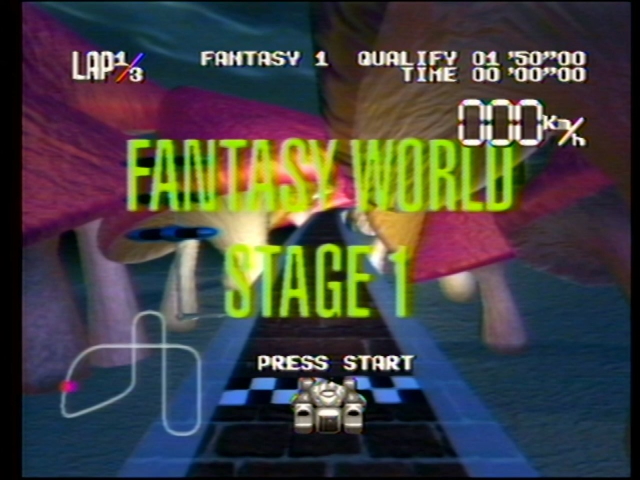
Guidelines: Choose “Fantasy” and “Type 1”. Compare the beginning of the track with the “Press Start” text visible.
MINI AV2HDMI (black)
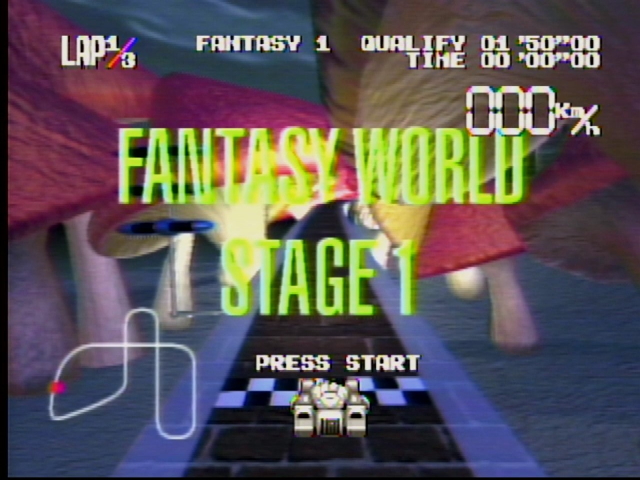
A washed out image with rainbow banding on the text. Nothing to write home about.
MINI AV2HD (white)
Much improved color reproduction compared to the older model, but there’s still some rainbow banding on the speedometer.
RetroTINK-2X Mini
Comb filter, no smoothing
Comb filter, smoothing
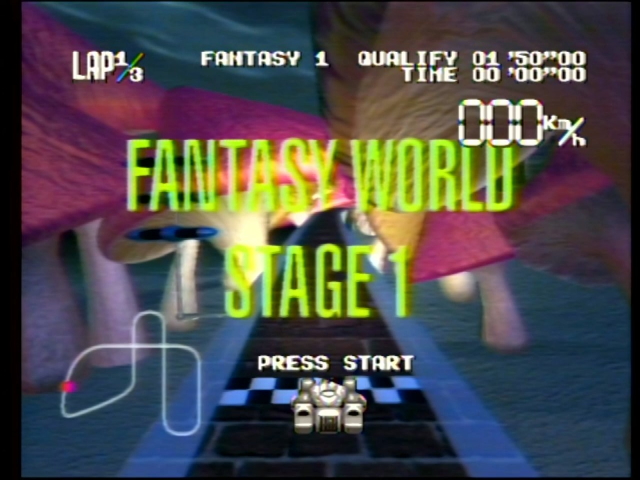
There’s so much noise in this LaserDisc that you can only really see the impact of the smoothing around the game sprites; as a result, you might as well leave it off, since the game sprites are fairly sharp and well-defined. Like the MINI, there is rainbow artifacts around the speedometer.
Notch filter, no smoothing

Notch filter, smoothing
This game is actually a good example of some of the downsides of the notch filter. Look at the area around the “Fantasy World” text and you can see a lot of dot patterns in the green glow. Additionally, the rainbow banding is actually maybe just a hair worse.
Extron IN1502

As we’ve come to expect from this scaler, the colors are a bit darker but still well-defined. The image is sharper than the RetroTINK but again possibly a little too sharp, especially around the car sprite. Rainbow banding seems comparable to the RetroTINK with notch filter.
Micomsoft Framemeister

The most washed-out picture of the bunch. Other than that, this is comparable to the RetroTINK I’d say.
Test 7: Conclusions
I’m going to give this to the Extron IN1502 due to the more vibrant color reproduction, with a second place going to the AV2HD (white), and an honorable mention to the RetroTINK-2X Mini (with comb filter).
You can see that in this case we didn’t see any of the wild color issues that were seen in Blades of Vengeance; there really seems to be something about that game in particular.
Test 8: 240p sprite motion
For past tests I’ve focused on still images. Of course, the downside of a still image is that it hides issues that could show up in motion. For this test, I’ll take a little demo I made while learning the TurboGrafx-16, which shows my “Nicole Express” logo with the Happy Train! protagonist going across the screen from left to right. The below screenshot is from an emulator. We can’t expect perfection, but we can try to get as much detail as we can.
![]()
Guidelines: The image should not be blurred in the axis of motion, and should render correctly, with relatively sharp pixels.
MINI AV2HDMI (black)

No real motion blur, but the train is basically a blob. The cyan is impossible to see, and the pink flower is too thin. Rainbow banding everywhere.
MINI AV2HD (white)
Much more reduced rainbow banding; the pink flower is now a deep violet but it is more visible in size than on the older version.
RetroTINK-2X Mini
Comb filter, no smoothing

Very nice sharp pixels. Some artifacts around the flower and more rainbow banding than the AV2HD (white), but I find this more pleasant to look at.
Comb filter, smoothing

This sprite’s fine detail doesn’t lend itself to smoothing. Still, I think this looks better than the MINI boxes.
Notch filter, no smoothing

The train’s flower definitely lends itself better to the notch filter, judging by this still. However, the colored dots in the passenger compartment are still not visible. Very nice picture.
Notch filter, smoothing

It’s the notch filter, with smoothing. This test does show that smoothing on the RetroTINK only smooths spatially, and not in the time dimension, which would be unacceptable.
Extron IN1502

What a surprise: it’s sharp, a little bit too sharp. The violet flower has become an angry red headlamp. Text might be the best-looking of the bunch, but the sharpening I keep complaining about is probably the reason.
Micomsoft Framemeister

Feels just a little blurrier than the (unsmoothed) RetroTINK-2X screenshots.
Test 8: Conclusions
The winner here is the RetroTINK-2X (notch filter, smoothing off). We’ll follow that with the other RetroTINK options and the Micomsoft Framemeister. The MINI boxes lose here, though I’m glad to not see any motion blur at least.
Test 9: 240p-480i mode switching
This is something we took a look at with RGB back in the GBS Control review. The game Castlevania: Symphony of the Night on the Sega Saturn uses a 240p mode in gameplay, but a 480i interlaced mode when paused. Some upscalers, when switching between modes, add quite a bit of delay.


However, a CRT can switch between these two screens with just a second to spare. Now, usually I use my Sega Saturn over RGB, as those pictures show. But I do have the composite cable for it, so let’s hook it up. One hypothesis you might have is that the systems that try to treat 240p as 480i might have an advantage, since they don’t need to do a mode switch.
Some other cases where this mode switch may be relevant includes pausing a LaserDisc on the LaserActive disc with a PAC installed, playing Chrono Cross on the PlayStation, doing basically anything on the NEC PC-FX, or when going into “laced” modes on the Commodore Amiga.
We finally can put the LaserActive aside!
Guidelines: Pause and unpause. Shorter is better. If the system loses sync, the Elgato HD60S video capture will be used to determine re-lock-on time. Measure the amount of time the screen is completely black.
| Device | 240p -> 480i (s) | 480i -> 240p (s) |
|---|---|---|
| AV2HDMI (black) | 1.53s | 2.12s |
| AV2HD (white) | 1.55s | 2.12s |
| RetroTINK-2X Mini | 1.65s | 2.10s |
| Extron IN1502 | 1.55s | 2.10s |
| Framemeister | 6.17s | 6.55s |
I consider pretty much all of the top four to be within the margin of error, and therefore acceptable; in fact, I could see the menu fading in, which means it was likely going as fast as the game is. (This is also probably why unpausing takes longer than pausing across the board)
However, the Micomsoft Framemeister suffers from one of its most well-known Achilles’ heels. (Even if it did a little better than the same test over RGB, surprisingly) I must say, though, that on this console (not one I plan to use over composite) which has a pretty good composite output, its picture looks fabulous, better than pretty much any of the competition. Sadly, that’s not what it was being judged on.

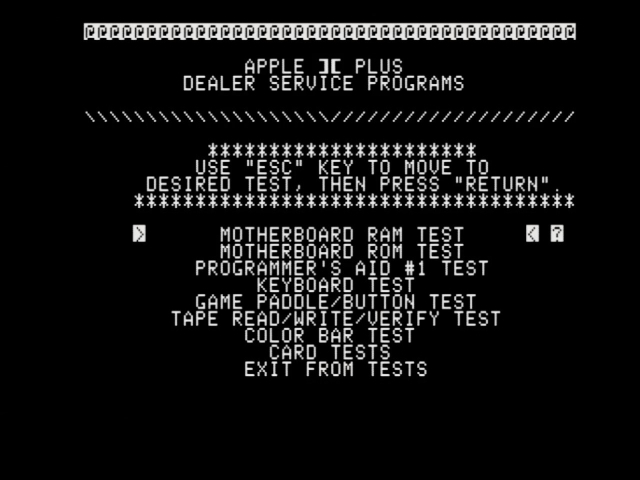
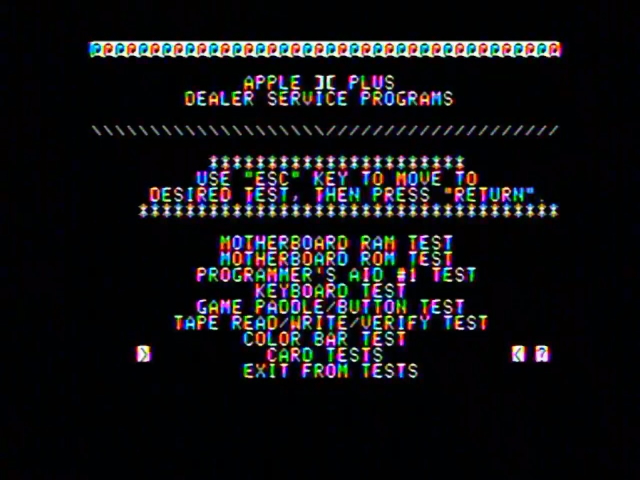
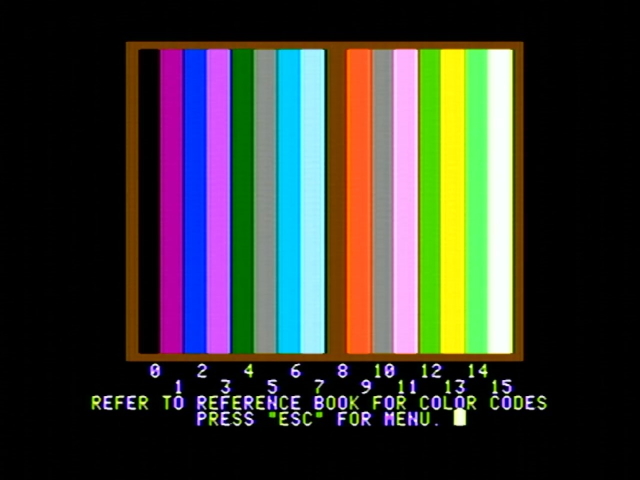
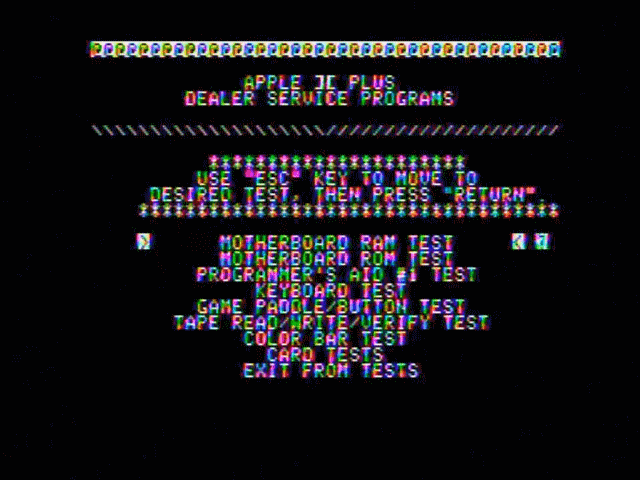
Test 10: The Apple ][
![]()
The Apple ][plus is one of my favorite computers I own. It’s also well-known for its, shall we say, unique composite video output. I don’t plan to use it with any of these upscalers, so mostly this is for my own curiosity.
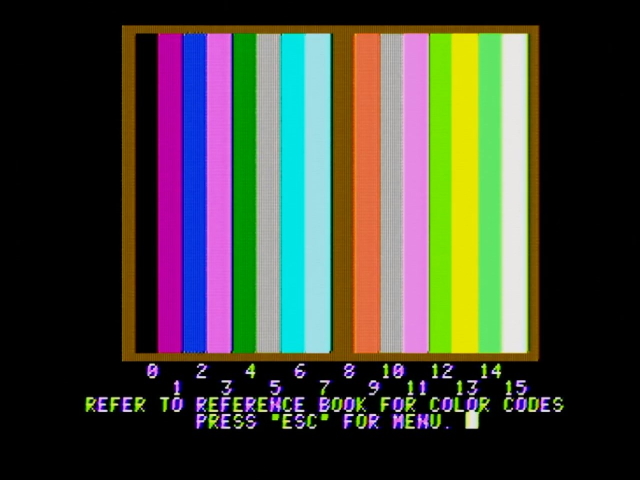
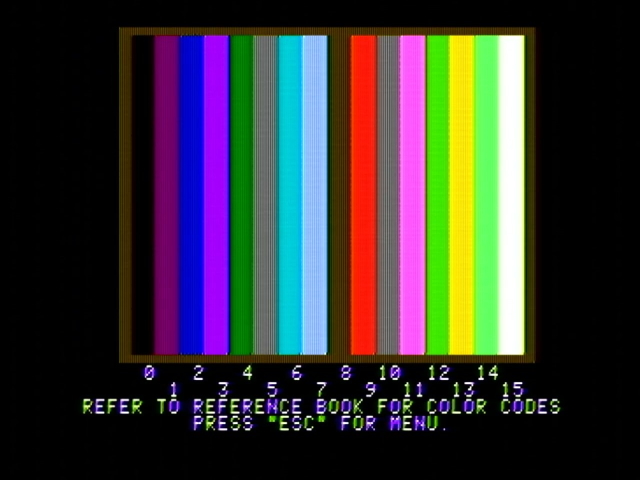
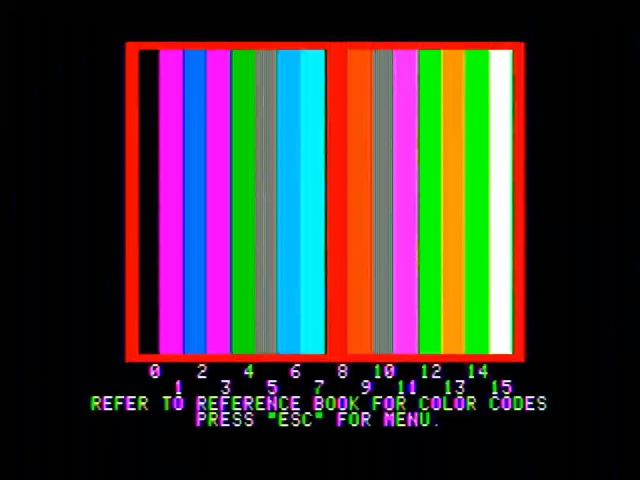
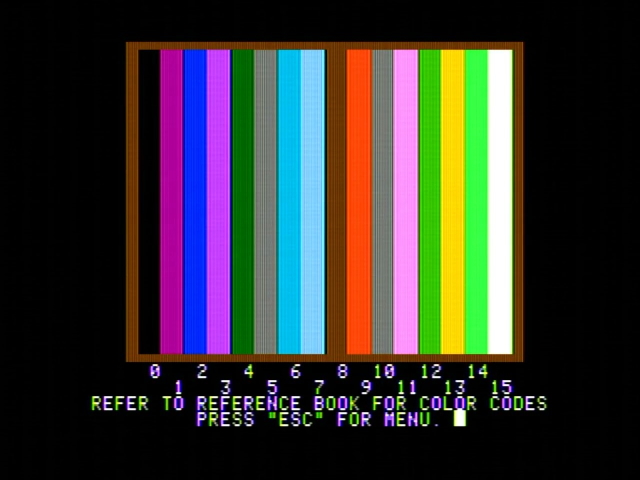
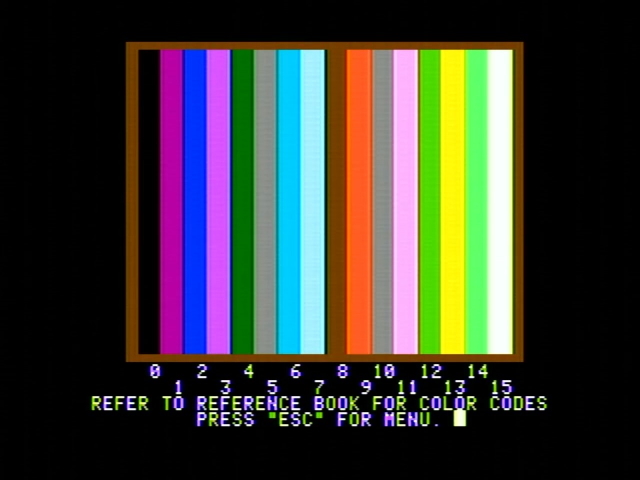
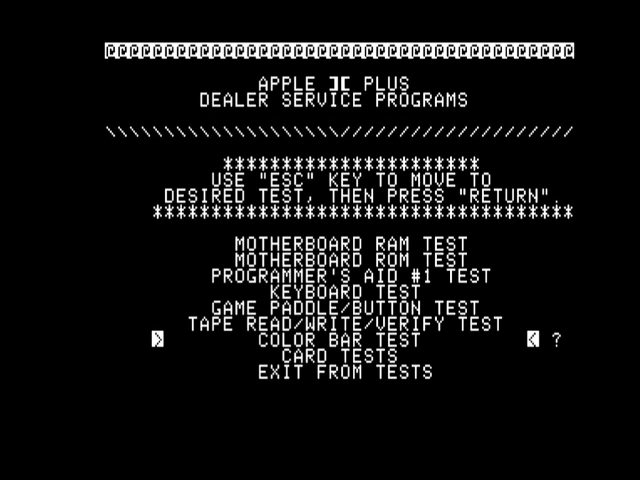
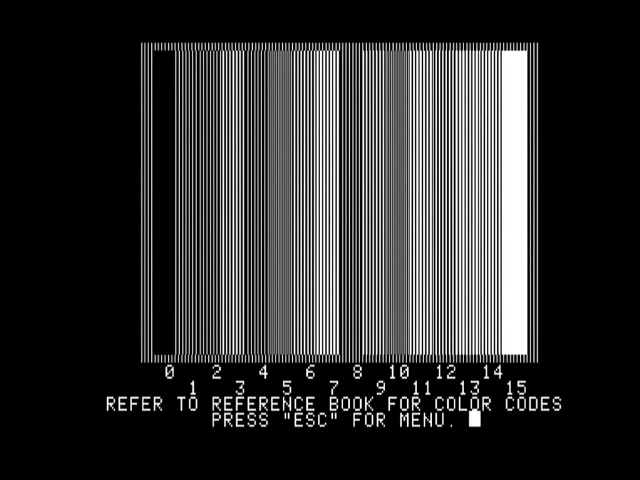
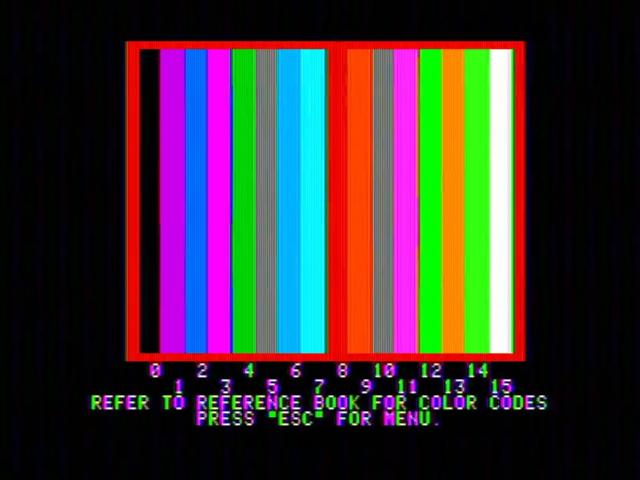
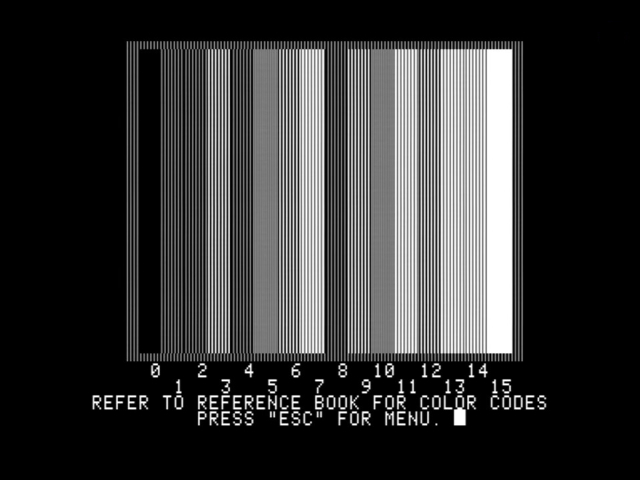
Guidelines: Load the Apple ][ diagnostics disk. To pass, it must show the main menu with no color, and show color on the (LORES) color bar test.
Extra credit: For devices with an S-Video input, I’m going to try to use an S-Video splitter and provide the Apple ][ output as luminance. This should, ideally, provide a sharp black and white picture. But this is a misuse of the standard so no problem if it doesn’t work.
Interestingly, we can see an RGB output from the Apple ][, courtesy of the Apple IIgs, which simulates the artifact colors to produce a high-quality output. The downside is, it is not quite equivalent and some of the colors have been changed; additionally, the background color is configurable and is blue by default. Still, here they are for reference, upscaled with the GBS Control.


Let’s bring out the real deal!
MINI AV2HDMI (black)
An interesting thing is that Apple ][ modern parts seller ReactiveMicro sells what appears to be this adapter as a dedicated kit for the Apple ][, though of course there’s no guarantee what chipset is inside it. (Remember, my claim that one chipset is used with a black housing and the other uses a white housing is based off of a sample size of 1.)
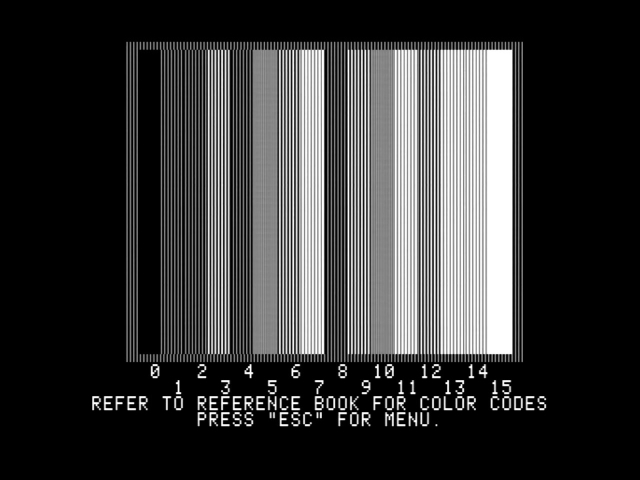
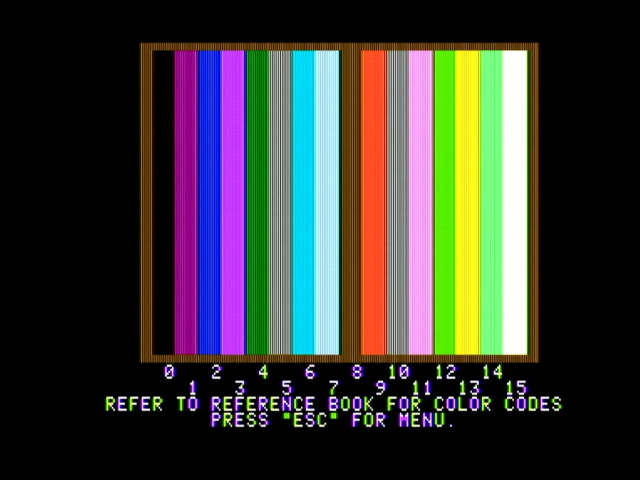
This looks pretty much what I’d expect for the Apple ][. There’s no color shimmer on the text screen, so the color killer is doing its job, while there is the purple and green shimmer on the text with color bars.
MINI AV2HD (white)
I am a bit surprised at how different the white model’s color palette is than the black one. Notice that the orange, which is also part of the HIRES palette, turned into a bright red. Honestly, I prefer the MINI AV2HDMI (black) here; hopefully that is indeed the model that ReactiveMicro is selling.
RetroTINK-2X Mini
Comb filter, no smoothing
The color killer is not detected properly, resulting in shimmering colors.
At first, the color bars were very bright and overly saturated, but after a second they dimmed out to a more typical palette similar to the AV2HD (white).
These both occurred regardless of the comb or notch filter, or regardless of the smoothing, so I’m going to just use static images from here on out on the RetroTINK.
Comb filter, smoothing

You can really see how subtle the smoothing is; it doesn’t even blur away the horizontal interference lines.
Notch filter, no smoothing
The notch filter does seem to eliminate the horizontal interference, but the color interference on the text-only screen looks even worse.
Notch filter, smoothing
This actually looks decent on the text alongside the colorbar, does a nice effect on the Apple ][ font. However, on the text screen, the smoothing makes the color mess even worse.
Extra credit
The RetroTINK provides a very nice monochrome image when you feed the Apple ][’s composite output into its S-Video luminance. These lines are correct; they are timed such that they interfere with a composite video decoder, producing chroma without needing to create a separate chroma signal.
Extron IN1502
Crisp and sharp, like we’ve come to expect; it also handles the color killer correctly. Of course, there’s also that excess sharpness we’ve come to expect, which has taken the horizontal interference in the color bars and made it worse.
Extra credit
The Extron also passes here.
Micomsoft Framemeister
The Framemeister behaves similarly to the RetroTINK. In fact, it behaves so similarly, it also starts out too bright on the color bars, and then fades into the correct ones.

My best guess is that this is some sort of automatic gain control that is being confused by the out-of-spec Apple ][ image.
Extra credit
The Framemeister has no issues here either, providing a very crisp image. That’s three-for-three, which I honestly wasn’t expecting.
Test 10: Conclusions
The winner goes to the MINI AV2HDMI (black). Next up is the MINI AV2HD (white) and the Extron IN1502 for getting the color killer right, and an extra point to all the S-Video-compatible systems for being able to handle a monochrome image.
You might wonder why you’d want a monochrome image; I also love the Apple ][’s weird artifact colors. But at the time, using monochrome monitors was very popular, especially with business users, as the monochrome image is quite crisp whereas when color gets involved, it doesn’t always look great, even on a CRT.
Test 11: Display lag
Alright, this is the one that I expect many people have been waiting for. That’s why I did it last; well, that and also that it requires a lot more setup.
Essentially, we’re going to run the 240p test suite lag tester. This is a series of counters that updates each frame, as you can see below captured on the OSSC.

This is running on a Sega Dreamcast, since it will allow us to go into both 480i and 240p modes. The Dreamcast is set up with a composite output (usually it lives on 31kHz RGB) going through a powered composite splitter, with one side going into a CRT, and the other going to the infamous Acer monitor, which according to a Time Sleuth adds only 2ms of lag on its HDMI input. Finally, I took three photos that showed both screens legibly, and measured the frame difference between them. This method can’t reliably determine lag less than one frame.
Guidelines: The lag should be as low as possible. It should also be consistent as possible; low variable lag can be worse than slightly more but consistent lag, since you can’t get used to it.
The Framemeister meists up
For some reason, the monitor started complaining about the Framemeister’s output, claiming any signal coming out of it is not supported. I’ve used the Framemeister with this monitor for years without any issues, so I’m not quite sure what’s going on here. For this test, I used a HDMI->VGA converter that is supposedly lagless, but the picture quality is awful, and the lag may be different from the monitor’s HDMI input.

So take any Framemeister results with a grain of salt. Additionally, 480i measurements were taken with motion-adaptive deinterlacing, not with bob deinterlacing, so you can subtract a frame if you don’t want nice deinterlacing.
Test 11: Results and conclusions
Remember that one frame is 16.67ms.
240p
| Device | Run 1 | Run 2 | Run 3 | Avg. delay (frames) |
|---|---|---|---|---|
| AV2HDMI (black) | 2.5 | 2.5 | 2.5 | 2.5 |
| AV2HD (white) | 2.0 | 2.0 | 2.0 | 2.0 |
| RetroTINK-2X Mini | 0.5 | 0.5 | 0.5 | 0.5 |
| Extron IN1502 | 3.0 | 3.0 | 3.0 | 3.0 |
| Framemeister* | 2.0 | 2.0 | 2.0 | 2.0 |
480i
| Device | Run 1 | Run 2 | Run 3 | Avg. delay (frames) |
|---|---|---|---|---|
| AV2HDMI (black) | 2.0 | 2.0 | 2.0 | 2.0 |
| AV2HD (white) | 2.0 | 2.0 | 2.0 | 2.0 |
| RetroTINK-2X Mini | 0.5 | 0.5 | 0.5 | 0.5 |
| Extron IN1502 | 3.0 | 3.0 | 3.0 | 3.0 |
| Framemeister* | 3.0 | 3.0 | 3.0 | 3.0 |
Conclusions
For one thing, I think the Framemeister over VGA is adding an additional frame of lag, as most other reports I’ve seen say the Framemeister has 1 frame of lag for 240p and 2 frames for motion-adaptive deinterlacing. So I would not take those results seriously.
I’m also very impressed with both the MINI boxes for both consistency and pretty low lag. And I’m the opposite of impressed with the Extron IN1502; three frames is not great. Of course, it’s probably that additional frame that allows for its high quality deinterlacing, which as we saw was even (almost) able to mask the effects of deinterlacing 240p.
Still, the clear winner is the RetroTINK-2X Mini. I didn’t bother testing things like the comb filter or smoothing here, since they’ve been confirmed already to have no impact on the display lag.
Announcing the Victors. Here they are.
So, as a first round, I tried to just assign everything points, 3 points for winning a test, while trying to give 2 points for second place and 1 point for honorable mentions, and an extra 1 point for the extra credit. But it got a bit messy, and really, all these tests aren’t equally-weighted. Still, let’s go through some use cases for each one in the reverse order, and I’ll say what each one seems to most be suited to.
5. MINI AV2HDMI (black)
Fifth place goes to the AV2HDMI (black). Some standout performances include Blades of Vengeance, and it also had my favorite color bars on the Apple ][ diagnostics. If this is what they’re selling on ReactiveMicro, then it’s not a terrible option, especially at that low price.
The combination of an analog-to-digital-to-analog composite to VGA converter, followed by an analog-to-digital HDMI converter, did seem to cost some image quality. But it also seems to possibly help with more problematic or out-of-spec signals? Not sure.
4. Micomsoft Framemeister
![]()
Ouch! Though, this isn’t quite fair to the Framemeister here, and shows more flaws with the methodology of how I’m ranking these than a real problem.
But most of all, what makes the Framemeister suffer in these tests is that I’m putting some bad signals in it; if anything, its performance is making me think my LaserActive may need a recap. Among these, I’d recommend the Framemeister if you have a high quality composite video output, especially 480i, that you want to upscale. It’s also the only one of these five which can do RGB, which is what you’d really use it for.
Also, don’t buy a Framemeister in 2021.
3. MINI AV2HD (white)
This one punched above the weight class I expected, with consistent lag and pretty good upscaling for video content. Where it falls flat on its face, though, is when gaming or 240p signals come into play.
If this chipset is what’s being used in your flat-screen television’s composite input, then you probably are good using it for things like Laserdisc video playback and VHS tapes. Skip it for the game consoles, though.
2. Extron IN1502
Over the course of this review I came to really like the Extron IN1502 for its rich colors and crisp image quality. However, it did suffer from some problems, including a little too much sharpness; where it fell flat on its face, though, was in the lag test.
I’d recommend this for someone who wants a good upscaler for video sources that goes beyond the AV2HD’s chipset, especially if your TV doesn’t have a composite input but does have VGA. Might even be decent for gaming if you’re using a computer monitor, for example, which usually have lower lag than TVs which will compensate for those three frames.
1. RetroTINK-2X Mini
The RetroTINK line of upscalers is well-regarded in the community for a reason. This is pretty good, and the smoothing even made the bob deinterlacing bearable for video content. In some ways this is the exact reverse of the MINI upscalers; its video quality is passable, but its gaming performance is amazing.
Looking through the results, it looks like the notch filter performed best on the LaserActive; I suspect this is in part because the LaserActive seemed to throughout the test have an issue with high brightness everywhere except the Extron, since usually the comb filter is recommended for PC Engine sources. (And again, a recap may be in this system’s future)
What will sit under the TV?
The RetroTINK-2X Mini! I’ll keep an eye on how well the smoothing next time I watch a movie on LaserDisc, though. I wanted to use the Extron initially, but my flatscreen already doesn’t have a game mode, so I need all the low-lag I can get.
It’s true that the RetroTINK-2X Mini couldn’t handle Blades of Vengeance; but it did look correct in all the LaserActive PAC S-1 games I looked at, and I usually play Genesis cartridge games over RGB on the Genesis 1 or CDX anyway. So for my needs, I think the RetroTINK is the right call here.
Overall, its performance makes me very excited to get my hands on the RetroTINK-5X Pro; since it offers motion adaptive deinterlacing that should solve my concerns with watching LaserDisc video. But it’s probably good that I didn’t manage to get one from the first batch. This blog post is way too long already.