Making of Aspect Star N: "Making" Aspect Star N!
The biggest benefit, in my book, of making games for older consoles is that you can make physical cartridges for them. As a young kid, video games felt almost magical, and that mystique still lives around cartridges for me. Holding one and knowing “I made that” is a wonderful feeling, and one I recommend you try if you have the chance! It turns out to be pretty easy!
The Basics
On an eight-bit machine like the NES, a cartridge is one of the simplest ways to connect data to a computer. Essentially, it’s just a PCB edge connection designed to go into a socket on the board; when the cartridge is inserted, it’s part of the system, all the chips on it wired directly to the chips that are built into the circuit board. There’s no BIOS and no need to manually load files into the system’s memory before executing.
As I discussed in detail in my last article, the NES actually has two system buses. Buses are just a group of wires that are either high or low; the CPU bus has a 15-bit address bus (which is why cartridges are limited to 32K, as 215 = 32768), and an 8-bit data bus. The graphics chip, the PPU, also has its own 14-bit address bus, and its own 8-bit data bus. Just buses give us 45 lines! Combine that with power, ground, clocks, interrupts, select lines, expansion ports, the lockout chip, and the NES cartridges use a 72-pin connector. By comparison, the Famicom (which has no lockout chip, and trades the expansion pins for much more useful audio pins) uses a 60-pin connector.
That’s a lot of lines! By comparison, the Atari 2600 has 24 lines; a 13-bit address bus (just 8K!), an 8-bit data bus, two grounds, power, and that’s it. So you can see the tradeoff of the Nintendo approach of having separate CPU and graphics buses; it made some things simpler in the graphics chip, avoided the need for VRAM (or exact cycle timing like on the 2600, look up “Racing the Beam” if you’re interested in that), but it made the cartridge more complicated.
Still, Aspect Star “N” is a very simple game by NES standards. There’s no bankswitching necessary, so the only hardware we need on the cartridge are the two ROM chips themselves, along with a lockout chip. So if you take a look at the board I used, a “discrete reproboard” from RetroStage, all those chips at the top stay unpopulated. We only care about the three at the bottom.
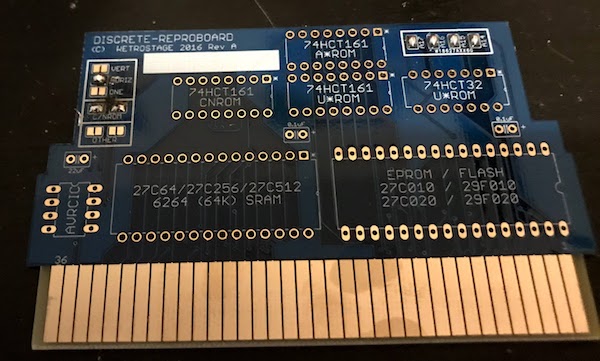
Stuffing the board
Now that we have the board (that particular board appears to be no longer sold, but there are other equivalent ones out there) we have to populate it. This is going to involve some soldering. But it’s all easy-mode through-hole soldering, no special equipment required.
One warning! You probably will want to socket the main chips. Don’t do this! Space inside a cartridge shell is less open than you might think!
First off, if you’re making an NROM cartridge like I am, you’ll need to separate your NES ROM into two different files. One will be the 32KB of program data, the other will be the 8KB of graphics data. You might ask about the header– the INES header’s functionality is in reality played by the PCB itself, so you don’t need it. See all those solder pads on the board?
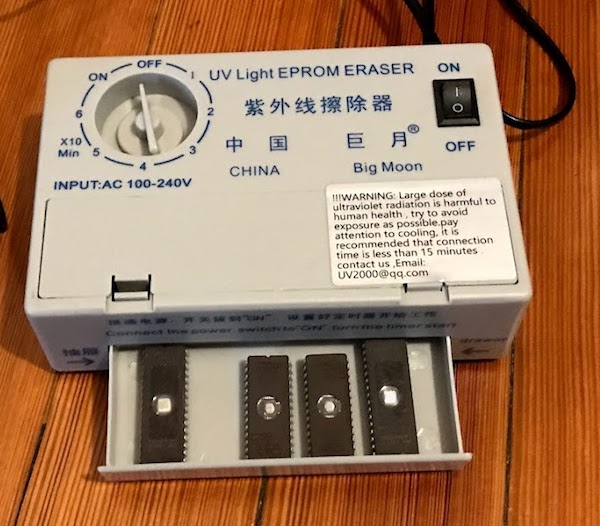
I’m using EPROMs. These are standard, but there are part numbers on the board itself. EPROM stands for Erasable Programmable Read-Only Memory; it’s erased by exposing the chips to UV light. (That’s why, if you have EPROMs you care about, always put a sticker over the chip) I got this cheap UV eraser from China, but if you have a UV lamp already it will probably do the same thing. In fact, I don’t recommend this model, because it came with a Europlug.
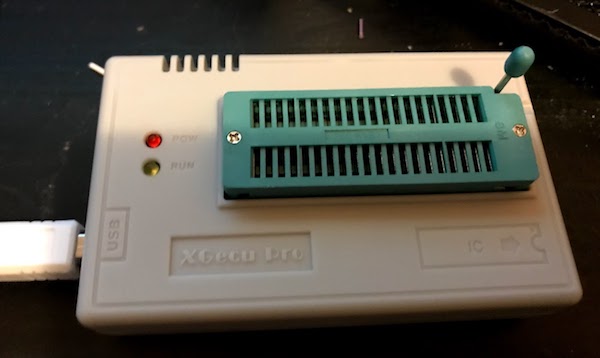
Following erasing, you’ll need some sort of EPROM programmer. This here is a TL866II. These are also easily obtained anywhere Chinese electronic hardware is sold, but any programmer will work for EPROMs this basic and old. Make sure to verify that everything’s zero’d out first, you can do that in the software.
And that’s it! Then you just solder everything in, including some sort of modern-day AVRCIC if you want your system to work on systems with lockout chips. (Interestingly, I don’t own an NES with a lockout chip) I’m not going to give soldering advice, as I’m quite bad at it.
Putting it all together
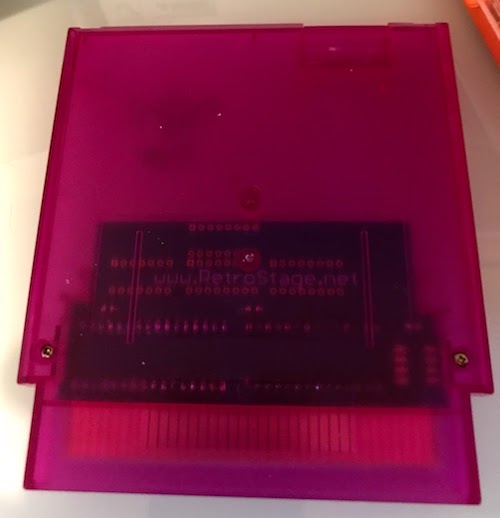
Cartridge shells are widely available on eBay, Etsy, and Amazon. I found these sweet transparent purple ones, which remind me of 90’s tech and also are just translucent enough to hide my terrible soldering job. (Just keep repeating to yourself: if it works, it’s not terrible)
For the art, I wanted something early 90’s anime, thinking of in particular the art of Valis II, a classic platformer from 1989. Which is technically not the early 90’s, but let’s not get technical.
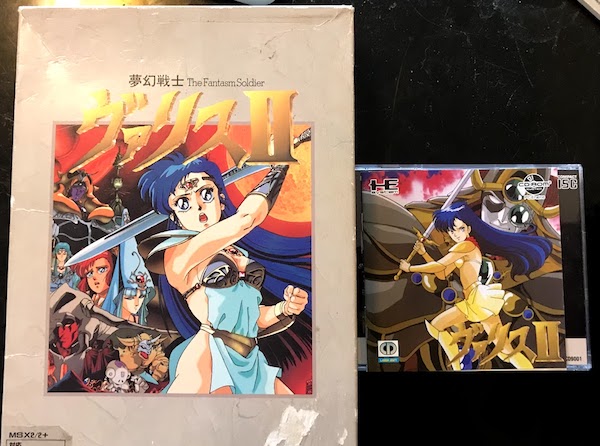
So I reached out to a friend, and he suggested I talk to his friend Tim Sparvero. I’m glad I did, because he was super easy to work with, and did just an amazing job with the art. The astute among you will notice that her outfit looks nothing like her in-game outfit. As far as I’m concerned, that’s a plus.
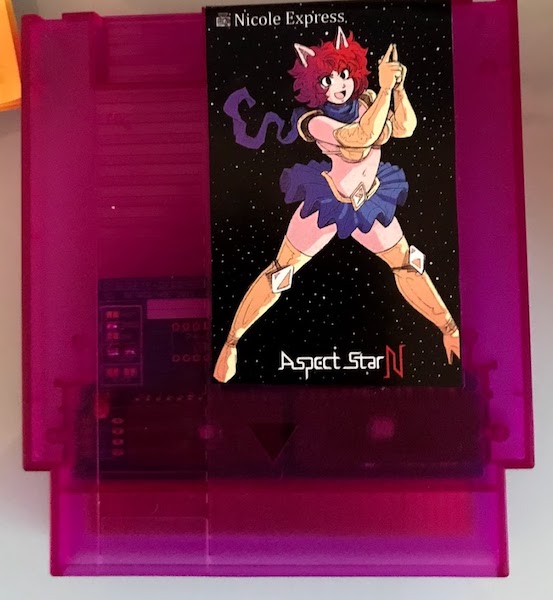
Aspect Star “N”, in the flesh. I never thought I’d see a game of my own like this. I’m really thrilled with how this turned out, and I think it might make me want to turn to the retro game homebrew again… This was a really fun project, and nothing was too difficult at all. (That’s why this article took so long to write, it didn’t feel worth it!)
And one more thing?!
The astute among you will notice that the cartridge pictured has no stickers over the EPROMs, and no lockout chip. That particular one was given to a close friend who doesn’t have an NES to play the game on, so I decided to save the AVRCIC, and give them the tradeoff of the cooler-looking but unprotected chips.
