"Modding" the ToyShock Haunted House!
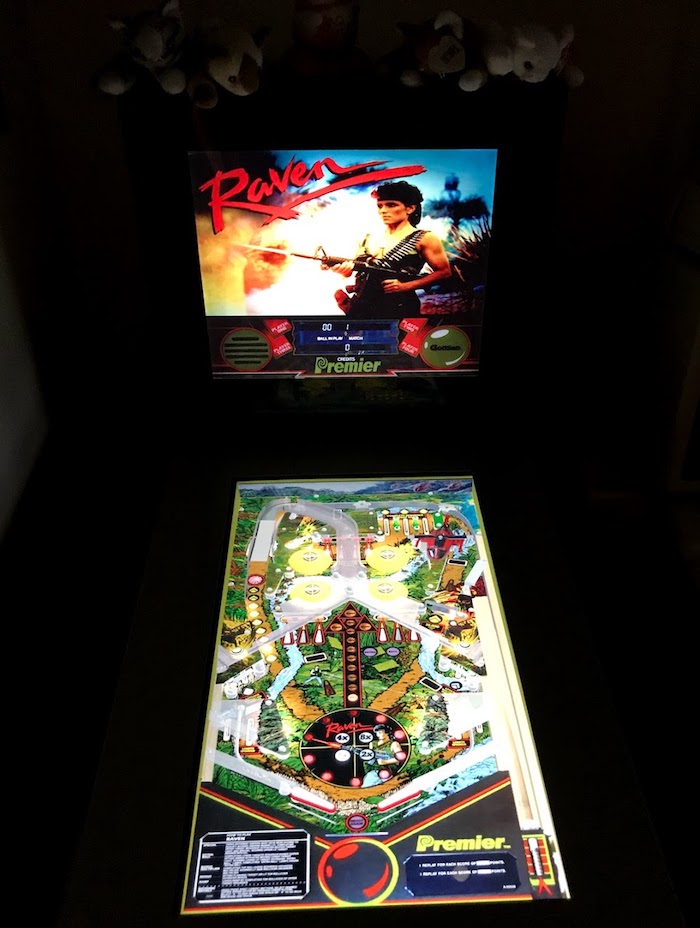
I gave the ToyShock Haunted House digital pinball machine a pretty good review. So it stands that within two months, I would’ve completely gutted the machine, replaced all the software and the screen, and made it something completely different. Let’s take a look!
The Machine and the Screens!
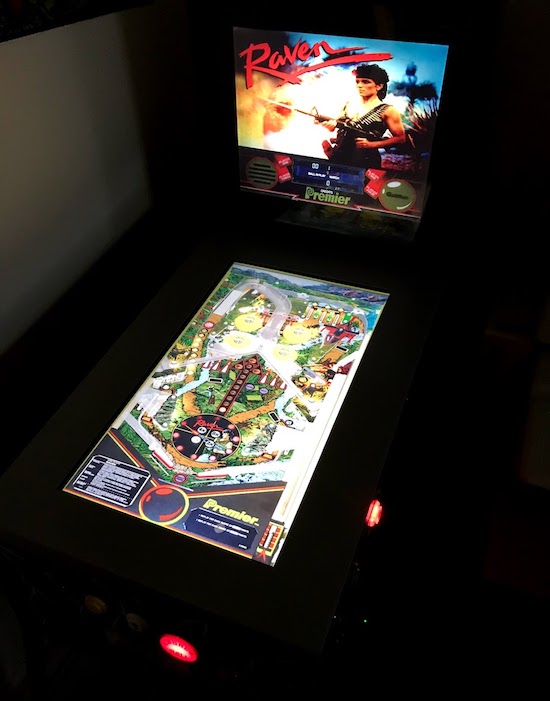
That’s right; baby’s all grown up. I’ve added a second screen, and a beefy PC (an Intel Hades Canyon NUC) mounted to the underside of the table to power and run everything. This thing takes everything that I’ve thrown at it and continues chugging, without any slowdown or overheating.
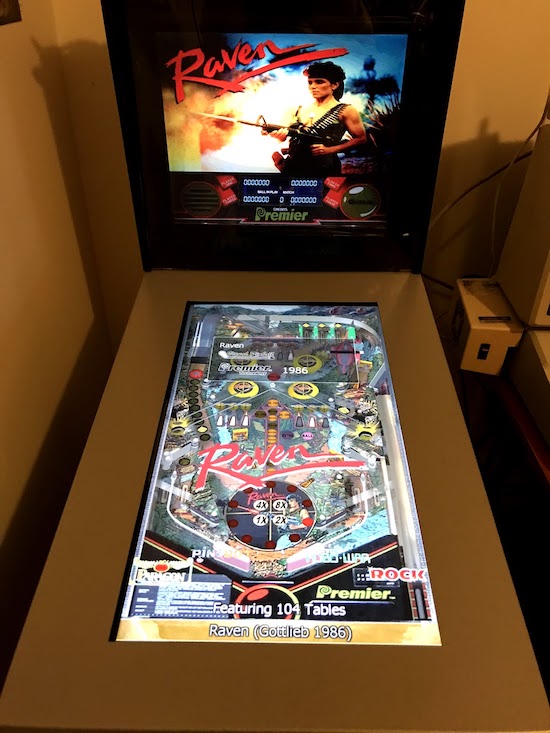
That’s not the original monitor, but it’s the same size, and I’ve kept the original bezel intact. This is for two reasons:
- The original bezel comes with a glass top which I quite like; I’d probably have to replace it with acrylic, which isn’t as resilient.
- The bezel is nice for resting my hands on while playing.
The monitor for the playfield is a VIOTEK 1080p 144Hz monitor; the high framerate is nice, but in general I don’t actually recommend this monitor for a simple reason. It has a very thin bezel, as you can see in this early shot before I took everything apart:
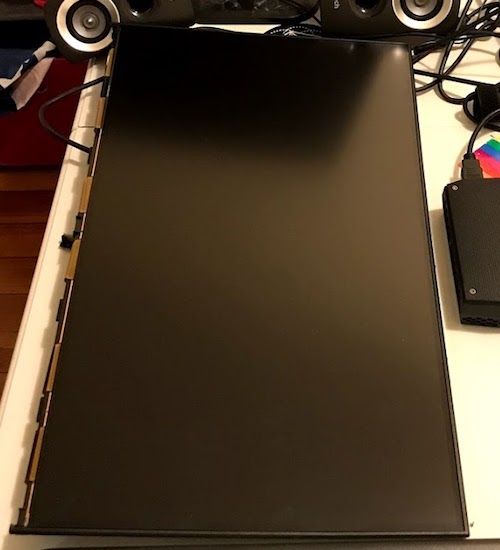
The monitor’s bottom bezel removes easily, but the top and sides are thin hard plastic that can’t be removed; the thinness was achieved by making it part of the screen mechanism itself. This makes it hard to mount, despite it having the same size screens, since the monitor it replaced didn’t have those bezels.

The image quality, brightness, and contrast of the screen is pretty good. Even though it’s only at 1080p I can just about read even the small text.
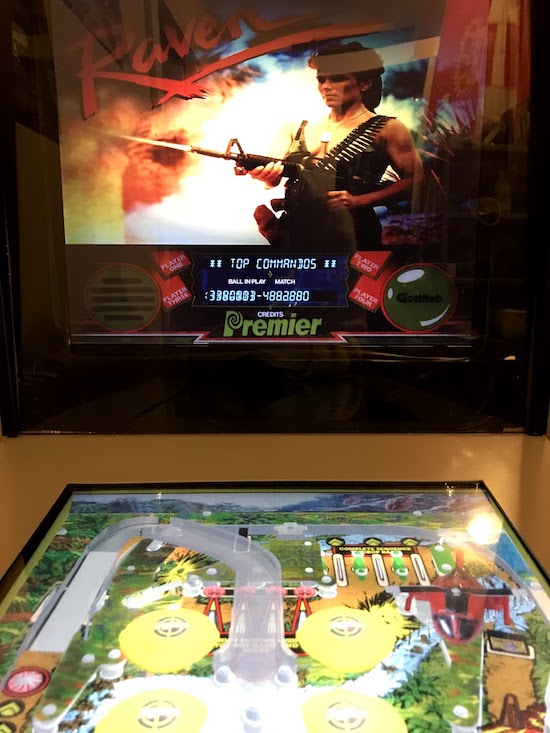
The backbox monitor is a Samsung SyncMaster 710N, a 17” screen that I had lying around. (I used it for 15kHz video at one time, but the video quality was blurry in that mode, even though it did technically support it. It looks much better in VGA) The resolution in 1280x1024, which is plenty for a backglass.
A thin layer of acrylic, which I had custom-cut by the folks at a local company to the same size as the stock Haunted House marquee, completes the look. It’s amazing the difference it makes, especially since the 710N is a matte screen.
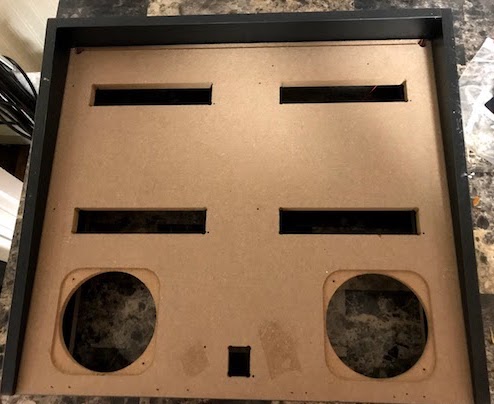
This is what the original backbox looks like when you take everything off, by the way. You’ll have to cut the hole for your monitor yourself. Take my advice, and don’t use a handsaw for it. I think my arm is still sore, and it’s been two weeks.
The monitor mounts to the back of the backbox using a VESA wall mount I had lying around; it wasn’t originally for this monitor, but that’s what standards are for. One nice thing about doing a bunch of projects is that you start to find that you don’t always need to buy new parts, since you bought them already.
The buttons!
I did use a power tool to cut the button holes. And yes, you can use a Forstner bit on a handheld power drill; well, as long as you’re not going for ultra-precision, anyway. All of the buttons are mounted to a standard “zero delay” USB board. I use JoyToKey to map them to keyboard keys for maximum compatibility.
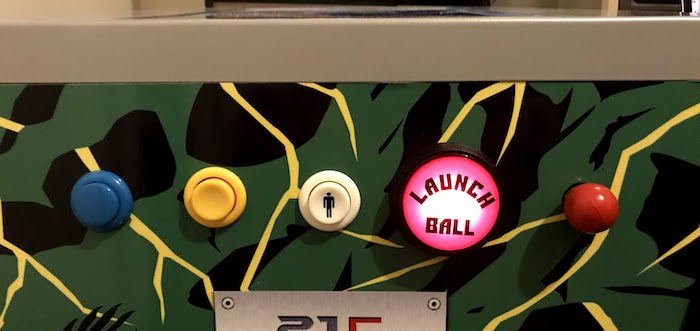
From left to right, the buttons on the front are:
- The blue button: This is the front nudge button, the same function it has on the ToyShock. In fact, this is the same button from the original, and is in the same hole. It’s convex, and the other buttons are concave. This makes it more distinguishable, maybe?
- The yellow button: Insert coin. This has a particularly stiff microswitch under it, which I like for “setup” buttons.
- Player 1 start: Player 1 start. This also has a stiff microswitch.
- Launch ball: This is a lit button, designed for actual Williams pinball machines! It’s a replacement part, though, so I doubt Williams made it. It’s useful for tables like Attack from Mars and Super Mario Bros. that don’t use traditional plungers.
- Plunger: This is the stock ToyShock plunger (which they’re actually replacing on their next wave, lol). And yes, it works, more into that later.
The launch button is using an incandescent light bulb; I know, I know, those connections are designed for LEDs, but it’s designed for 250mA at 6.3VAC, so especially at a lower 5V DC the current is well within USB’s limits! That button is very picky about which LED bulbs it likes, and I haven’t found one yet that’ll fit.
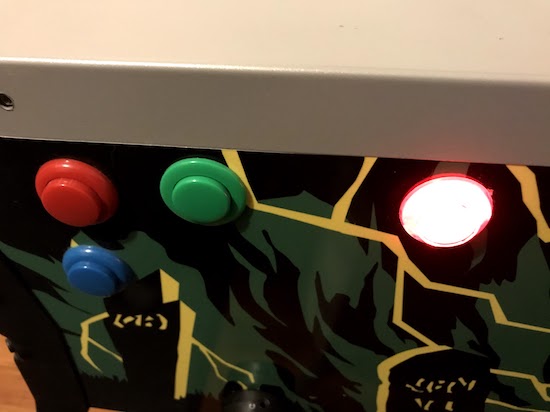
On the sides, there are three buttons on the left, and four on the right. I’ll just go over the right side.
- The red button (top left) - The stock ToyShock flipper button, still used. And still clicky!
- The blue button (bottom left) - The stock ToyShock nudge button. I haven’t installed an accelerometer in here, so this is how you tilt the table.
- The green button (top center) - Magna-Save, for games like Williams’ Black Knight. It also provides a more authentic Haunted House experience than the ToyShock, since the original cabinet had separate flippers for the top playfield.
- The LED button (right): Quits the current table. Only on one side.
I don’t actually recommend putting your quit button on the side like this, as I’ve quit the table by accident on a few occasions.
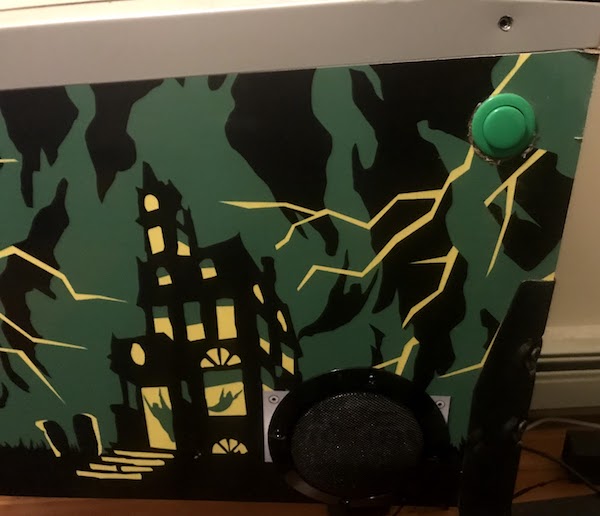
The speakers are inside the cabinet, as you can see by the grill. Since the usable space in ToyShock cabinet is actually only about half the height you’d expect, they’re mounted upside-down. I used Logitech Z313, and combined with the subwoofer they give a lot of bass and sound great, especially on 80’s solid-state games with square-wave heavy tunes.
You can also see that I drilled, and mangled the hole for the power switch into another button. This button presses “Esc” for exiting the menu entirely and shutting off the machine; this can go a whole play session without needing a mouse or keyboard.
The Software

The genius here is the launcher PinballX. This is freeware, but there’s a paid subscription for people who are too lazy to add table art themselves. (It doesn’t work for every game, and has some quirks, but I like supporting the developers, it’s good software)
Most of the tables I use are for a piece of software named “Visual Pinball X” or VPX, made by fan communities. These are pretty cool, because they have good physics, excellent graphical effects, and can integrate with PinMAME to run real ROMs for the computer side of things.
It’s worth noting that the VPX community seems to frown upon table packs, so I’d recommend looking around sites like VPForums for tables and tutorials for getting started. If you prefer videos, I think Detroit Love’s video on adding tables is a good place to start. He’s also done a ToyShock mod.
That plunger…
The ToyShock comes with an actual analog plunger; this is a nice feature, which can be pretty expensive to implement yourself with real parts, and many virtual pinball cabinets just have a button. (As it seems Arcade1up’s upcoming one will) Usually, these use a linear potentiometer. The ToyShock, though, uses a Hall effect sensor, with a strong magnet. The Hall effect is a bit of complex physics, but using it seems to be pretty affordable; I believe Microsoft also uses it for the analog triggers in modern Xbox controllers.
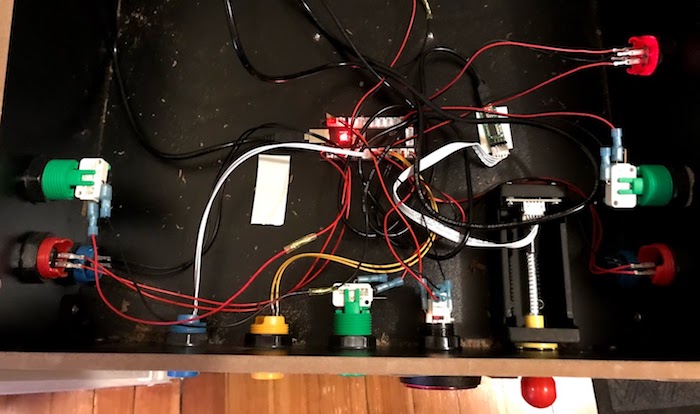
Here you can see the inside of my table. (It’s a slightly earlier version where I didn’t have the start button yet, which is why there’s a green button there instead) It’s filthy, but other than that, you’ll notice there are two boards. On the left, where all the buttons go, is the Zero Delay board, with some ports for lighting. But what’s that tiny board on the right?
It’s a U-HID Nano. That’s a microcontroller board that can convert signals to a USB joystick, and is very flexible. Plus, the existing 5-pin cable that goes to the plunger can be plugged right into its pin headers, which is nice.
The U-HID works with software called U-Config to assign pins. You’ll need to map them properly for this to work. I’ve attached a labeled photo of the circuit board below; note that this is the back of the circuit board, and these components are facing the rear of the ToyShock. The cable goes into the other side of those five solder pads!
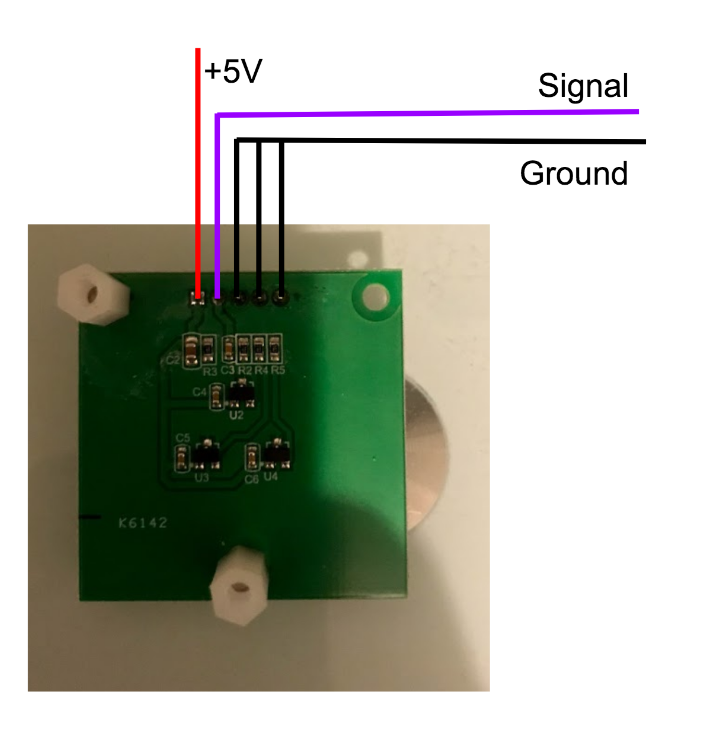
It’s simple enough, though, powered by 5V. Tuning the output signal is the hard part; for me, an analog axis offset of 214 with a scale factor of 9 seems to work decently. Will that be the case for other ToyShock plungers? I have no idea. Also, it needs to be on axis 3 for Visual Pinball to recognize it.
Do I recommend this route? Not really; the ToyShock’s plunger is very loose, so if you were starting from scratch, it’s not something to love. I’m considering modding it with springs to make it stiffer, but I might just cut my losses and go for the more traditional virtual pinball potentiometer route.
Overall thoughts
My overall thoughts is that I love this machine. I love pinball, but in my tiny apartment, a full-size machine would never be feasible. This little machine fits in and can give a decent enough experience, though it’ll never beat the real thing.
But one thing I’d do differently if I was starting from scratch? I’d ditch the ToyShock and go with one of the other 3/4 kits around. I bought the ToyShock because I wasn’t sure if I’d be up to a mod like this; it was a lot of work, and nowhere near cost-effective. If you have a ToyShock, it’s easier to use the shell you already have.
But enough talk! It’s pinball time.
