The Console That Wasn't: The SuperGrafx CD-- Let's make it real!
Hey kids! You’ve probably heard from those goons at Feka Corporation that the Sega CD 32X is the first overly complicated combination of consoles and CD add-ons in the entire console generation. But I’m bringing out the TRUTH about overly complicated consoles and CD add-ons! ADMIT IT! NEC did it first, and theirs was even more nonsensical and provided even less benefit to the end user!
Set the stage

In the late 1980s, NEC released two enhancements of their PC Engine console. Both could be argued to have a different fatal flaw, though at least one was fairly successful.
- The PC Engine CD-ROM2 System in December of 1988, which brought CD-ROMs to gaming for the first time, but suffered from a complicated add-on and a tiny 64kB of buffer RAM that made many early CD-ROM games more limited than their HuCard equivalents. (This is the successful one.)
- The PC Engine SuperGrafx in December of 1989, which added parallax scrolling by duct-taping two PC Engines together; but it was a separate console, not an add-on, and the improvements it brought proved not worth it to developers, causing it to have very few games. (This isn’t the successful one)
An interesting thing about these two systems is that apparently the designers never talked to each other.
The Interface Unit
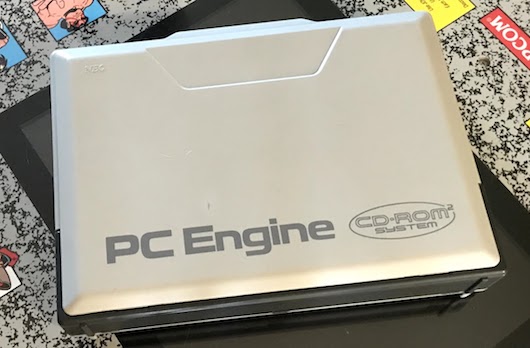
The Interface Unit, affectionately known as “the Briefcase” because of its carrying case cover, was between 1988 and 1991 the only way to connect a CD-ROM drive to your PC Engine. And I mean that literally: the Interface Unit is only the case itself; the CD-ROM2 is its own separate unit, and can even be used as a standalone CD player. They were even sold separately until some unknown point. (Apparently, this had to do with Japanese tax law, though I don’t know the details)
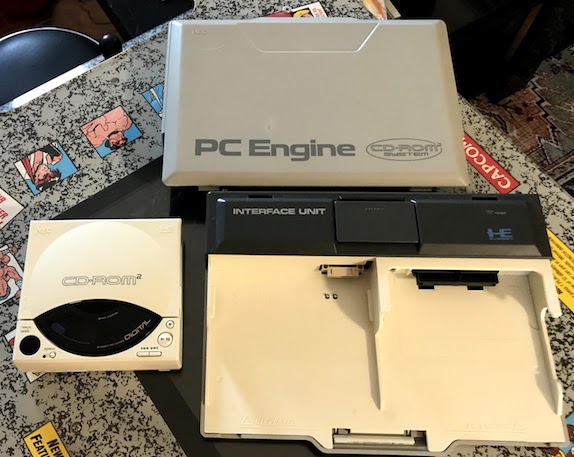
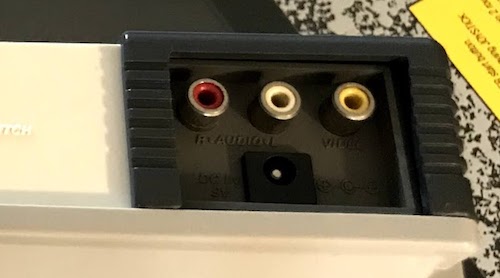
The CD-ROM2 is only a CD player; it’s the Interface Unit that makes it a game console. The Interface Unit takes advantage of the small size of the PC Engine to put it side-by-side; while this does block the PC Engine’s expansion port, the Interface Unit includes all the features of add-ons: 2KB backup RAM (otherwise provided by the “Tennokoe Bank 2” add-on) and composite video and stereo audio out (otherwise provided by the “Booster”).
This small compact system has one fatal flaw for our combination: The SuperGrafx is gigantic– it’s actually bigger than the entire Interface Unit. No way it’s fitting into that slot.
The Solution: The RAU-30
The RAU-30 has got to be in the running for the most ridiculous overly glorified extension cable in human history. I mean, it’s bigger than a furry cat!
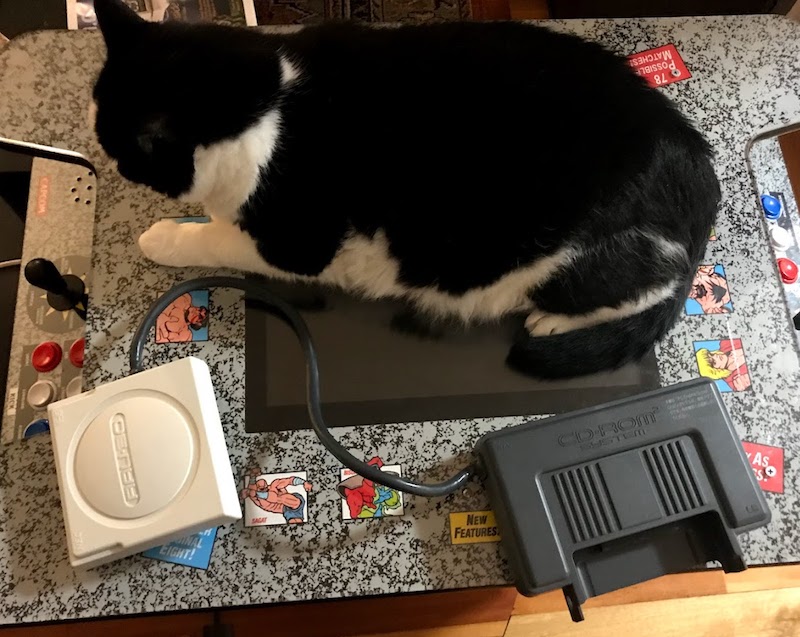
The Interface Unit is designed to take a PC Engine console directly. Therefore, one end of the RAU-30 is literally a cable plug the size of a PC Engine. But what about that ridiculous hat that plugs into the SuperGrafx? Why is it so large?
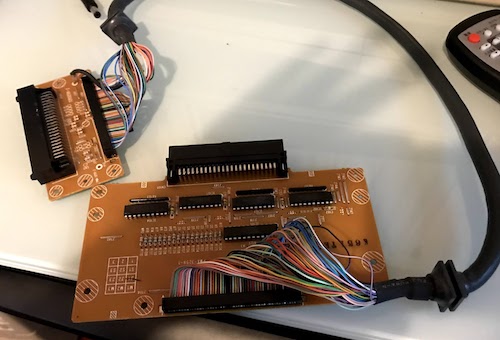
Let’s look at some of those chips!
- 3x 74HC245N: Octal (8-bit) transceiver, high-speed CMOS
- 1x 74ALS245AN: Octal transceiver, higher-speed variant
- NEC D65005CX405
The octal transceivers essentially allow for buffering signals on the data and address buses due to the long cables. (Most devices that attach to the expansion port attach directly). The 74ALS245AN, which is a faster one made on a different node, goes to the data bus lines, whereas the other two go to the address bus and other lines that are passed through.
The D65005CX405 is more interesting, but seems to be a gate array; this is a custom IC. (You may have heard of field-programmable gate arrays; the NEC 6500X series was not field-programmable, which means that it can only be configured once) So unfortunately, it’s hard to tell exactly what it was used for, but it seems to be attached to the control lines on the transceiver, so perhaps it controls direction.
Overall, it looks like they ran into issues with the signal quality going over the long cable, and needed to add additional transceivers to keep it up. It’s this sort of thing that leads me to say the designers didn’t talk to each other; the Interface Unit had been out for a year by the time the SuperGrafx came out, after all.
The video lines from the SuperGrafx are not connected at all, probably again because of the length of the cable. That’ll come back to bite us, as we’ll see.
And yes, the standalone Super CD-ROM2 add-on was able to plug into the console directly, without any need for all this nonsense. But I don’t have one of those; in any case, it didn’t come out until 1991. During the whole life the of the SuperGrafx as a console that got new games, this was how you connected a CD to it.
Spread out the board
So, the PC Engine expansion port was designed on the original PC Engine: a console that only had mono audio output combined with video through an RF modulator. Therefore, there is only a mono audio in on the port. This is definitely a failure of NEC’s to look forwards; the PC Engine’s sound chip was stereo-capable from day one, and it always had stereo output on the expansion port.
Therefore, on the SuperGrafx, which has no RF modulator and only a stereo audio output on its DIN-5 AV port, the Interface Unit can’t pass the stereo CD audio to the SuperGrafx’s audio out, and so we can’t get the audio from the CD add-on. We need to use the output on the unit. But the RAU-30 prevents us from getting video from the Interface Unit. The NEC-approved answer? Use both ports!
Oh, and both systems need their power supplies; the Interface Unit can power the PC Engine, but all those extra chips in the SuperGrafx don’t come for free, and the Interface Unit can’t supply the amps.
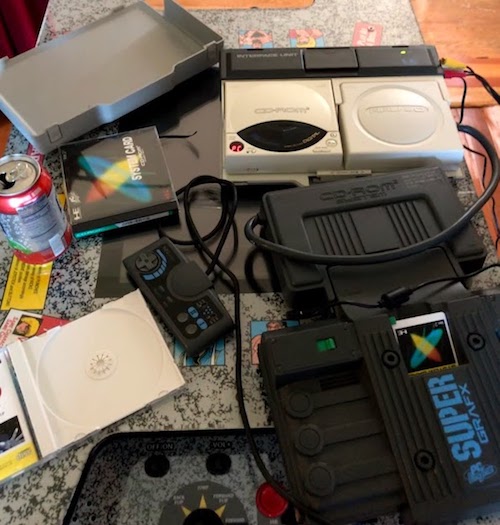
But hey, you can stack everything and shove the cables aside and it doesn’t look too bad. It’s like a tower of power that just isn’t nearly as stable! And also has a lid that I don’t know what to do with.
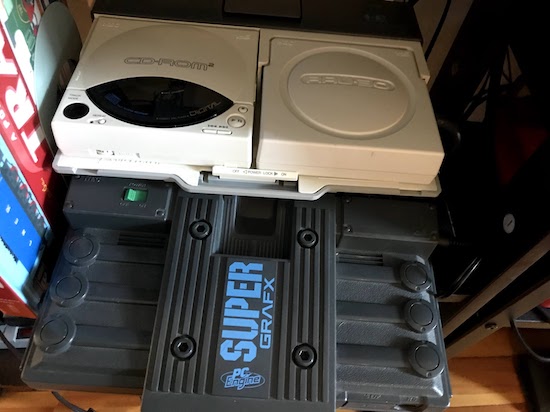
So, what shall we play on our system? Well, you have access to the huge library of PC Engine CD-ROM2 games, so you’ll be busy for awhile! And with the Arcade Card Pro and Super System Card, there are even more to play once you finish those! But what’s that? You want to actually use the combo that you paid the huge price difference for?
You can’t. There are no SuperGrafx CD games.
None at all?
This combination isn’t well-documented, but while some games are apparently not compatible (without the switch disabling the SuperGrafx set, anyway), I feel like if anything, any licensed game at all, had used the SuperGrafx CD combination features for anything, it would’ve been noticed by someone. It just didn’t happen. And considering the SuperGrafx on its own died fast on the market, it’s not surprising.
While some developers really went above and beyond early on (Ys Book I & II is a standout example), we really only started to see the sorts of graphical action games that might benefit more once the Super System Card came to market on October 26, 1991– before then, HuCards with their fast bank-switchable ROM were king when you needed graphics performance. (Arguably, they were even after the Super System Card, as demonstrated by games like Street Fighter II’ Champion Edition)
The last SuperGrafx game, 1941: Counter Attack was released on August 22, 1991; by October, the console was essentially dead. And with skilled developers, there was plenty to milk out of the base PC Engine hardware anyway; look at Castlevania: Rondo of Blood for a good example of a game that doesn’t need a second VDP to even do some parallax scrolling.
So it’s really not surprising. Creating a game for the SuperGrafx-CD is just a complete waste of time that massively limits the market for your game.
But can we change that?
So as you might know, I’m working on a TurboGrafx-CD game, Space Ava 201. And since I’m digging into the forbidden combination anyway, I think it might be fun to give a few tiny enhancements for the one person who might play it attached to a SuperGrafx.
Now, note that I said enhancements. This certainly won’t be a SuperGrafx-CD required game. I want someone to be able to play it. Think more like Darius Plus, but with some extra graphics layers rather than extra sprites. (Space Ava isn’t exactly coming anywhere near pushing the sprite limits, though if I implemented it in the way the JavaScript version using individually placed cubes and an isometric viewpoint… I’m sidetracking)
This is a weird thing to do! Since this combination was (quite wisely) never used by any developers, we’ll need to figure out some things.
Problem 1: Emulators
My preferred emulator for development has been Ares, using the “Lucia” GUI. This poses some issues here; this only supports a PC Engine CD combination. It does have a more complex GUI option that should’ve allowed this, but I couldn’t get it to work. Also, Ares is an abandoned project due to the developer leaving the community.
Therefore, I took the predecessor/successor project (now community-developed), Higan, and again couldn’t get the advanced UI to work at all. It’s probably a telling thing about me that rather than try to do that, I just forked the emulator to add SuperGrafx-CD as a menu option in the “byuu” GUI. (This is the equivalent to the “Lucia” GUI in Ares)
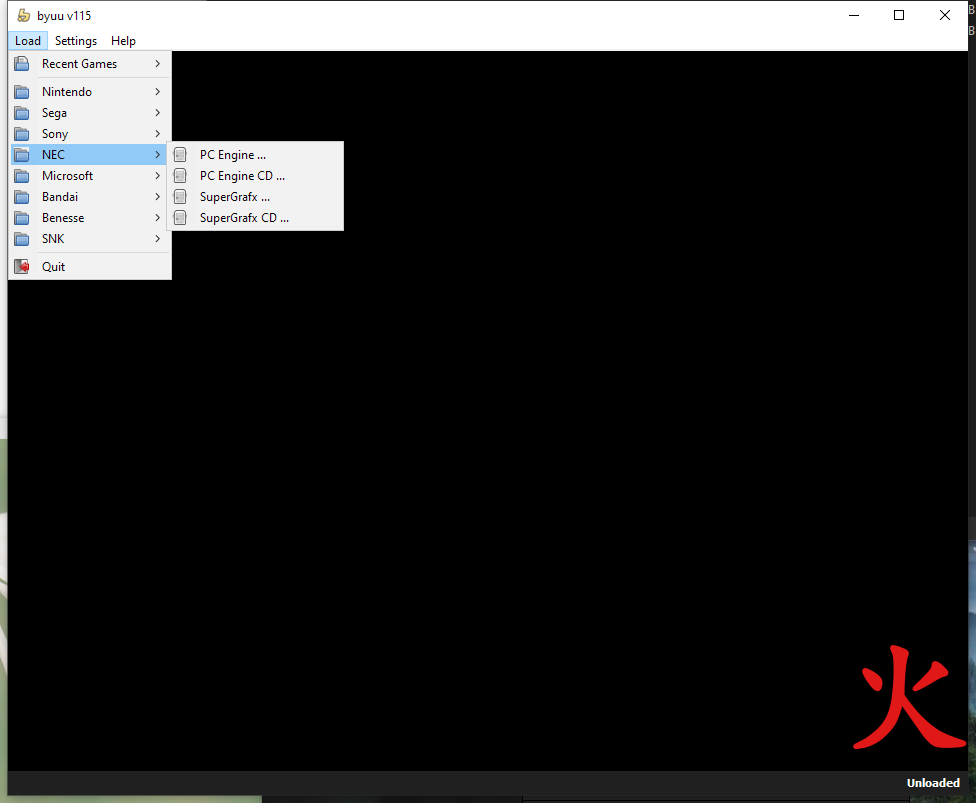
I imagine there are other emulators I could use, or I could’ve just learned how to use the “higan” GUI. (I suspect something is broken with my setup) But as I said, for me this was actually the easiest option. Now I can just use it the way I already know.
Problem 2: The Enhancements
So, Space Ava 201 is a top-down game. Therefore, a parallax scrolling background might not make perfect sense.

As it turns out, though, one of my favorite top-down games, Phantasy Star II, saw a similar problem, and decided that the best way to take advantage of multiple background layers (in this case, provided by the Sega Genesis) was to add a parallax scrolling foreground.
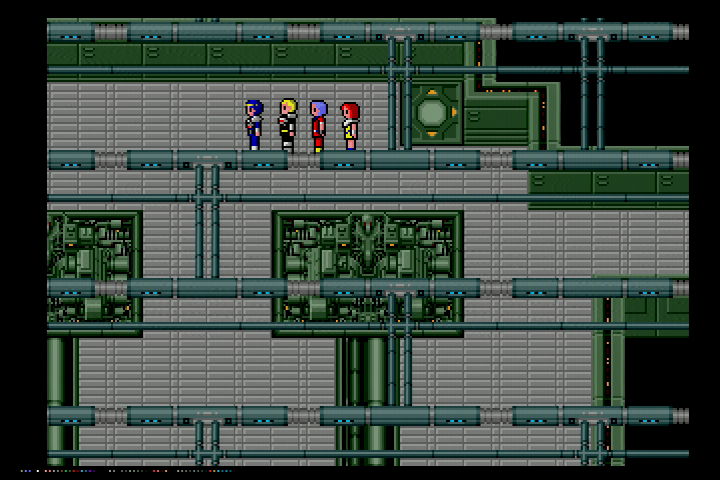
(Damn, I’ve never seen the difference between 256-pixel wide and 320-pixel wide graphics modes so starkly before)
Now, I’ve seen a lot of people complain about this as it obscures the screen, though I never had much of a problem with it. And in Space Ava 201, positioning of objects on the screen is the entire challenge of the game. So we’d need to be careful about how we make the overlay look. But is this even possible to do as an enhancement?
You know a console’s well-documented when the only place I can find documentation is the Wayback Machine. But let’s dig into the Video Priority Controller (VPC). Specifically, we want to see how to choose the priority order on screen, which layers go on top of which other layers.
The default priority as as follows:

Back                          Front
 SP2 > BG2 > SP2' > SP1 > BG1 > SP1'

 BG2 = VDC #2 background
 SP2 = VDC #2 low priority sprites
 SP2'= VDC #2 high priority sprites
 BG1 = VDC #1 background
 SP1 = VDC #1 low priority sprites
 SP1'= VDC #1 high priority sprites

  The 2-bit priority field affects the layer ordering. The above default
 priority setting is selected for values of 00b and 11b.

 For 01b, VDC #1 sprites are shown behind the VDC #2 background. However,
 the VDC #1 background has missing sprite-shaped areas where it's sprites
 are, even though they are hidden behind both background layers.

 For 10b, VDC #2 sprites are shown in front of the VDC #1 background and
 behind VDC #1 sprites. However, low priority VDC #2 sprites are still
 shown behind VDC #2 background tiles.
So, what does this all mean? Long story short, the SuperGrafx is more limited than I thought. It seems that there is no way to place VDC #2’s background layer in front of VDC#1’s background layout; VDC#2 is always behind VDC#1, with exceptions made only for sprites. So in this case, we’d need to draw the main playfield on VDC#2, and the parallax foreground layer on VDC#1.
Unfortunately, I want this game to remain PC Engine compatible. The PC Engine only has VDC#1, which means we need to draw anything that we want PC Engine users to see to that. (Well, we could potentially get around that, but it would require a lot of conditionals and might complicate things with the CD BIOS) We could maybe pull this off with VDC #2’s sprites, but given that this is an iffy feature to begin with, I gave up on the Phantasy Star II-esque foreground layer. Anything we do will need to be a background.
(This isn’t really fair as a criticism of the SuperGrafx; it’s not uncommon for game systems to not allow their layers to be in arbitrary order. What we’d need to do, having different layers in different contexts, and also bolt it onto an mostly coded game without breaking past compatibility, is not the sort of thing you’re supposed to need to do on game consoles. The whole point is everyone has the same hardware! Well, modern consoles may disagree… but I digress again)
At a few points in the game, it switches to a mode where you need to arrange mirrors to cause particles to collide. This is on a black background. Even better, the main field uses low-priority sprites and therefore everywhere under them needs to be color #0. This is a perfect use-case for a scrolling background.

The astute reader might consider that this is a very simple game mode, technically. It doesn’t do much on each frame, and the logic is simple. This mode could definitely be a CD-ROM2 game (even coded in inefficient HuC, the overlay is only 56KB at the time of this writing). It’s got plenty of space to waste on this.
So that’s the plan now: create a starfield on the VDC#2 background layer, and scroll it around independently of the VDC#1 background and sprite layers where everything that matters is taking place. We won’t use sprites at all. That’s not very ambitious, but being unambitious feels appropriate somehow, don’t you think?
Problem 3: Coding in the HuC world
I’m using HuC for this game. This means I can write most of the game logic in C, while only needing to fallback to assembly when I care about speed. It won’t work for every game, but for a fairly slow methodical game like Space Ava 201, the performance hit is basically invisible.
HuC has a SuperGrafx library. Unfortunately, when I enable it and the CD library at the same time, some odd things happen.
I have no idea how this happened pic.twitter.com/jNWJgeS55n
— Nicole Express (@nicole_express) September 2, 2020
It looks like the SuperGrafx functions are stored in the same bank as some of the CD functions, causing them to become scrambled. In this case, the ADPCM calls are now calling the wrong sound effect. The fact that that sound effect is, by the sort of sheer coincidence that makes you assume your computer is possessed, an evil laugh doesn’t help.
Now, I probably could’ve debugged the assembly, moved things around, and gotten it to work. But our goals are very meager. We don’t need sprites and we don’t need multiple graphics modes, we just need the ability to detect the SuperGrafx, to turn it on in the one graphics mode the mirror puzzle uses (256 pixels wide), to copy data into the VRAM, and to turn on and off the VDC#2 using the priority controller. We can do all that by hand.
Copying data into memory
Another example of the downsides of using someone else’s library is copying data directly from the CD into the VDC#2’s VRAM. HuC provides a function, cd_loadvram, for this purpose. However, this function only sends data to VDC#1.
The PC Engine’s CPU is a modified 65C02 core. We’ve talked about its memory mapping capabilities already, but it also has three special opcodes: st0, st1, and st2. These store a value to the three registers of the VDC, regardless of your memory mapping state. On the SuperGrafx, there is a magic register on the VPC that lets you choose which VDC these opcodes go to (defaulting to #1, of course, for backwards compatibility).
If all your code consistently uses those to target a particular VDC, you should be able to use that register and easily switch. However, anything that targets the addresses directly using the more normal 6502 opcodes will not be impacted. Unfortunately, something in cd_loadvram is using the addresses directly, so we can’t use this to load data directly into the VDC#2 VRAM. (Remember, each VDC has its own 64kB of RAM on the SuperGrafx) I’m not sure if it’s in the HuC wrapper code, or in the CD-ROM2 BIOS. Either way, it’s in code I didn’t write, and don’t control. I don’t feel like controlling the CD-ROM drive directly, so we’ll let it be.
However, as a consequence of this, we’ll need to find 2048 bytes of RAM (one CD-ROM sector) to use a buffer for transferring data between the CD-ROM and VDC#2 VRAM. I can spare it in these cases, but it’s a sacrifice you might not be willing to make.
Let’s see the code
We’ll start with the detection of the SuperGrafx. This is important, because the registers are mirrored. If we mess with VDC#2 on a PC Engine, we’ll actually be messing with VDC#1.
char is_sgx()
{
    return peek(0x18) == 0xFF;
}
This function takes advantage of that mirroring. Address FF:0018 (the peek function, part of HuC, targets the IO bank, so we can leave off the FF: part of the address) is an unused register on the SuperGrafx which always returns 0xFF. On the PC Engine, it’s a mirror of the VDC status. It doesn’t really matter what the status is, because we know it won’t be 0xFF– the first bit says whether we’re using hardware collision detection, and I never do that, so it won’t be set.
Now let’s look at loading VRAM. Remember, we can’t load data from the CD directly into VRAM like we can with VDC#1. So this will only be copying data that’s already in RAM.
sgx_load_vram(int vaddr, int *data, int nb)
{
    int i;

    poke(0x10, 0x00);
    pokew(0x12, vaddr);

    for (i = 0; i < (nb >> 1); i++)
    {
        poke(0x10, 0x02);
        pokew(0x12, data[i]);
    }

    return;
}
So, this will take some explanation, poke writes to a register. pokew writes a 2-byte value to a 2-byte (16-bit) register.
The VDC, either VDC#1 or #2 as they’re identical, has three registers. The first is called the “address” register at 0x10, though I don’t like that name since it’s not a memory address; it’s where you choose which VDC function you’re calling. Then, you can write a two-byte value to 0x12 and 0x13, which is the argument you’re passing to that function. Once you’ve written to the argument address, the VDC performs the action.
Here, we start by writing 0x00 to the address register. This is used to set the address into VRAM we’re going to work with. It’s worth noting that vaddr is an address into VRAM; while I call the TurboGrafx-16 an 8-bit system a lot, the VDC is 100% 16-bit, even in its addressing. So this is actually an address to a 16-bit word, not a byte; since there’s 64k of VRAM, the highest address is 0x7FFF, not 0xFFFF like it would be for the CPU.
Finally, writing 0x02 to the address register allows us to write the data to the address we set, and increments the address. We passed in nb, the number of bytes, but this is the number of 8-bit bytes, so we need to divide it by 2 (using a bitshift) to get the number of words. (I implemented it this way to match HuC’s load_vram function) We can just loop over this all. The VDC has been set up to automatically increment each time we write to it, so we don’t need to constantly send it new addresses.
You’ll notice this is all in C, rather than Assembly. This is for a few reasons:
- I figured it’d be easier for the reader of the blog post to understand
- Performance isn’t critical here, since we only need to load up the VRAM when starting, and even for things that run on each frame, we’re not doing very much with VDC#2.
- I’m lazy
This is definitely much slower! If you enable the background layer you can see things getting draw one tile at a time. And yet I wrote everything in C for accessing the SuperGrafx. There are a few more functions for initializing and setting the scroll, but it’s all just the same as above; calling functions in the VDC to do what I want. My source code will be posted when the game is released; if it’s released and I haven’t linked it here yet, let me know.
UPDATE 4/9/2025 Nobody let me know until vriska on BlueSky. But yes, the game was released a few weeks after the post; the SuperGrafx functions are here. You might also enjoy this altered version designed to work with the TerraOnion Super HD System 3, which their team wrote to make my game accessible on their system as well.
Problem 4: Real hardware testing
So I found something stunning here: the CD-ROM2 is better at running CD-Rs than my Turbo Duo; though not as good as my PC Engine Duo R. Loading is very slow, and music tracks are iffy, so I’m probably doing some damage to my laser, but hey, it works at all! This means that to fix bugs, all I need to do is burn a million CD-Rs. You can still find tubes of Taiyo Yudens about, so this isn’t as terrible as it sounds.
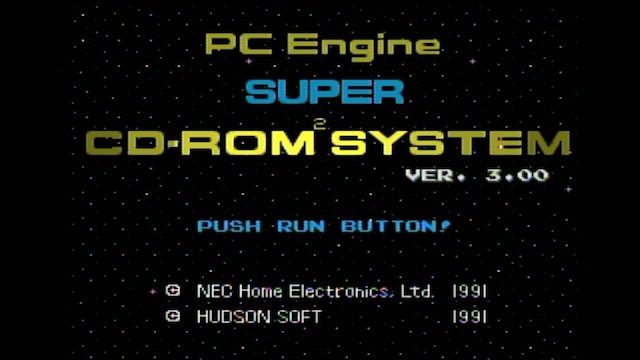
I also found out that the START+SELECT reset doesn’t reset the SuperGrafx hardware, so any background layer you had shows up. (At least, it does when using the System Card BIOS 3.0) So it’s likely that NEC and Hudson never actually intended using the SuperGrafx features on CD; it’s very likely they wouldn’t have approved any such combination. (Good thing we’re not officially licensed!)
The end result!
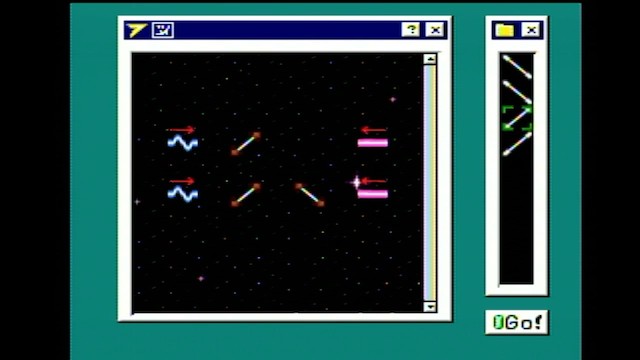
All images are in composite; my SuperGrafx isn’t RGB modded, and the Interface Unit takes up the expansion port. Can you see the stars behind the gameplay? Maybe seeing it in motion will help?
I also decided to add a little animation to the title screen; this also made testing much faster, since I didn’t have to navigate directly to the mirror puzzles to make sure anything worked.
Oh, and one more thing. You remember that “PC-SG” logo that Darius Plus and Darius Alpha used? Well, I decided I should use that too. But the problem is, it features a HuCard prominently… so I made my own.
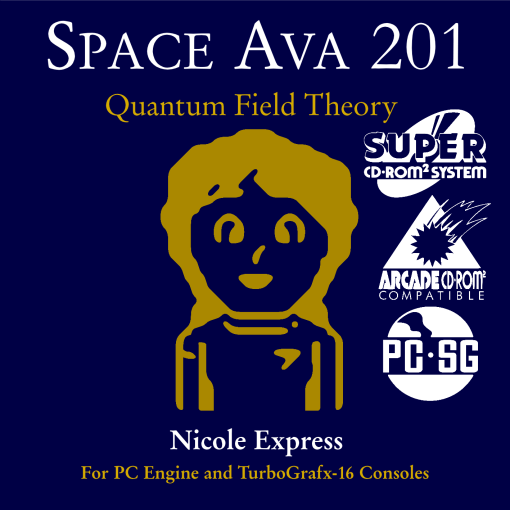
Overall this was a fun project; being able to make my own software for this made the combination more fun to play with than the LaserActive. Space Ava 201 is nearing completion; hopefully you all will enjoy it when it’s out, SuperGrafx or no SuperGrafx!
