The Sega Master System: Third Mark's the Charm
Oops, I did it again; a section that was supposed to be a smaller part of an upcoming blog post came into being as its own giant post. Here, we’re talking about Sega’s first home console to achieve American release, and where I’m planning to make a new project on: the Master System. Or the Mark III. Or the Sega System, with its mastery depending on bundle. Or…
Just get on with it
Sega’s second home console built on its first, at a time when the System 1 was still its major arcade platform, though it was showing its age. The Sega Master System, or Mark III in Japan, built on the previous SG-1000 in an interesting way. (The name “Mark III” came from being the third revision of the SG-1000 hardware, but as far as I can tell a full name “SG-1000 Mark III” was never used, just “Mark III” on its own)
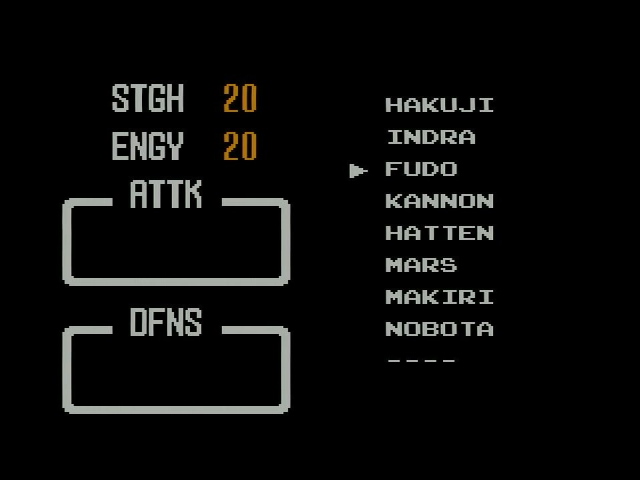
Likely to ensure compatibility with older Sega software, it was limited to a two-button controller. Instead, a pause button was provided on the console itself. Games like Spellcaster used this as a menu button, which meant to play them you had to sit nearby the console, which is a bit of a bother.
Oddly, the pause button is actually implemented as an interrupt, while the reset button on the console has to be polled like a controller button. This means that whether your game can be reset is determined by software, and you can’t reset a crashed console. It’s not a huge deal, since only a small fraction of consoles actually had the reset button, but it can be annoying when you expect it to work like pretty much every other reset button on the planet.
Graphics
The SG-1000 and SC-3000 used the Texas Instruments TMS9918 graphics chip. (PAL models used the TMS9929) This was an incredibly popular chip designed for the TI-99/4A computer, but would eventually make its way into many machines, including the ColecoVision and MSX. It has a 16-color palette but can only use up to two colors for each 8x1 area on screen, a 256x192 resolution, and three different graphics modes. It has hardware sprites (except when in text mode), but those sprites are limited to one color and transparency. The Master System would retain all these modes, though their conversion of the hardcoded 16-color palette would lead something to be desired in many cases.
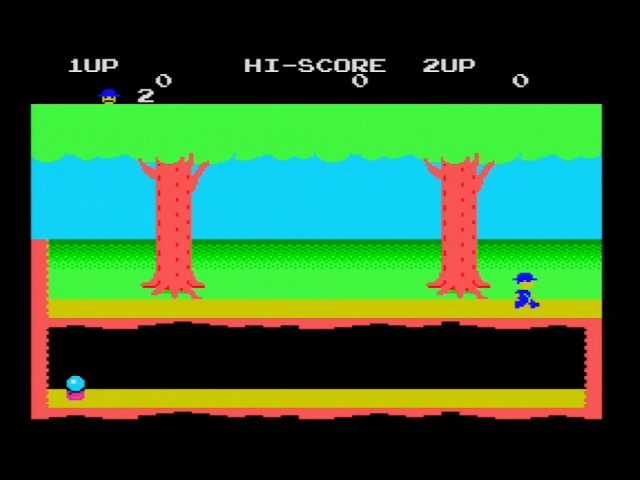
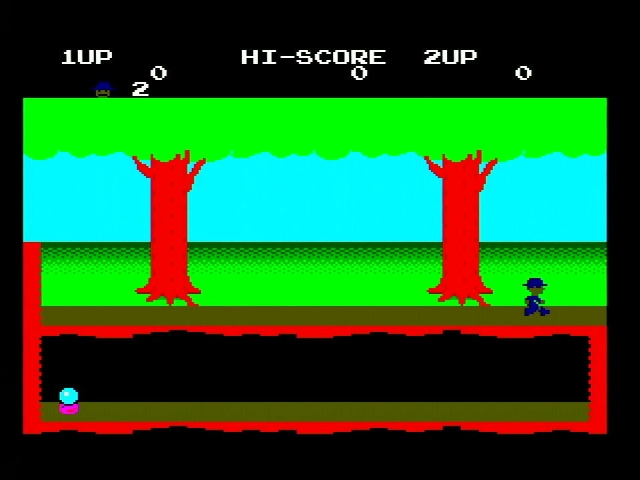
In addition, though, the Master System added a fourth mode with some very useful features: a scrolling tilemap, and customizable 16-color palettes. In this “Mode 4”, the Master System VDP is actually a 16-bit chip, even though it’s still paired with the 3.5MHz Z80 from the SG-1000.
Therefore, much like the later PC Engine, the Master System is an 8-bit/16-bit hybrid system. But the Master System has less video RAM (16kiB VRAM vs. the PC Engine’s 64kiB), a slower CPU without a built-in memory mapper, more limited sprites and far more limited palettes, so it’s usually categorized more with 8-bit systems while the PC Engine is grouped with the 16-bit consoles. Bit values are arbitrary, and it Wouldn’t Do to have the Genesis not be the first Sega 16-bit console considering how much “16-bit” was plastered over it and its marketing.
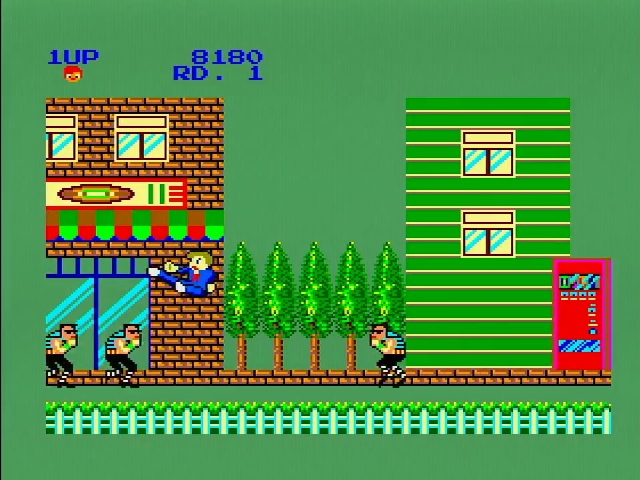
The palettes are where the system really shows its limitations compared to later 16-bit systems. Like the later Genesis, it has 16-color sprites, but only two. One can be used for the background, and the other can be used for the background or for sprites. Additionally, these are 6-bit color palettes, 2 bits each for red, green, and blue, giving 64 possible colors. This contributes to the unique look of Master System games; the limitations encourage more colors rather than shading, since there aren’t that many shades available. (Of course, art styles varied widely over time) Personally, I love it.
So what is Mode 4?
The tilemap of the Master System mode is surprisingly smaller than that of the NES; it’s 32x28 8x8 tiles instead, or 256x224 pixels. Since the vertical height of the display area is limited to 192 pixels, this is still fine for vertical scrolling. (There are 224 and 240-line modes on some later SMS models; they also expand the tilemap, and were only used by some European publishers late in the system’s life) Note that the tilemap eats into that 16kiB of VRAM.
There are 64 sprites, but like the NES they are limited to 8x8 or 8x16 in size. There is an option to zoom sprites to double size, inherited from the TMS9918, but it’s buggy on some models so didn’t get much use. As far as I can tell, this was never used by any commercial games; it was not supported by the Genesis.
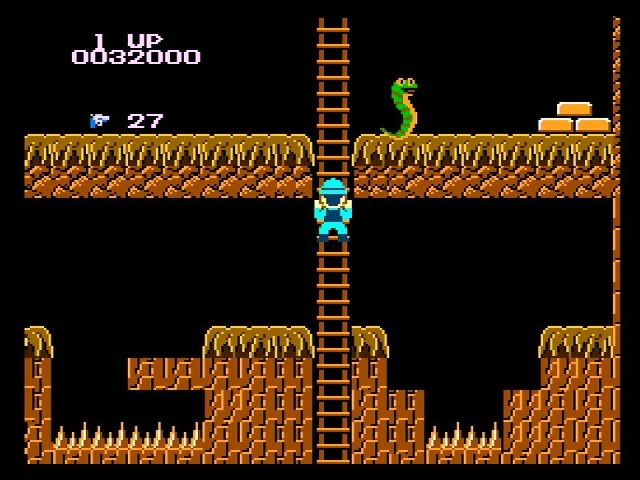
So, how do you scroll horizontally when your tilemap is at the same resolution as the console is outputting? One option, done by some NES games like Super Pitfall, is to show a “seam”, a row of tiles on the side of the screen, and hope overscan saves you. Super Pitfall, for reference, has a tilemap of 256x512 pixels; the NES can do 256x512 or 512x256, though it has far more limited palette functionality than Mode 4.
Now, let’s take a look at a Sega Master System game; what was arguably the greatest console “Japanese-style” RPG of its day, Phantasy Star. We’ll take a look at the town map of Camineet, where you start the game, and then pause, which gives you a first-person view.
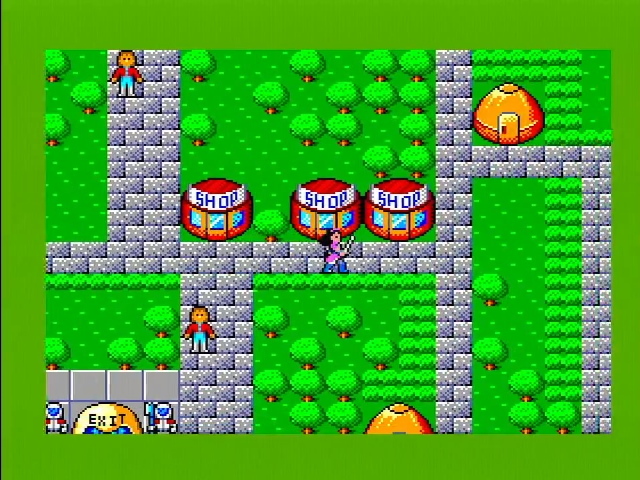
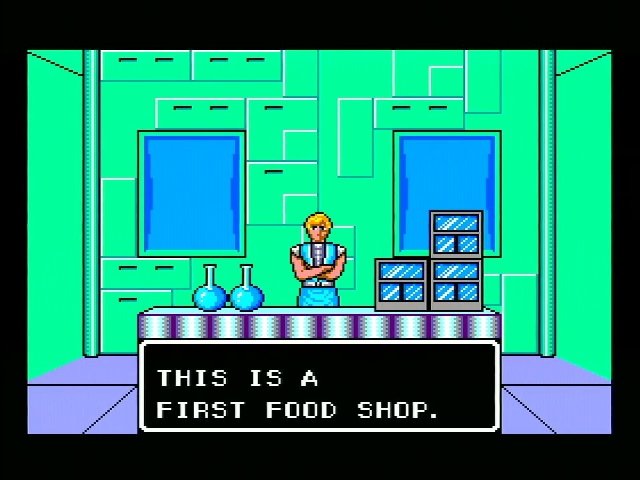
Notice that the first-person view is actually in a higher resolution; there’s more visible graphics there, while the border is larger. How’d they manage that? The Master System can mask off an 8-pixel-wide region of the screen. Technically, this is all you need to manage smooth scrolling. However, this masked region is always on the left side. I talked about this more in my posts on My Hero and on Alf.
Sound
The Master System did maintain several traits of the SG-1000 series without upgrading. First off the Z80, though it was faster than the SG-1000 at least. It also did not provide any audio updates, still using a TI SN76489-based 4-voice sound chip. (Well, technically, it used a clone with slightly different noise channel behavior) For an example, let’s use Space Harrier 3-D, with its take on the iconic arcade theme. It does a better job of using the chip than the SG-1000 Pitfall II, I’d say.
Audio is a big concern for me while developing. See, on the PC Engine CD, I could just use CD audio, so I could use literally anything (and therefore decided to use tracker music). On the NES side, things were a litte harder, but the NESDev community is huge, and the excellent FamiTone audio library proved a lifesaver. I did code Master System-style music for the original Space Ava using DefleMask, and it looks like the PSGLib library is a common choice.
Modulate my frequency
The thing is, there’s also FM. No Master Systems in the West had it, but in Japan an add-on was available for the Mark III, and the later Japanese-marketed Master System did have the FM functionality built-in. Nowadays, it’s possible to either import Japanese systems, or use modified adapters for the Genesis to get this FM sound in the west.
However, it’s worth noting that while the Genesis has FM sound, the two are very different.
| Master System | Genesis | |
|---|---|---|
| FM chip | Yamaha YM2413 | Yamaha YM2612 |
| Family | OPL-derived | OPN |
| Channels | 9 (fewer if percussion) | 6 |
| Percussion mode | Yes | No |
| Operators | 2 | 4 |
| Software-defined instruments | 1 | All |
| Hard-coded instruments | 15 | 0 |
FM synthesis is pretty complex, but the most important one here is “Operators”; essentially this determines how complex the instruments can be. So while the Genesis has fewer channels, its FM channels can do more complex sounds and give more realistic sounding instruments. Therefore, any Genesis adapters you see that add FM sound to Master System games need to include a YM2413 on board. (As an aside, that chip is derived from the YM3812, used in many PC sound cards like the AdLib and Creative Sound Blaster)
Many Master System games can take advantage of the FM sound chip if it’s present; including some never released in Japan, like Activision’s Shanghai. To hear the difference, let’s listen to Space Harrier 3-D again, this time with FM sound available.
But wait, there’s more
You might have noticed something; the music in Space Harrier 3-D is a little tinny sounding, missing some of the heavier notes you get in the PSG version. The Genesis is well known for combining PSG and FM sounds to masterful effect, and another composition of the same Space Harrier theme shows that off on the Japanese Master System BIOS. This is just the “insert a cartridge and try again” theme.
So why didn’t Space Harrier 3-D have this level of music? The Sega Mark III’s FM sound add-on was designed in such a way that you could only have PSG, or FM, but not both simultaneously. However, when Sega designed the Japanese Master System, they improved it to allow both tracks to play at once. Of course, games had to keep their soundtracks backwards-compatible, but the BIOS would only ever be on Master Systems, so Sega could show off a little.
As far as I know, there is no available sound library for Master System homebrew games that supports both PSG and FM sound; I’m welcome to be corrected, as it would definitely be nice to support both if possible. I’m not sure I’m up to the task of writing a sound engine; for whatever reason audio programming something I’ve found intimidating. (Maybe that’s a reason to do it)
Model differences
As the sound alone shows, the Master System has a lot of different models; and unlike the PC Engine, where all the different models played games in roughly the same way (except perhaps the SuperGrafx), the Master System’s models have differences that can really matter.
Sega Mark III
- Original model released in Japan in 1985
- Supports cards and cartridges (SG-1000 pinout)
- No BIOS ROM
- VDP has TMS9918 modes, zooming bugs, only 192-line mode
- Only version to support FM expansion unit, can only play FM or PSG, not both
Sega Master System (Model 1, export)
- Released in US in 1986, EU in 1987
- Supports cards and cartridges (export pinout)
- BIOS ROM ensures lock-out of other regions, includes built-in game (even if only Snail Maze)
- VDP has TMS9918 modes, zooming bugs, only 192-line mode
Sega Master System (MK-2000, Japan-only)
- Released in Japan in 1987
- Supports cards and cartridges (SG-1000 pinout)
- BIOS ROM, but only to switch between cards and cartridges, no region lockout or built-in game (though it does have that nice rendition of the Space Harrier theme)
- VDP has TMS9918 modes, zooming bugs, only 192-line mode
- Only model to include built-in FM sound
Sega Master System II (export-only)
- Released in US and EU in 1990
- Supports cartridges only (export pinout)
- BIOS ROM ensures lock-out of other regions, includes built-in game
- VDP has TMS9918 modes, fixes zooming bugs, 192-line, 224-line, and 240-line modes (240-line PAL only)
Sega Genesis (with converter)
- Converters released in 1989 in JP and US, 1990 in Europe
- Supports cartridges of the appropriate region; some models support cards
- No BIOS ROM, no region lockout (beyond pinout changes)
- VDP does not have TMS9918 modes, does not have zooming at all, only 192-line modes
- FM sound only available with aftermarket adapters
- Backwards compatibility not available with 32X or on unmodified “Genesis 3” or Nomad models.
Sega Game Gear (with converter)
- Converters released in 1992 in US, 1991 in EU, never in Japan
- Supports export pinout cartridges; no card support
- No BIOS ROM, no region lockout
- VDP has TMS9918 modes but with no palette, fixes zooming bugs, additional SMS2 modes
- Graphics are resized to fit on the lower-resolution screen
- FM sound not available, PSG only
There is no “ideal” Sega Master System, and no model that can do everything. Nevertheless, most games targeted the overlap of features, using only Master System mode, having non-FM audio fallbacks, and using 192-line modes. By the time later models were released the Sega Card was a memory, and most of the better games were re-released on cartridges in Europe.
In order to effectively write a game that will support most consoles, I’ve created a small collection of methods of playing that should hopefully cover most.
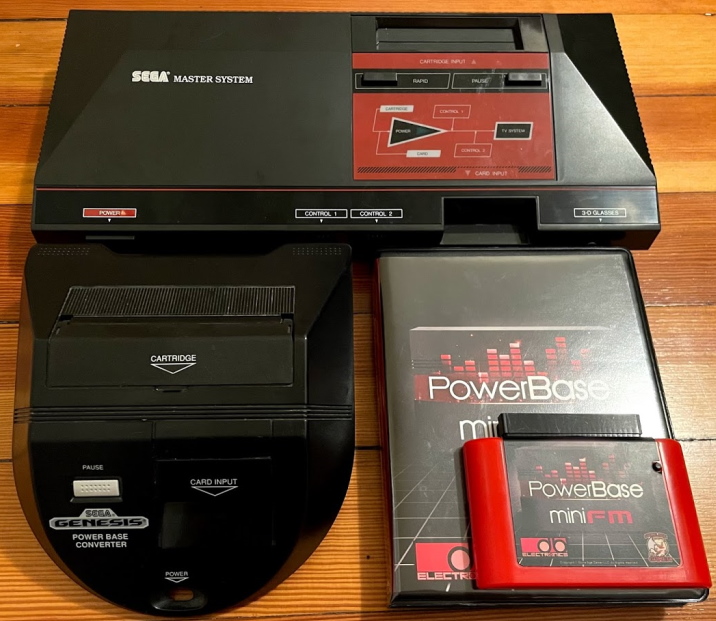
For the Master System 1-specific issues, I’ll be using this Japanese Master System. It’s a fairly nice system, and with a simple adapter can play Western games too, sometimes with FM sound to boot. Plus I have two different adapters for the Sega Genesis; the official Power Base Converter, and the dbElectronics PowerBase Mini FM. As you might be able to guess, the latter adds FM sound, while the former has card support. I’m not sure any card games had FM capability; they were pretty limited by the 32kiB size limit.
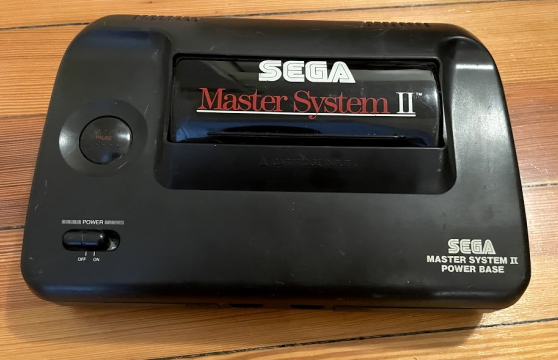
To access PAL-only modes I’ll be using this Master System II. It’s a French model; those have the interesting characteristic that they’re actually based on the NTSC motherboard; they’re also the only models of the Master System II to have RGB output. They only have RGB output; therefore, this technically isn’t a SECAM or a PAL model. It does have that 50Hz timing, though, and therefore some giant bars when running in 192-line mode.
Interesting, the French RGB release is based off of the NTSC circuitboard, and it should be easy to add a 50Hz/60Hz timing switch. I haven’t done that yet, though I likely will. I need to crack this thing open anyway, its video port is very finicky and probably has some broken solder joints.
But should I try to use them all?
One big question is, should I bother trying to support them all? In Europe and Brazil, where the Master System lasted longer than other regions, the Master System II, with its bugfixed and more featureful VDP became the standard. For example, let’s take Earthworm Jim, ported by TecToy from a Game Gear game. (The Game Gear is pretty much equivalent to a Master System II with a smaller screen and better color support)
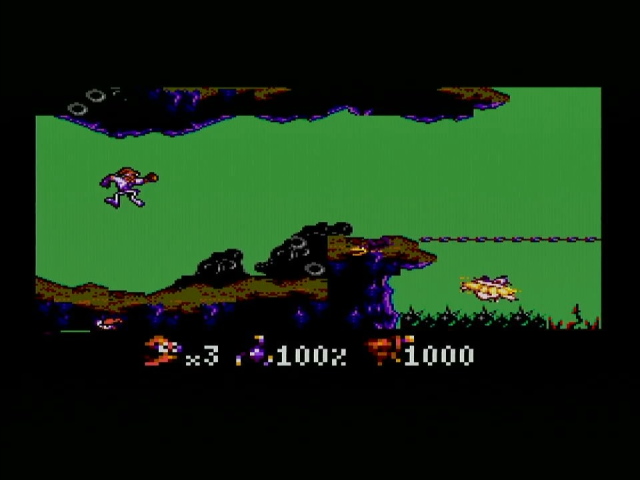
The most important thing here is the lower part of the screen, where you can see the stats Earthworm Jim has. This is using my Master System II, and the stats are displayed using sprites that are double-sized compared to regular sprites (“zoomed”). There is some very precise timing being used here (which might not be working quite right; this game being from Brazil, was designed for 60Hz timing, as they use a 60Hz variant of PAL there)
But remember that list above? What does it look like on a Master System 1?
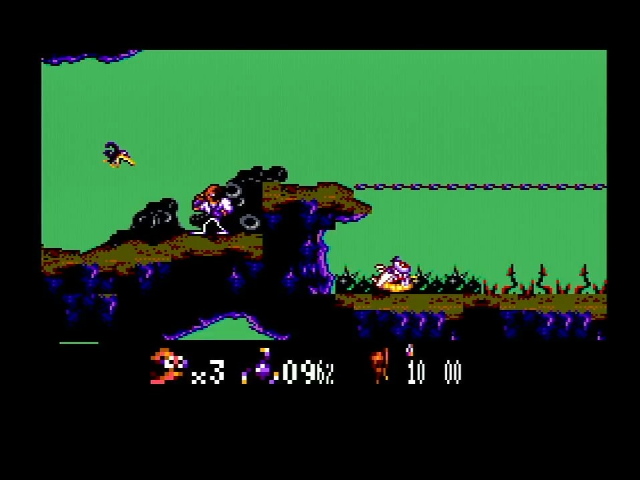
On the Master System 1 models, only the first four (out of eight per scanline) zoomed sprites function properly. The others will be zoomed vertically, but not horizontally. So the lifebar is all distorted.
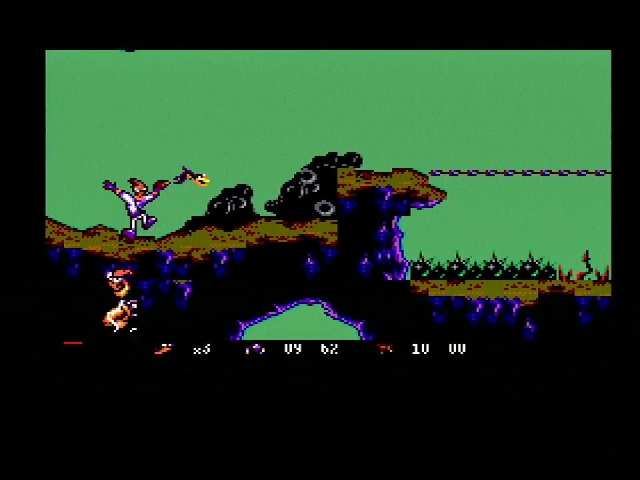
On the Power Base Converter (in this case, running on my CDX, but it really doesn’t matter), sprite zooming is not supported at all. Therefore, they come out all small.
So as you can see, sprite zooming is a feature that you can’t really use if you want to have the highest compatibility. Other Master System II-exclusive features include 224-line and 240-line modes; the Master System’s vertical resolution of 192 is definitely lower than the competition. (The 240 line mode only works on PAL systems, as it overwrites the vertical blank on NTSC and makes the image roll) But being Master System II exclusive means you give up FM sound, and even if I limit myself to 192-line mode and 4 zoomed sprites, a lot of people only have Genesi. And losing NTSC support is a step too far for me.
Please feel free to let me know if you have strong feelings about compatibility! Unfortunately the nature of these features seems to make it hard to make them optional (like I did for the SuperGrafx functionality in Space Ava 201), though maybe a specific minigame or something wouldn’t be too painful for users.
The other elephant in the room for support is the Game Gear. And the Game Gear is a fascinating system in its own right; but at the moment, I don’t have too much interest in portable systems. Maybe if I can get my hands on a “consolized” one.
The plan, and the bad news
I’m planning to finalize what I need for this game soon; still need to make decisions like what assembler I’d like to use; especially if bankswitching is going to be used (and it likely is), having a good linker capability is a must, so I’m currently leaning towards WLA DX, but I’m considering other options as well.
Finally, I have to set expectations. In the past, on the NES and PC Engine CD I’ve open-sourced my projects. However, since then I’ve changed jobs, and I’ll have to go through an approval process. This might cause a delay before I can release source code; it’s all a bit of a bother. But that’s something I really want to do, so I’ll try my best.
So, what will the game project itself look like? Only time will tell! But I hope you look forward to it.
