Converting from the Game Gear to the Master System
Sometimes people ask me: “Nicole, how do you convert a Master System game to the NES?”, or some other combination of game consoles. And the answer is invariably the same: there is no way to do so without rewriting the game from scratch. 8-bit games are almost always written in assembly, and also take advantage of the platform-specific features. For you to be able to do this, the two platforms would have to be near-identical to begin with. And the best example, the exception that proves the rule: the Sega Master System and the Sega Game Gear. Thanks to Bob from RetroRGB for the post idea.
Easy Mode
The Sega Game Gear is very similar to the Master System. Let’s take a totally arbitrary game: OutRun Europa. How do I port this game from the Game Gear to the Master System?
Rename it.

See, as far as OutRun Europa is concerned, the Game Gear isn’t just similar to the Master System. It’s the same console. The Game Gear has a mode where it is literally a Master System, and OutRun Europa, as well as anything using a MasterGear Converter, runs in it.
In fact, in many emulators, OutRun Europa won’t run correctly unless you run the game in Master System mode. Take, for example, the byuu/ares v115 emulator: (Newer versions may have fixed this; I tend to use this version because it’s my fork where I support the SuperGrafx CD from a menu option)
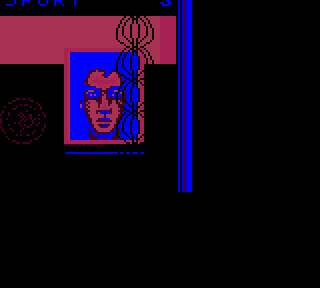
These emulators only emulate the Game Gear mode when you choose a Game Gear game; otherwise, you need to load the ROM in Master System mode. And to be totally, honest, that’s not so different from the hardware. Nothing in the ROM tells the Game Gear whether it’s running a Master System game or not.
Take a look at the pinout of the Game Gear cartridge.
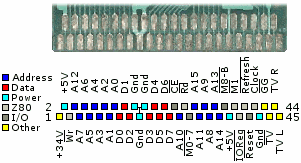
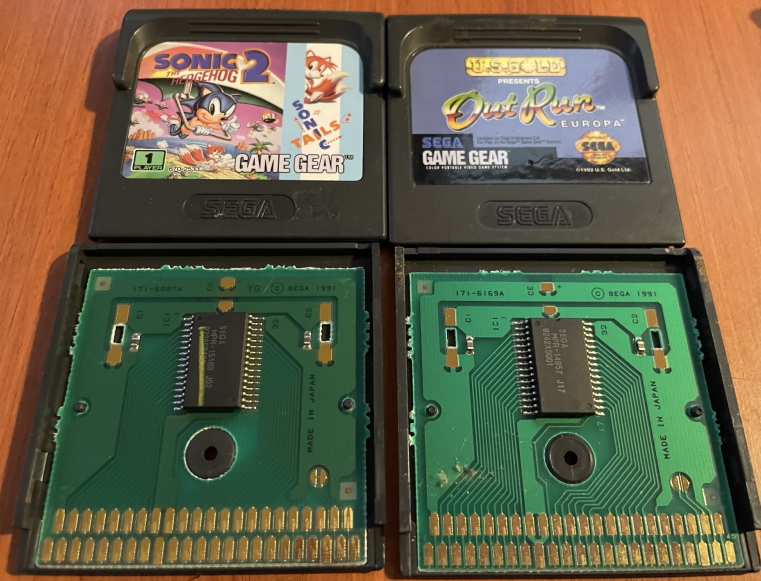
Notice in particular pin 42, on the top right, labeled GG. To be consistent with other usages on this blog, you might call it GG'. When this pin is low (0V), the Game Gear will act as a Game Gear. But when the pin is high (tied to +5V), it acts as a Master System. If you look at the circuitboard, you can actually see a jumper point that differs based on games running in Game Gear mode (Sonic the Hedgehog 2, for example) and Master System mode.
Mode this, mode that
Now, of course, I’m playing a game here– the Sega Genesis does the same thing. Phantasy Star Fukkokuban, which has made many appearances on this blog, triggers a pin on the Genesis cartridge connector to enter Master System mode. And nobody would say this makes porting a real Genesis game to the Master System possible.
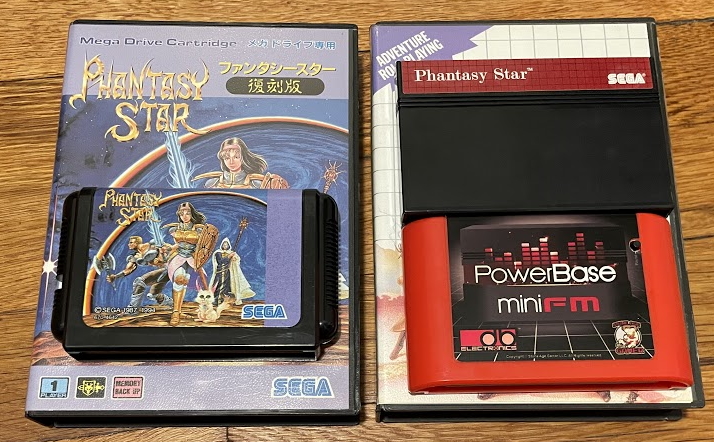
And the reason for that is that Genesis mode (“Mode 5”, in developer parlance) adds quite a few things:
- A whole new graphics mode
- Additional palettes (all 9-bit RGB vs 6-bit RGB)
- Extra VRAM
- Extra work RAM
- A new sound chip
- A new CPU!
So what does “Game Gear” mode do?
- Lower resolution output (160x144 vs 256x192/256x224/256x240)
- More colorful palettes (12-bit RGB vs 6-bit RGB), but still the same number
- User-defined colors in SG-1000 modes
- Start button is a button and read like one; on the Master System, the pause button is an interrupt to the CPU
- Stereo sound capability (albeit quite limited)
So quite unlike the Genesis in Genesis mode, the Game Gear in Game Gear mode has:
- The same CPU as the Master System, at the same clock
- The same amount of RAM as the Master System
- The same amount of VRAM as the Master System
- The same sound chip as the Master System
- The same graphics modes as the Master System 2 VDP– just zoomed in
So really, the main thing that the Master System absolutely can’t do are the more colorful palettes, and the SG-1000 mode differences. And nobody uses the SG-1000 modes.
Visible area
It’s worth noting that the higher resolution isn’t always a good thing, though. Take this version of Phantasy Star Gaiden, converted to Master System by the dedicated programmer BcnAbel76.
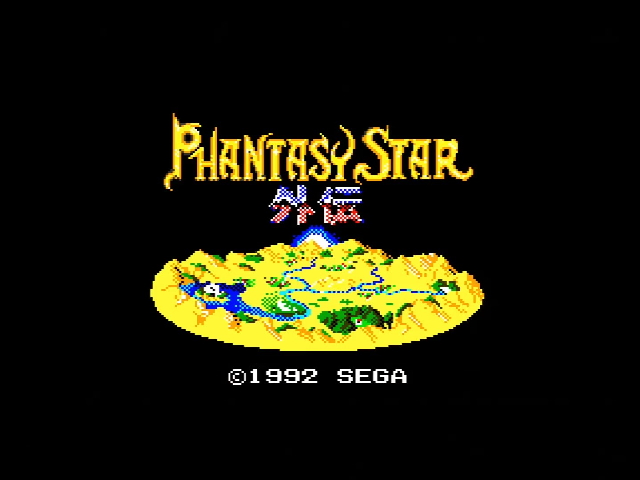
See, the Game Gear has a 160x144 resolution, but internally, it’s still rendering a full screen size. In fact, the sprites-per-scanline limit even applies to sprites in the full screen area, and you can even use the extra-height SMS2-only modes! But it will only show the middle of the screen. On the Master System, you see the whole thing.
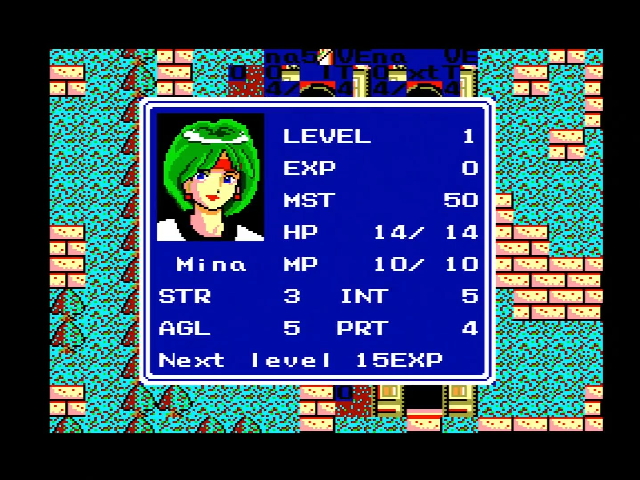
This is fine for games that were developed or ported from the Master System. But a developer making a game that would only ever be on the Game Gear, like Phantasy Star Gaiden, often is only going to care about the part of the screen that’s visible. So things can get pretty wonky if you can see the whole area.
I’ll do it myself!
So, what does it take to port a game? Let’s find out! I’ve chosen what I’m hoping will be a simple enough target: Namco’s Ms. Pac-Man.
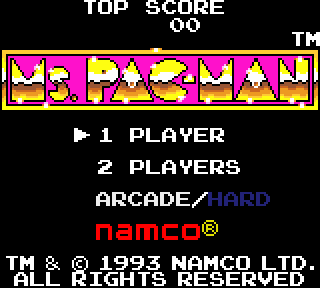
I’m choosing this game as a target for a few reasons:
- It’s a tiny game (1 megabit) compared to others in the library
- It didn’t appear on Master System– the Master System got an (imo, better) Tengen-designed port
- It isn’t already on the SMS Power list (However, look out for spoilers later)
So my first step was to disassemble it, which I did using the Emulicious emulator, which has a pretty advanced disassembler built into its debugger. You probably want to play through the game a bit to make sure the code/data logger can figure out what’s code and what is data.
The disassembly can be configured, in this case I went with WLA-DX, so it also created a linkfile. I recommend getting very familiar with your assembler’s build pipeline because they can be finicky. Still, I went through and got what looked like the same game output. You can run it in your Master System emulator if you want:
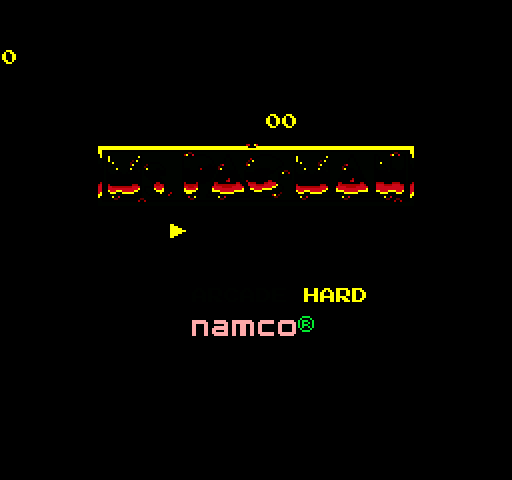
I don’t recommend it, though. Right now there are two huge issues blocking playability.
- The palettes are wrong.
- The Master System doesn’t have a start button, so you can’t start the game.
Disassembly
Disassembled code can be pretty obnoxious to read:
_LABEL_1A2_:
  push bc
  push de
  push hl
  push ix
  push iy
  di
  in a, (Port_VDPStatus)
  ld hl, _RAM_C02B_
  bit 0, (hl)
  jr nz, +
  jp _LABEL_20D_
This is part of the interrupt routine, and Emulicious is nice enough to let us know what port is being used– Port_VDPStatus is a little more obvious than $bf. But overall, it can’t tell most things, so it just gives default labels like _LABEL_1A2_. You can rename them as you go to make things cleaner.
Start Button
The start button is part of IO port $00 on the Game Gear. This port does not exist on the Master System, so any reads from it need to be changed.
If we search our decompilation for in a, we find only one place where a port that isn’t Port_VDPStatus, Port_VDPData, or Port_VCounter is read. Unfortunately, it’s using in a,(c), which allows the use of an arbitrary port using the c register. So we have to actually read the logic.
_LABEL_6033_:
  ld ix, _RAM_C02D_
  ld iy, _DATA_6055_
  ld b, $03
-:
  ld c, (iy+0)
  in a, (c)
  cpl
  ld c, a
  xor (ix+3)
  and c
  ld (ix+0), a
  ld (ix+3), c
  inc ix
  inc iy
  djnz -
  ret

; Data from 6055 to 6057 (3 bytes)
_DATA_6055_:
.db $DC $DD $00
So what’s going on here? First, a RAM address is loaded into ix. A ROM address is loaded into iy, and a loop is done going three times, using djnz to count using the b register. The IO ports come from iy. $dc and $dd are the joystick ports on both the Master System and Game Gear, so $00 is definitely the input port.
This is the code we’re looking for. So what does it do? The cpl is there because the bits are reversed for the joystick buttons– 0 means a button is pressed, 1 means it isn’t– but the developer wanted it to work the other way around.
You often want to know if a button has been newly pressed, but don’t care if a button is just being held down. That’s what the rest of this routine, the xor and the and, does.
  ld c, (iy+0) ; Load c with the IO port
  in a, (c)    ; Pull the IO port data into A
  cpl          ; Flip all bits in A (1 -> 0, 0 -> 1)
  ld c, a      ; Store a in c for later
  xor (ix+3)   ; Take the XOR with the last value
  and c        ; Only select the bits that are active
               ; This gives us the buttons that have
               ; changed since the last update.
  ld (ix+0), a ; Store the changed buttons in RAM
  ld (ix+3), c ; Store the full pressed buttons too
  inc ix       ; Continue the loop
  inc iy
  djnz -
Many conversions of Game Gear to Master System games will let you use the down arrow direction on the second player controller as a start button. That might seem weird, but looking at this code, it makes sense.
You see, the start button is bit 7 of port $00. The player 2 down arrow is bit 7 of port $dc. In this case, it’d be a one-byte change.
But let’s say I don’t want to rely on bit 7 of port $dc. I rarely even have a player 2 controller plugged in, because I have no friends left willing to play Master System with me. So let’s see if we can find where the start button is actually read.
ix, our RAM address, is set to $c02d at first. But because it’s the last value in in the loop, the data for port $00 is being stored in RAM addresses $c02f for the changed buttons, and $c032 for the raw data. Our disassembly has generated a label _RAM_C02F_, so that’s probably the easiest place to look.
It turns out it’s used in quite a few places, but in every single one, it’s followed by a bit 7,a.
  ld a, (_RAM_C02F_)
  bit 7, a
So let’s change that to use _RAM_C02D_ and bit 4, a. This will use player 1 button 1 instead. Notice that I’m just replacing it everywhere; I’m not bothering to check which one is our title screen. This will also allow you to pause by pressing button 1; in some games that might be an issue, but this is Ms. Pac-Man, a game that doesn’t require in-game button presses, so it’s a feature.
And now, we can get into the game!
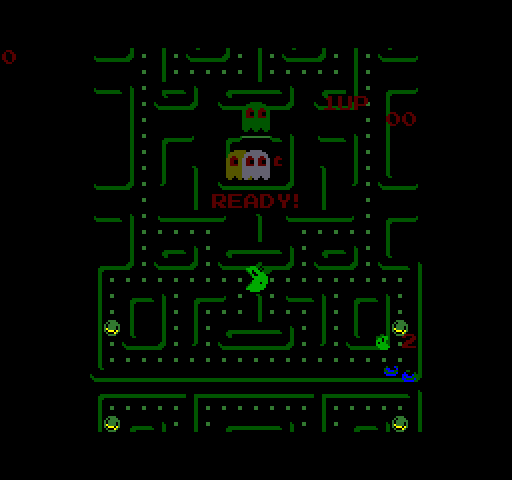
If we wanted to release this as Ms. Pac-Man Techno Night Edition, I guess we could be done. But instead, let’s get to palettes.
Palettes
Palettes are stored in Color RAM, frequently called CRAM. Color RAM accesses are distinguished only by the top two bits of the second write to $bf being set. Given the layers of indirection, this could get complicated. (Color RAM is also distinguished from VRAM in that the processor can’t read it, only write to it.)
On the Game Gear, it’s a bit more complex (you can only write a full 16-bit, or actually 12-bit, palette entry at once), but the general sense is that color RAM is twice as big: a palette entry is one byte on the Master System, two on the Game Gear.
Palettes in the Master System and Game Gear are done through the VDP data port, $be. This is definitely bothersome, because it means we’ll need to understand what’s happening around the situation, we can’t just look for a dedicated port– the same port is used for sending graphics to VRAM. And Ms. Pac-Man uses the VDP data port a lot, as will, well, any Sega 8-bit game really.
I used Emulicious again to set a “watchpoint” on the first byte of the CRAM.

By the time the Sega screen loaded, the following events had already shown up:
ROM01:6073: PALETTES Watchpoint hit: Writing 00 to 0
ROM00:01F4: PALETTES Watchpoint hit: Writing 00 to 0
ROM00:01F4: PALETTES Watchpoint hit: Writing 00 to 0
ROM00:01F4: PALETTES Watchpoint hit: Writing 00 to 0...
With the bottom line repeating each frame.
Let’s take a look at what’s at 0x6073. In our disassembly, this is part of _LABEL_6069_.
_LABEL_6069_:
  xor a
  out (Port_VDPAddress), a
  ld a, $C0
  out (Port_VDPAddress), a
  xor a
  ld b, $40
-:
  out (Port_VDPData), a
  djnz -
  ret
In Z80, xor a is a slightly more efficient way of doing ld a,0; it does an XOR of the a register with itself, which always gives 0. So all this is doing is clearing color RAM. Since color RAM is half the size, we might as well change ld b, $40 to ld b, $20, but other than that there’s not really anything to change here. This seems to be an initialization function.
The second part, at 0x01f4, is deep in the interrupt routine. This is running on every frame.
  xor a ; ld a,0
  out (Port_VDPAddress), a
  ld a, $C0 ; set the top 2 bits high: color RAM write
  out (Port_VDPAddress), a
  ld b, $40
  ld hl, _RAM_C040_
  ld c, Port_VDPData
  otir
Here’s a common Master System/Game Gear programming technique. There’s a block of RAM, here 0xc040, which is being used as a “mirror” of the palette. The game logic can change the palette whenever it wants as easily as changing RAM, and it’s updated at each frame.
It’s potentially safe to assume this is where all future palette changes will happen, since it’ll run in the interrupt routine and would overwrite any other attempts at changing it. (However, be careful of anywhere disabling interrupts!)
A Game Gear palette entry is two bytes: ggggrrrr 0000bbbb A Master System palette is one byte: 00bbggrr. So there’s a problem: converting these won’t be easy. With the controls, we managed to replace all the code that needed to change in-place. Now, we’re going to need more space in the ROM.
When I’ve been assembling this ROM in WLA-DX, the link output has always ended with:
-------------------------------------------------
---                 SUMMARY                   ---
-------------------------------------------------
ROM: 0 bytes (0.00%) free of total 131072.
RAM: No .RAMSECTIONs were found, no information about RAM.
Having zero bytes free of ROM is very concerning, because it makes things hard to patch. Thankfully, this is actually because the disassembler is very thorough. After all, who knows if a part of the ROM filled with $00 is used as empty tiles in graphics? These groups of repeating $00 are denoted with the .dsb directive. This just means to fill a certain number of bytes.
One section is see is at $007f. This is ideal because it’s in the same bank (I don’t want to talk about bankswitching in this post!), and the _DATA_7F_ doesn’t appear to be referenced anywhere.
; Data from 7F to FF (129 bytes)
_DATA_7F_:
.dsb 129, $00

_LABEL_100_:
So first, let’s remove that .dsb statement. I use an orga to keep the alignment; while you’d hope a disassembly wouldn’t require everything to be at the same address, it often does due to various code shenanigans.
; Data from 7F to FF (129 bytes)
_DATA_7F_:
;.dsb 129, $00

.orga $100
_LABEL_100_:
As for our function, the folks at the SMS Power forums have written a routine which you can see in the attached thread, by user vingazole. It’s mostly a lot of bit-shifting; we’ll only keep the highest (“most significant”) bits. Losing some color information is inevitable here– but hey, could you really make out that 12-bit color on the original Game Gear’s screen anyway?
Make sure to also add an orga on the block immediately after the interrupt routine so you don’t shift everything. Forgetting that will break things; ask me how I know. But if you get it right, you get: Ms. Pac-Man.

Just play the Tengen version
After all, this is just an example project anyway. But nevertheless, I’d feel like a fool if I didn’t show you it running on REAL HARDWARE: my French SMS2. Surely there’ll be no surprises.
Why did it stall? Why is it not doing anything?
Well, in this case it’s my fault for not using Emulicious– both byuu/ares and MEKA don’t handle the correct emulation here that would’ve caught the bug right away. See, I forgot one more hardware difference: the stereo sound. How do you add stereo sound to a system that only has a mono output? The Game Gear adds an additional IO port at $06. And our game’s music code writes to it.
But why does it crash the entire game?
On the Master System, Charles MacDonald’s documentation signifies that writes to even addressses between $00-$3f go to the memory control register. The memory control register, by the way, has the capability to among other things, disable the cartridge slot or the system RAM. Why does it crash when a game starts? The game crashes as soon as it tries to play sound.
This register is really only for the BIOS to use; there’s no real reason a game would ever need to disable the cartridge it’s running off of. Therefore, it’s understandable that some emulators don’t actually emulate it properly.
In any case, let’s comment that out, and remember to .orga the next data table so we don’t lose our offsets.
So you might wonder, will I post a download link? Well, I was going to, but it turns out people on the SMS Power forums already did, they just hadn’t posted it on the site yet. And their version is better than mine, as they do some more adjustments– go check out this post from user Stokes. Sorry about that!
Another option
So, of course, the big downside here is that to play a Sega Game Gear game on your Master System, you have to do the following:
- Dump the game
- Reverse engineer it if someone hasn’t already
- Get a flashcart
What if there was a device that could do all of this for you? Of course, that’d be impossible and

This converter comes courtesy of Apocalypse. If you saw Bob from RetroRGB’s video on the topic, rest assured that this is the same device– I mean literally the same device, thank you to Bob for sending it my way.
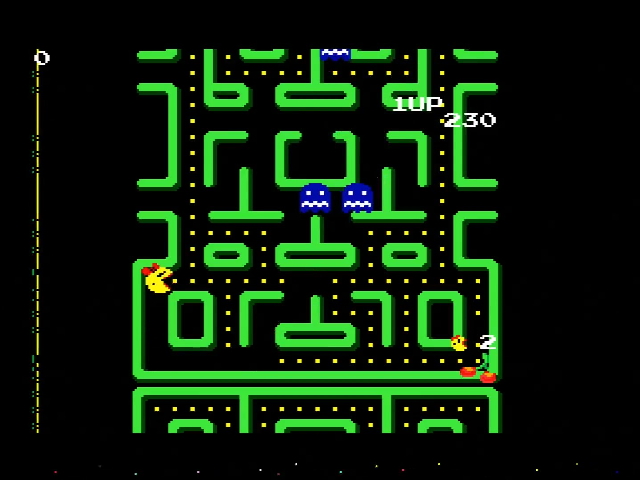
The only real difference between the manual conversion I just did and the automatic conversion is that my conversion remapped the buttons, whereas this cartridge is not so smart, and simply always maps the pause button to the start button on the port $00. Therefore, if you’re going to use this adapter, make sure you’re sitting near your console. (The switch on the side is for the region bits that are also on $00, and are almost never used on the Game Gear)
The colors are converted automatically, but that’s not a huge deal, since the adapter is almost certainly doing the same thing as the code I grabbed– just taking the most significant bit. There’s not much reason to do anything else. I was asked not to reverse-engineer the adapter, though, so I can’t give you all the juicy details. Only fair to respect the effort Apocalypse put into this thing.
Sonic The Hedgehog 2
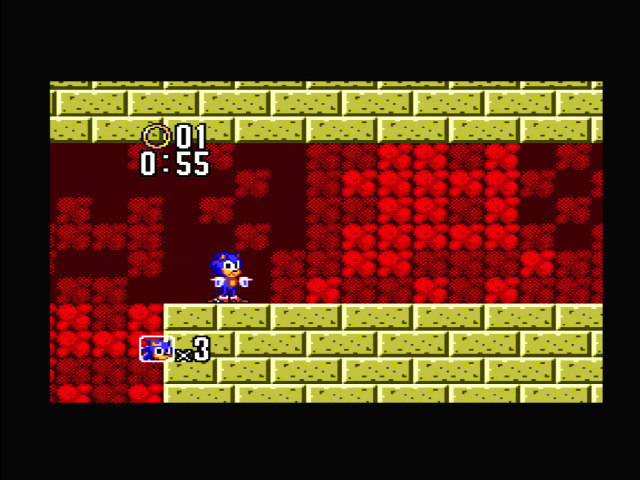
Early Game Gear games were often ports or worked on alongside Master System games, and therefore they tend to work pretty well in a conversion. Indeed, I ended up being surprised at even small differences, like this offscreen wall in Sonic the Hedgehog 2, which as the Master System version shows, isn’t there in reality.
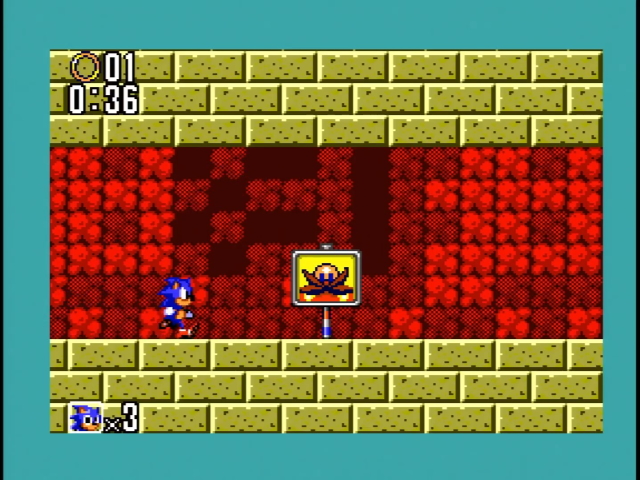
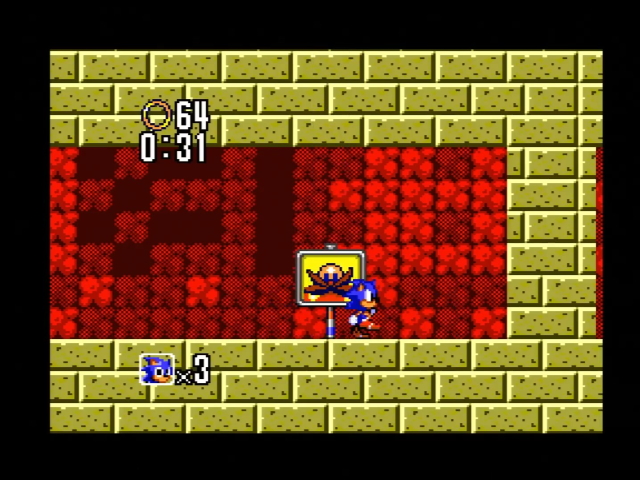
In general, Sonic the Hedgehog 2 has very little reason to play the Game Gear version this way. I guess the level select cheat is a little easier since it doesn’t require a second controller.
Wonder Boy III: The Dragon’s Trap
This section added 8/4/2022
This is a game that was originally written for the Master System and released by Sega and Westone in 1989; Sega then ported it to the Game Gear in 1992. So as a Master System to Game Gear port, you might expect it to run as well as Sonic the Hedgehog 2. But not quite!
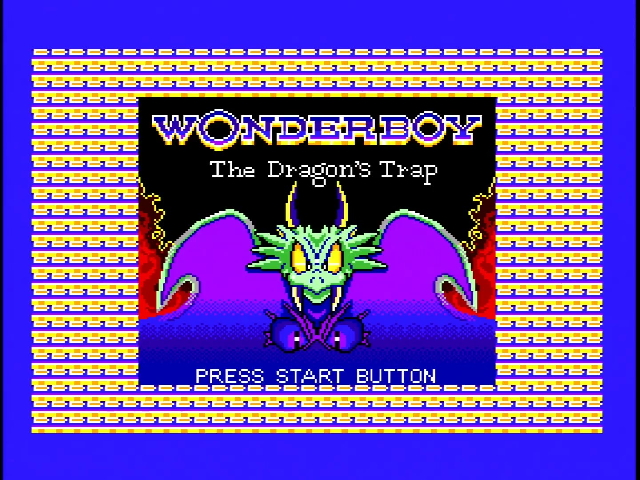
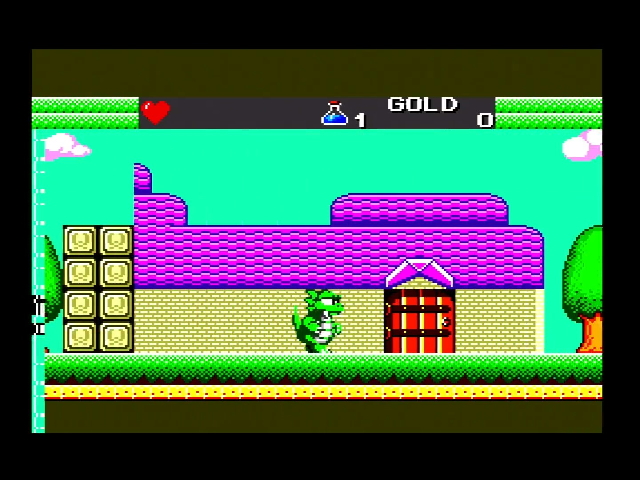
Title screen added for the remake aside, when Sega reprogrammed the game for the Game Gear, they actually moved the loading seam. This may have been part of rearranging the status bar, I’m not sure.
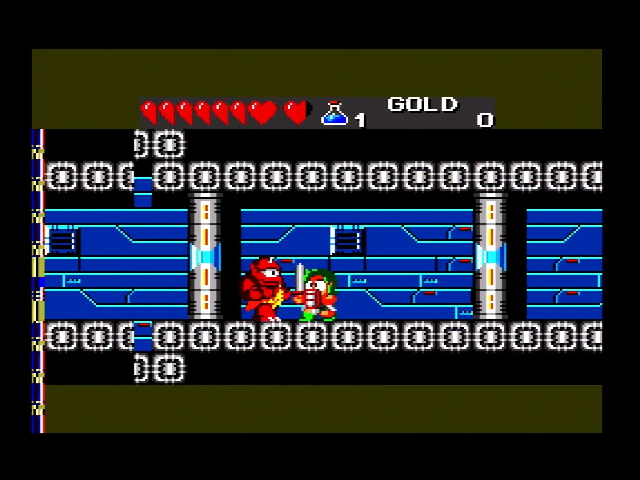
Another change is the visible “glitch area” on the left side of the screen. You might have seen this on the Ms Pac-Man port I did above as well; the Master System has a flag to hide this area if it’s going to be glitchy. When Sega did their changes, they neglected to set this flag, since on the Game Gear, it has no purpose.
Psychic World
Psychic World is a port of an MSX game, and honestly, the Sega Master System version would make you think it was a port of an MSX1 game, with its weird red sprites. (It wasn’t; it was actually a port of an MSX2 game) I guess it’s just really easy to get a sunburn in the psychic world.
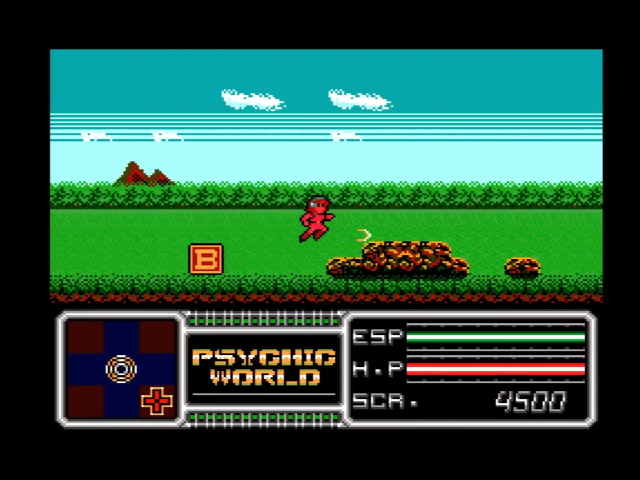
Interestingly, the Game Gear version is a pretty large improvement graphically, and even with the palette downscale, that comes across with the adapter pretty well. Unfortunately, the rewrite also means that you get the screen garbage. Still, for this game it starts to make a bit more sense that you might want to play the Game Gear version.
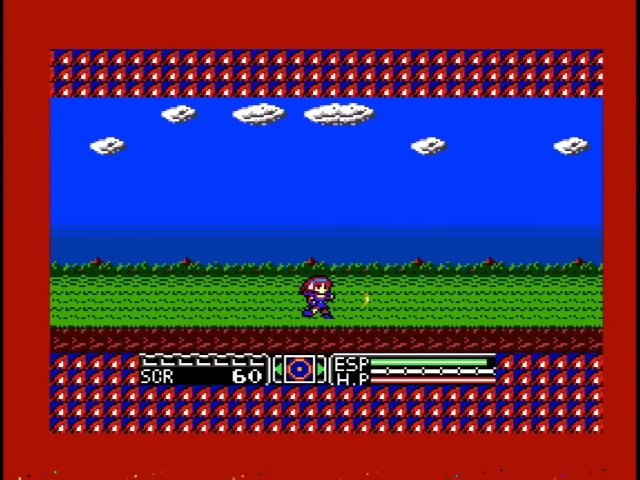
Of course, in this case the version you want to play is most definitely the ROM hack; it’s a case where the hackers have gone out of their way to remove most of the screen garbage, giving you the best of both worlds.
NBA Jam Tournament Edition
Finally, a Game Gear game that isn’t available on the Master System at all, though its non-tournament predecessor almost got a release on the long black slab. Honestly I like the bright high-contrast colors here, though it would be nice if half of each team weren’t covered in the gray pallor of the dead.
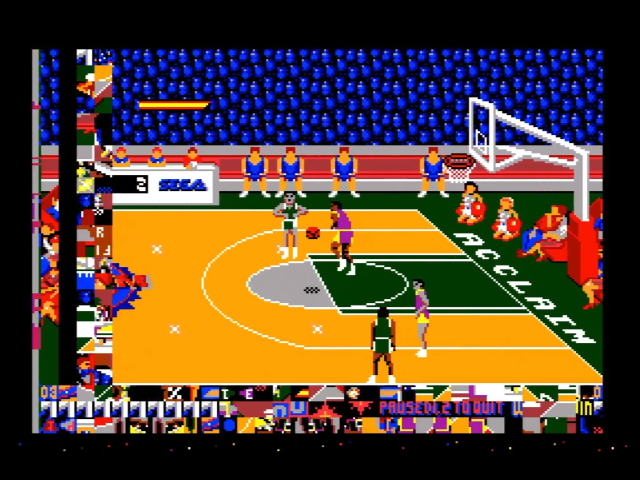
An interesting thing about running this game on the adapter is that the garbage on the formerly-invisible area isn’t just garbage. While the Acclaim logo is displayed, it’s actually a secret message from Iguana Entertainment UK developer Chris Kirby.
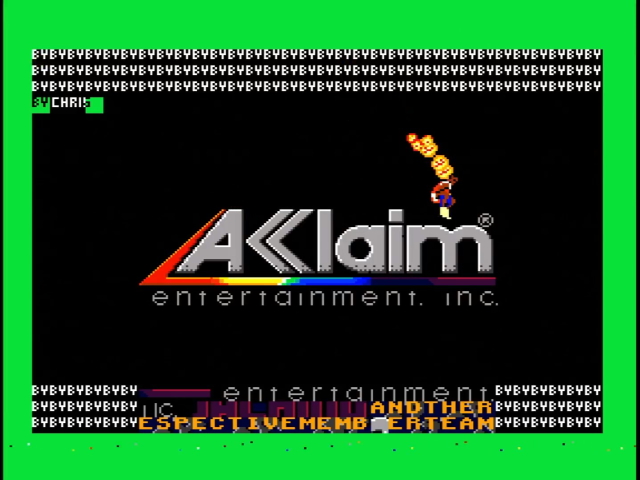
It’s a human connection.
Mortal Kombat
The big downside of an all-purpose adapter like this is that it can’t convert everything automatically; if it fails to intercept palette changes, things might not work out very well.
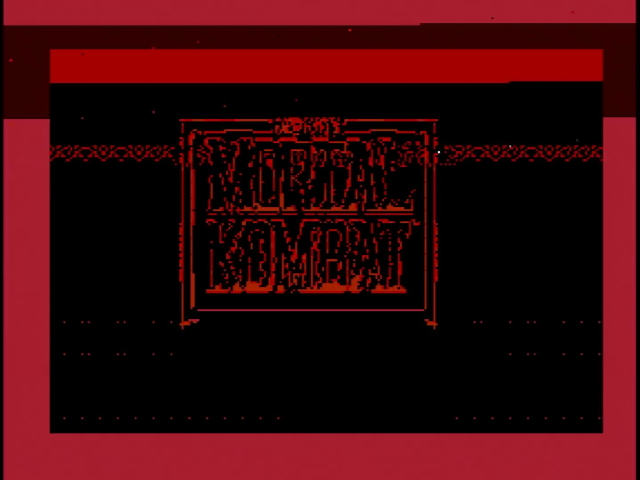
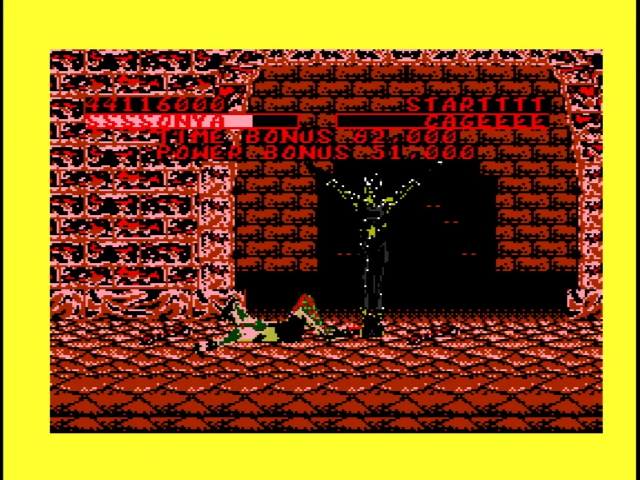
What I find interesting here is that Mortal Kombat also made it to the Master System in Europe and Brazil. And look at the broken sides of the HUD on the Game Gear and compare it to the Master System. It looks to me like this game was done on the Game Gear first and ported to the Master System second.
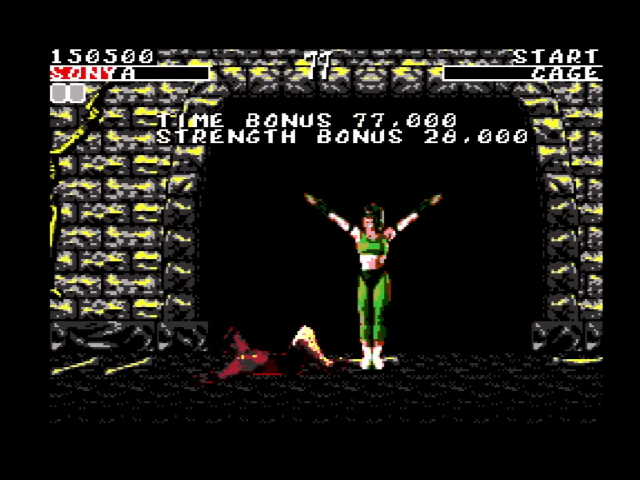
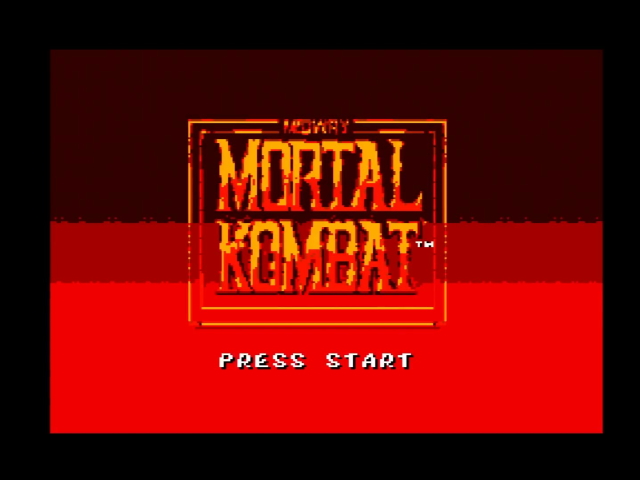
Of course, a look at the tiny title screen logo could’ve told you that.
The GG Shinobi
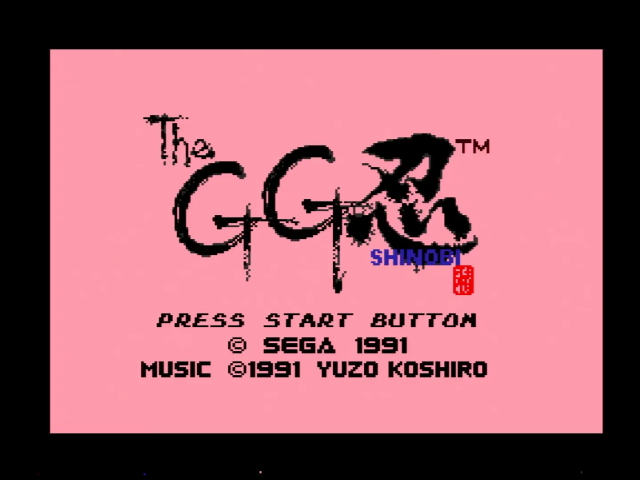
This game is not a port of the Master System Shinobi! It is, unfortunately, another case where the palette decoding didn’t quite work. In this case, the entire second palette (the one used by sprites) is never loaded for some reason.
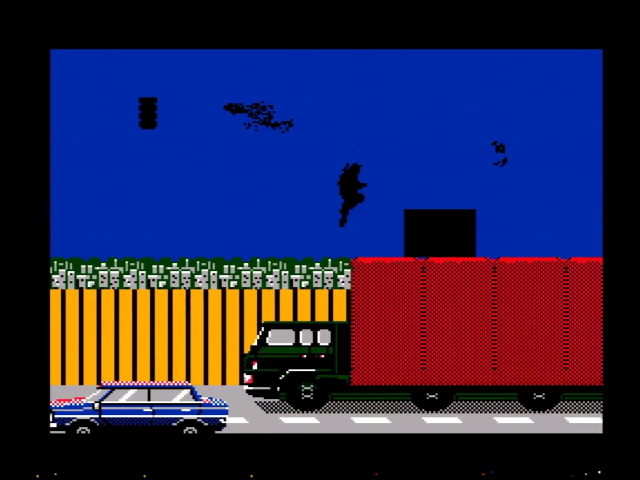
However, I find it interesting how much of this game does work without issue. See, The GG Shinobi is a 1991 Game Gear game, early in the console’s life– but unlike many Game Gear games, this one never got a port to the Master System, and I wondered if this adapter would reveal a game heavily restricted to the Game Gear screen area. Perhaps between Shinobi, The Cyber Shinobi, The Secret of Shinobi, and Alex Kidd in Shinobi World, Sega just figured Master System owners were Shinobi‘d out.
X-Men
The last game here. And let’s change things up– for all other games, I’ve been using that same French SMS2 with RGB out and a cable with a big box on it. Here, I’ll use an NTSC American Master System 1. Unfortunately, this adapter doesn’t work on the Japanese Master System or the Power Base Converter.
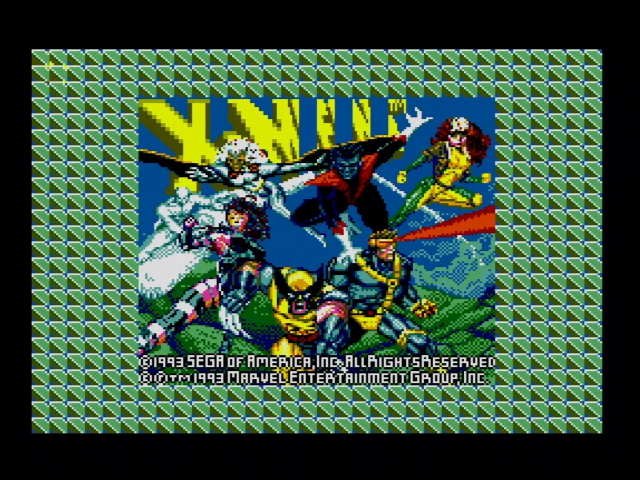
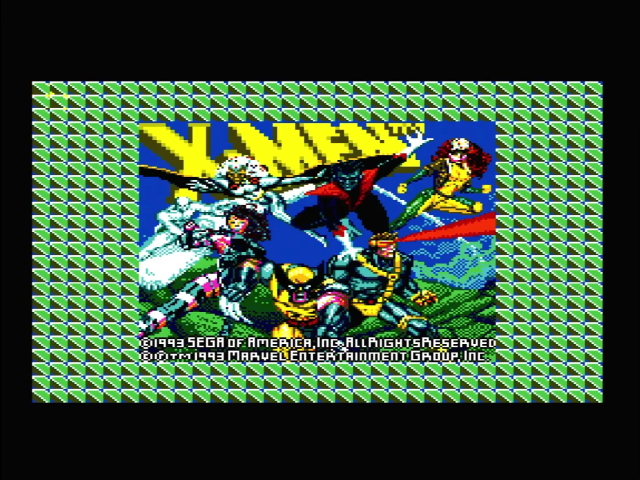
Woah! Why’s the logo all broken? Let’s try it on the Sega Master System 2.
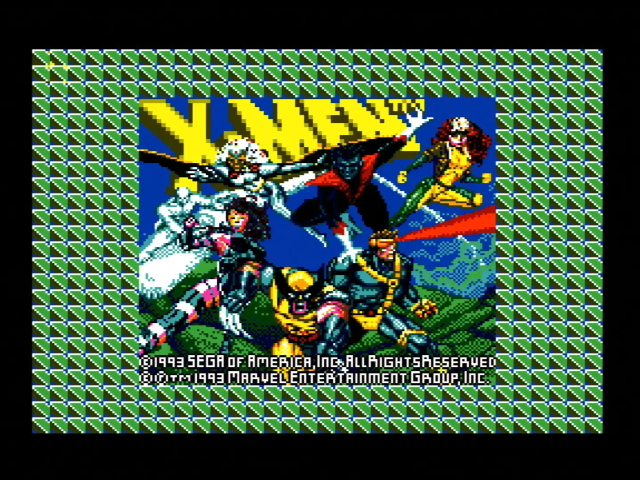
Notice the title screen logo rises from behind the titular X-Men. The Game Gear and the Master System only have one background tile layer, so the logo is made up of sprites. Because you can only have 64 sprite pixels on a scanline, the developers of this game used the rarely-used zoomed sprite feature to make it work. This feature makes all sprites double-size; it applies to all sprites on screen.
Unfortunately, as I noted when talking about Earthworm Jim in my Master System writeup, these zoomed sprites are buggy on the first iteration of the console. On the Game Gear, though, they always work.
There’s an excellent manual port of this game that cleans up much of the garbage and even adds support for the start button on a Genesis controller. But if you run it on a Genesis, even the best ROM hackers can’t re-add features that are missing from the silicon. The Genesis doesn’t have zoomed sprite mode at all, rather than the buggy version on the Sega Master System VDP1.
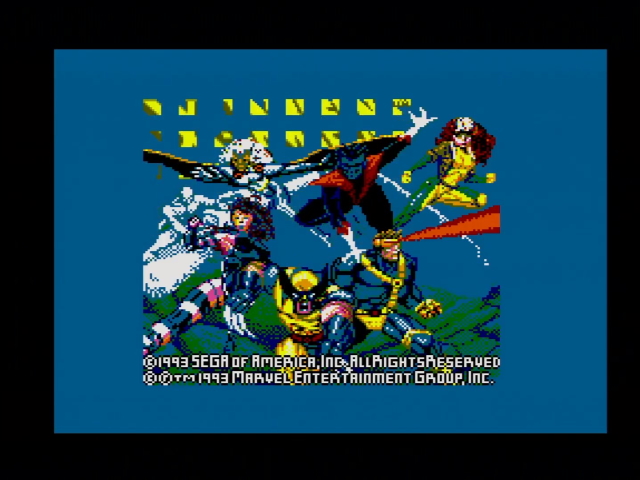
Thankfully, this is a rarely used feature.
Oh yeah, and on the subject of system variants, you can also use this adapter or the manual ports to play Master System games in 50Hz mode. While this often does work, it’s worth noting that even in Europe, the Game Gear is always 60Hz. So games aren’t likely to try to do any adjustment at all for the speed change.
That is, unless their Master System versions did and nobody bothered to delete the code; like the case of Sonic the Hedgehog 2, which does in fact compensate in its music logic.
Master Gear
Was Sega right to reuse their Master System hardware for the Game Gear? Well, given the Game Gear’s tendency to eat batteries, that might not be true– but then again, much of that can be attributed to the color screen and backlight. We’re not here to question Sega’s decisions anyway. After all, the game
If nothing else, this little adapter gave me a good excuse to start getting Game Gear games again. And, having spent all this time, I wonder if it’s worth going the other way, porting my ongoing Master System game to the Game Gear; or just make Game Gear users use a Master Gear Converter. I think I’ll give that a try once the initial Master System version is released. But that’s a story for another post.
